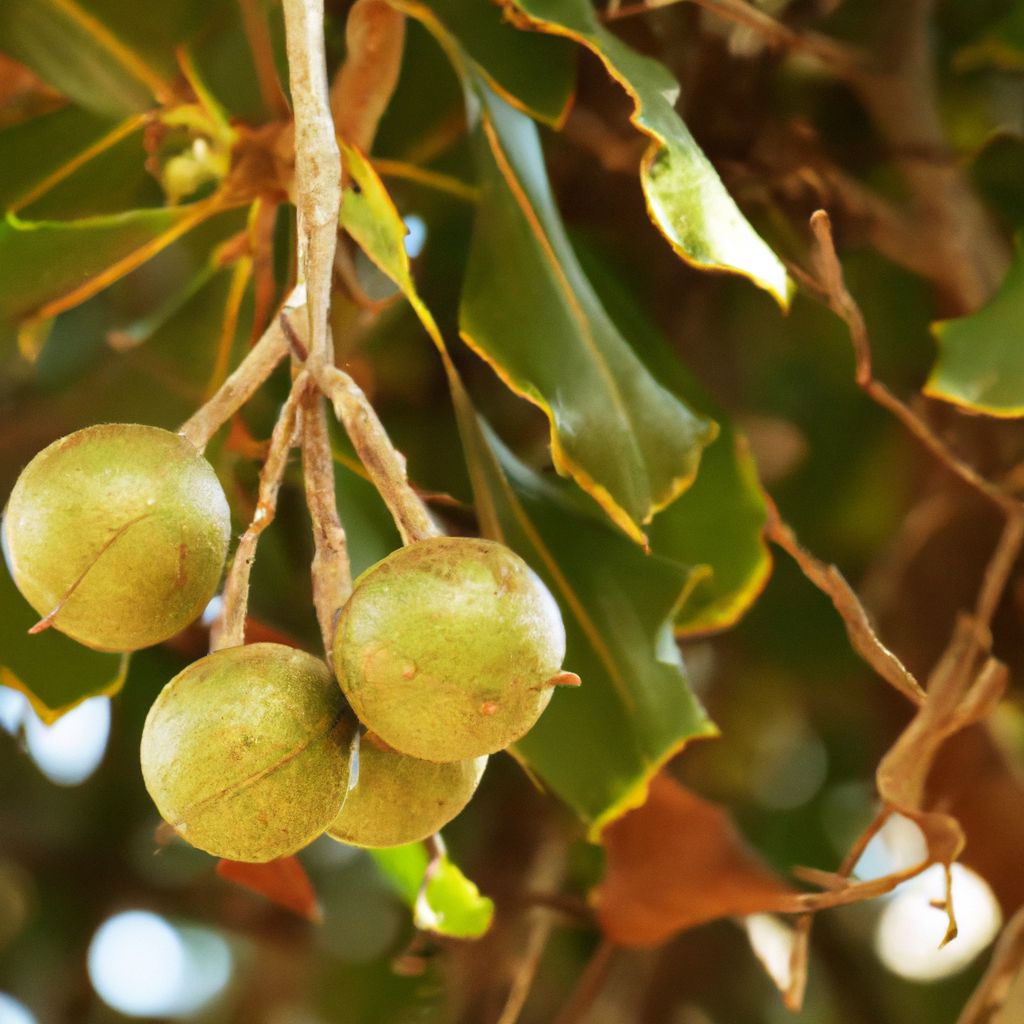
There is something truly special about growing your own food, and sesame seeds are no exception. Cultivating these tiny yet mighty seeds in your backyard provides an unparalleled sense of satisfaction and connection to nature. But beyond the personal fulfillment, there are numerous benefits to sesame cultivation that make this endeavor well worth the effort.
Why Grow Your Own Sesame Seeds?
- Access to Fresh, Nutrient-Dense Seeds: Homegrown sesame seeds are at their peak of freshness and nutritional value, bursting with flavor and health benefits. Unlike store-bought seeds that may have been sitting on shelves for months, your homegrown sesame seeds are picked at the perfect time, ensuring maximum nutrient retention and flavor.
- Control Over Cultivation: By growing your own, you have complete control over the cultivation process, ensuring the use of organic and sustainable methods. You can choose to avoid synthetic pesticides, herbicides, and fertilizers, opting instead for natural, eco-friendly alternatives.
- Cost Savings: After the initial investment in seeds, soil amendments, and basic gardening tools, you can enjoy a continuous supply of sesame seeds, saving money compared to purchasing them from stores. Over time, the cost savings can be significant, especially if you have a green thumb.
- Variety Exploration: Growing your own allows you to experiment with different sesame seed varieties, each offering unique flavors and characteristics. You can explore the nutty taste of white sesame, the richness of black sesame, or the earthy undertones of brown sesame, all while discovering your personal favorites.
- Sustainability and Environmental Impact: Cultivating your own sesame reduces your carbon footprint and supports sustainable farming practices. By growing food locally, you minimize the environmental impact associated with transportation and packaging, contributing to a more eco-friendly lifestyle.
Sesame Cultivation: A Primer
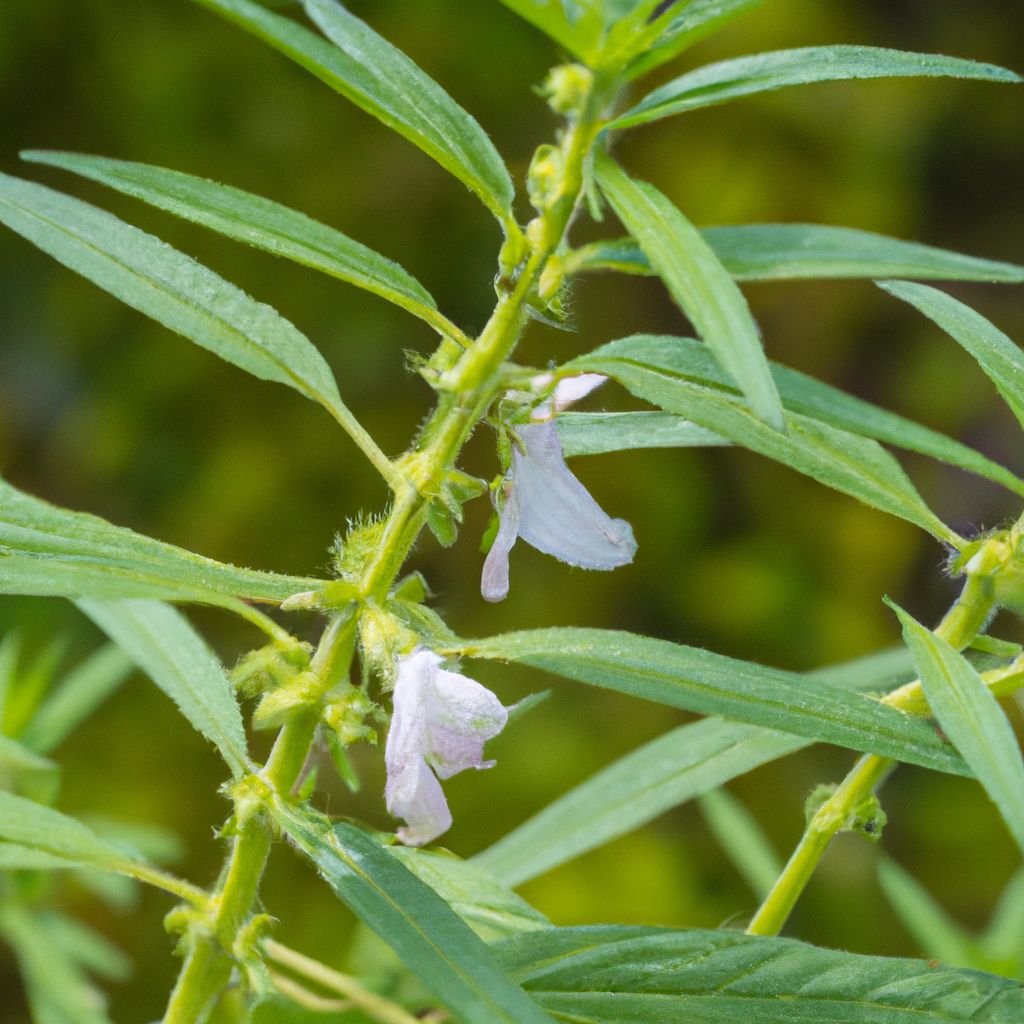
Before embarking on your sesame cultivation journey, it’s essential to understand the basics of these remarkable plants. Sesame (Sesamum indicum) is an ancient crop that has been cultivated for thousands of years, originating in India and later spreading across the globe.
Understanding Sesame Plant Varieties
Sesame plants come in various varieties, each with distinct traits. Some of the most common varieties include:
- White Sesame: The most widely cultivated variety, known for its mild, nutty flavor. White sesame seeds are versatile and can be used in a wide range of dishes, from savory to sweet.
- Black Sesame: Prized for its rich, slightly sweet flavor and striking color. Black sesame seeds add a unique visual appeal and depth of flavor to baked goods, sushi rolls, and other Asian-inspired dishes.
- Brown Sesame: A versatile variety with a robust, earthy taste. Brown sesame seeds are often used in Middle Eastern and Mediterranean cuisines, adding a distinct nutty flavor to breads, tahini, and other traditional dishes.
Soil and Climate Requirements
Sesame plants thrive in well-drained, sandy loam or loamy soils with a pH range of 6.0 to 7.5. They require warm temperatures, preferably between 75°F and 95°F (24°C to 35°C), and a frost-free growing season of approximately 120-150 days. Sesame is a drought-tolerant crop but requires consistent moisture during germination and early growth stages.
Preparing the Soil for Sesame
Proper soil preparation is crucial for successful sesame cultivation. Begin by testing your soil and amending it with organic matter, such as compost or well-rotted manure, to improve fertility and drainage. Loosen the soil to a depth of 8-12 inches, ensuring it is free of weeds and debris. Finally, level the soil surface to facilitate even seed distribution and irrigation.
Sowing the Seeds of Success
Selecting the Right Sesame Seeds
Choose high-quality sesame seeds suited to your climate and growing conditions. Consider factors such as disease resistance, yield potential, and flavor profile when selecting your desired variety. It’s also a good idea to purchase seeds from reputable sources to ensure their viability and authenticity.
Here are some tips for selecting the right sesame seeds:
- Disease Resistance: Look for sesame seed varieties that are resistant to common diseases in your area, such as Alternaria leaf spot or damping-off disease. This can help ensure a healthy crop and reduce the need for chemical interventions.
- Yield Potential: If you’re aiming for a bountiful harvest, consider varieties known for their high yield potential. These seeds have been bred to produce more seeds per plant, maximizing your return on investment.
- Flavor Profile: Choose sesame seed varieties based on your personal taste preferences or the intended culinary uses. For example, if you plan to make tahini paste, you might prefer the robust flavor of brown sesame seeds.
- Maturity Time: Consider the length of your growing season and select varieties that will mature within that time frame. Early-maturing varieties are ideal for areas with shorter growing seasons, while late-maturing varieties may be better suited for regions with longer, warmer seasons.
Determining the Optimal Planting Time
Sesame seeds should be sown after the last frost, typically when the soil temperature reaches a consistent 68°F to 86°F (20°C to 30°C). Refer to local agricultural resources or experienced growers for region-specific planting recommendations.
To determine the optimal planting time for your area, consider the following factors:
- Frost Dates: Sesame plants are sensitive to frost, so it’s crucial to wait until the risk of frost has passed before sowing your seeds. Check local weather patterns and frost dates to identify the safest time to plant.
- Soil Temperature: Sesame seeds require warm soil for proper germination. Use a soil thermometer or consult local gardening resources to determine when the soil temperature consistently reaches the ideal range of 68°F to 86°F (20°C to 30°C).
- Growing Season Length: Ensure that your growing season is long enough to accommodate the maturity time of your chosen sesame variety. Most varieties require at least 120 days from sowing to harvest, so plan accordingly.
Proper Sowing Techniques
Sow sesame seeds at the recommended depth and spacing, typically 1-2 inches deep and 4-6 inches apart in rows or hills. Gently firm the soil over the seeds and water thoroughly. Consistent moisture is crucial during the germination and early growth stages.
Here are some tips for proper sowing:
- Row Spacing: If sowing in rows, maintain a spacing of 12-18 inches between rows to allow for adequate air circulation and ease of maintenance.
- Seed Depth: Sow the seeds at a depth of 1-2 inches, ensuring they are covered with soil to protect them from drying out or being disturbed.
- Soil Firming: After sowing, gently firm the soil over the seeds using the back of a hoe or your hands. This helps ensure good seed-to-soil contact, which is essential for proper germination.
- Watering: Water the seed bed thoroughly after sowing, keeping the soil moist but not waterlogged. Consistent moisture is crucial during the germination period, which typically takes 7-10 days.
- Mulching: Consider applying a light layer of mulch around the seed bed to help retain soil moisture and suppress weed growth.
Nurturing Your Sesame Plants
Watering and Irrigation Best Practices
Sesame plants require consistent moisture during their growing season. Water deeply once or twice a week, ensuring the soil is moist to a depth of 6 inches. Drip irrigation or soaker hoses are ideal for delivering water directly to the roots, minimizing water loss through evaporation.
Here are some tips for effective watering and irrigation:
- Watering Frequency: The frequency of watering will depend on various factors, including soil type, weather conditions, and plant growth stage. In general, water once or twice a week, but adjust as needed to maintain consistent soil moisture.
- Watering Depth: Aim to water deeply, moistening the soil to a depth of at least 6 inches. This encourages deep root growth and helps the plants access moisture during dry periods.
- Timing: Water early in the morning or late in the evening to minimize evaporation and reduce the risk of fungal diseases that can develop on wet foliage during hot, sunny conditions.
- Mulching: Apply a 2-3 inch layer of organic mulch, such as straw or wood chips, around the plants. Mulching helps retain soil moisture, suppress weeds, and regulate soil temperature.
- Drought Tolerance: While sesame is considered drought-tolerant, it’s important to avoid prolonged periods of water stress, as this can negatively impact seed yield and quality.
Effective Pest and Disease Management
While sesame plants are relatively hardy, they can be susceptible to pests such as aphids, whiteflies, and spider mites, as well as diseases like Alternaria leaf spot and damping-off. Implementing integrated pest management practices, including crop rotation, resistant varieties, and organic pest control methods, can help maintain a healthy sesame crop.
Here are some strategies for effective pest and disease management:
- Crop Rotation: Practice crop rotation by planting sesame in a different location each year. This helps break the cycle of soil-borne pests and diseases, reducing the risk of infestations or outbreaks.
- Resistant Varieties: Choose sesame seed varieties that are known to be resistant to common pests and diseases in your area. This can help minimize the need for chemical interventions.
- Physical Barriers: Use row covers or floating row covers to create a physical barrier against insect pests, especially during the early growth stages when plants are most vulnerable.
- Beneficial Insects: Encourage the presence of beneficial insects, such as ladybugs, lacewings, and parasitic wasps, by planting companion plants or creating habitats for them in your garden.
- Organic Pest Control: If necessary, use organic pesticides or insecticidal soaps as a last resort. Always follow label instructions carefully and apply them at the recommended times and rates.
- Sanitation: Practice good garden hygiene by removing and destroying any diseased plant material to prevent the spread of infections.
Fertilization and Soil Care
Sesame plants benefit from a balanced fertilizer containing nitrogen, phosphorus, and potassium. Apply fertilizers according to soil test recommendations and the specific needs of your plants. Incorporate slow-release fertilizers for consistent nutrient supply throughout the growing season.
Here are some tips for effective fertilization and soil care:
- Soil Testing: Conduct a soil test before planting to determine the nutrient levels and pH of your soil. This will help you identify any deficiencies or imbalances that need to be addressed.
- Nutrient Requirements: Sesame plants have specific nutrient requirements at different growth stages. During the vegetative stage, they require higher levels of nitrogen, while during the flowering and seed development stages, they benefit from higher levels of phosphorus and potassium.
- Organic Fertilizers: Consider using organic fertilizers, such as compost, manure, or plant-based amendments, to provide a slow, steady release of nutrients to your sesame plants.
- Side-dressing: In addition to incorporating fertilizers into the soil before planting, consider side-dressing (applying fertilizer around the base of the plants) during the growing season to maintain optimal nutrient levels.
- Micronutrients: Pay attention to micronutrient deficiencies, as sesame plants can be sensitive to imbalances in minerals like zinc, boron, and iron. Foliar sprays or soil amendments may be necessary to address these deficiencies.
- Soil Amendments: Periodically incorporate organic matter, such as compost or aged manure, into the soil to improve its structure, water-holding capacity, and nutrient content.
The Bountiful Harvest
Recognizing When to Harvest Sesame Seeds
Sesame plants are typically ready for harvest when the seed pods turn brown and the leaves begin to yellow, typically 90-120 days after sowing. Monitor your plants closely and harvest when the majority of the pods have matured.
Here are some signs to look for when determining the optimal time to harvest:
- Pod Color: The seed pods will transition from green to a light tan or brown color as they mature.
- Leaf Yellowing: As the plant nears maturity, the leaves will start to yellow and drop off, indicating that the seeds have fully developed.
- Pod Cracking: Some mature pods may begin to split or crack open, revealing the seeds inside.
- Seed Rattling: Gently shake or rattle the pods near your ear. If you can hear the seeds rattling inside, it’s a good indication that they have fully developed and are ready for harvest.
- Days to Maturity: Keep track of the days from sowing to harvest and consult the seed packet or variety information for the expected maturity time.
Proper Harvesting Techniques
Cut the sesame stalks near the base, leaving a few inches of stem attached to the seed pods. Bundle the stalks and allow them to dry completely in a well-ventilated area for 1-2 weeks. Once fully dry, gently rub or shake the pods to release the sesame seeds.
Here are some tips for proper harvesting:
- Timing: Harvest sesame seeds in the morning after any dew has evaporated but before the heat of the day sets in. This helps prevent moisture buildup and potential mold issues during drying.
- Cutting Method: Use sharp pruning shears or a sickle to cut the stalks, taking care not to damage or crush the seed pods.
- Bundling: Bundle the harvested stalks together using twine or rubber bands, and hang them upside down in a well-ventilated area, such as a barn or shed, to dry.
- Drying Time: Allow the bundles to dry completely for 1-2 weeks or until the pods are brittle and the seeds rattle inside.
- Seed Extraction: Once fully dry, gently rub or shake the pods over a clean surface or tarp to release the sesame seeds. You can also place the pods in a mesh bag and shake or gently crush them to separate the seeds.
- Cleaning: Use a fine-mesh sieve or a gentle breeze to separate any chaff or debris from the harvested sesame seeds.
Storing Sesame Seeds for Longevity
Properly stored, sesame seeds can remain fresh for up to a year. Place the harvested seeds in airtight containers, such as glass jars or sealed plastic bags, and store them in a cool, dry, and dark location. Label the containers with the harvest date for easy tracking.
Here are some tips for optimal sesame seed storage:
- Airtight Containers: Glass jars or food-grade plastic containers with tight-fitting lids are ideal for storing sesame seeds. This prevents moisture and air from spoiling the seeds.
- Cool, Dry Location: Store sesame seeds in a cool, dry place, such as a pantry or cupboard. Avoid areas with high humidity or temperature fluctuations, as these can promote spoilage.
- Dark Storage: Keep sesame seeds in a dark location, as exposure to light can degrade their quality and flavor over time.
- Labeling: Label the containers with the harvest date and variety, if applicable. This helps you keep track of freshness and use the oldest seeds first.
- Freezer Storage: For long-term storage, consider keeping a portion of your sesame seeds in the freezer. The low temperatures help extend their shelf life even further.
- Moisture Control: If you notice any moisture buildup in the storage containers, immediately transfer the seeds to a new, dry container to prevent spoilage.
A Wholesome Indulgence
Health Benefits of Sesame Seeds
Sesame seeds are a nutritional powerhouse, packed with essential nutrients that offer numerous health benefits. Rich in protein, fiber, healthy fats, antioxidants, and minerals like calcium and iron, these tiny seeds contribute to heart health, bone strength, digestion, and overall well-being.
- Protein-Rich: Sesame seeds are a great plant-based source of protein, containing up to 20% by weight. This makes them an excellent addition to vegetarian and vegan diets.
- Heart-Healthy Fats: Sesame seeds are rich in polyunsaturated and monounsaturated fats, which can help lower cholesterol levels and reduce the risk of heart disease.
- Fiber: With a high fiber content, sesame seeds promote healthy digestion and can help regulate blood sugar levels.
- Antioxidants: Sesame seeds are a good source of antioxidants like vitamin E, lignans, and phytosterols, which can help protect cells from damage caused by free radicals.
- Bone Health: The calcium, magnesium, and zinc found in sesame seeds contribute to strong, healthy bones and may help prevent osteoporosis.
- Rich in Minerals: In addition to calcium, sesame seeds are a good source of essential minerals like iron, copper, manganese, and phosphorus, which play vital roles in various bodily functions.
Economic Advantages of Home Cultivation
Growing your own sesame seeds can be economically advantageous. After the initial investment in seeds and materials, you can enjoy a continuous supply of sesame seeds, reducing your grocery expenses. Additionally, any surplus can be sold or shared with others, potentially generating a small income. Here are some of the key economic benefits of cultivating sesame seeds at home:
- Cost Savings: By growing your own sesame seeds, you can significantly reduce the cost of purchasing them from stores or markets. Over time, the savings can add up, especially if you have a successful harvest year after year.
- Self-Sufficiency: Home cultivation of sesame seeds promotes self-sufficiency and reduces your reliance on external sources for this versatile ingredient. You can enjoy a steady supply of fresh, homegrown sesame seeds at your convenience.
- Income Potential: If you have a surplus of sesame seeds after meeting your personal needs, you can explore selling the excess at local farmers’ markets, through community-supported agriculture (CSA) programs, or online platforms. This can provide an additional source of income.
- Barter Opportunities: Homegrown sesame seeds can also be used for bartering with other local growers, exchanging your surplus for different produce or goods. This promotes community connections and a more sustainable local economy.
- Educational Value: Growing your own sesame seeds can be an excellent educational opportunity, especially for children. It teaches valuable lessons about agriculture, sustainability, and the connection between food and nature.
Tips and Tricks for a Thriving Sesame Garden
While growing sesame seeds is relatively straightforward, there are some tips and tricks that can help ensure a thriving and bountiful crop. Here are some valuable strategies to consider:
- Companion Planting: Incorporate companion planting by growing sesame alongside plants that can benefit each other. For example, planting sesame with marigolds can help deter nematodes, while growing it with beans can provide nitrogen fixation to the soil.
- Mulching: Apply a 2-3 inch layer of organic mulch, such as straw, leaves, or wood chips, around the base of the sesame plants. Mulching helps retain soil moisture, suppress weeds, and regulate soil temperature.
- Crop Rotation: Practice crop rotation by moving your sesame crop to a different location in your garden each year. This helps prevent soil-borne pests and diseases from building up and reduces the depletion of specific nutrients in the soil.
- Intercropping: Consider intercropping sesame with compatible crops, such as legumes or leafy greens. This can help maximize space and yield in your garden while also providing beneficial companion plants.
- Regular Harvesting: Harvest sesame seeds regularly throughout the growing season to encourage continuous production. Removing mature seed pods can prompt the plant to divert resources toward producing more seeds.
- Seed Saving: If you find a particularly productive or flavorful sesame variety, consider saving some seeds from your harvest for the following year’s planting. This can help you preserve and propagate your favorite strains.
- Proper Drying: Ensure that you thoroughly dry the harvested sesame pods before extracting the seeds. Improper drying can lead to mold growth or seed spoilage, compromising the quality and longevity of your sesame seed harvest.
Sesame Cultivation: A Rewarding Journey
Cultivating your own sesame seeds is a gratifying experience that connects you with nature, promotes sustainability, and provides a sense of accomplishment. By following the guidance in this comprehensive guide, you can embark on a rewarding journey of growing these nutrient-rich seeds in your backyard.
From understanding the allure of homegrown sesame to mastering the cultivation techniques, this guide has equipped you with the knowledge and strategies to cultivate a thriving sesame garden successfully. Embrace the joys of homegrown sesame and savor the flavors and benefits of your hard-earned harvest.
Remember, sesame cultivation is not just about growing a crop; it’s about fostering a connection with the land, appreciating the cycles of nature, and taking an active role in your own food security. As you nurture your sesame plants, you’ll develop a deeper understanding of the intricate relationships between soil, water, and sunlight that contribute to a bountiful harvest.
Moreover, cultivating your own sesame seeds aligns with the growing trend of sustainable living and locally sourced produce. By reducing your reliance on industrialized agriculture and minimizing the carbon footprint associated with transporting food over long distances, you’re making a positive impact on the environment.
So, whether you’re an experienced gardener or a newcomer to the world of seed cultivation, embrace the opportunity to grow your own sesame seeds. Revel in the satisfaction of harvesting these tiny, nutrient-dense treasures from your backyard and incorporating them into your favorite dishes. Share your bounty with loved ones, and take pride in contributing to a more sustainable and flavorful future, one sesame seed at a time.


