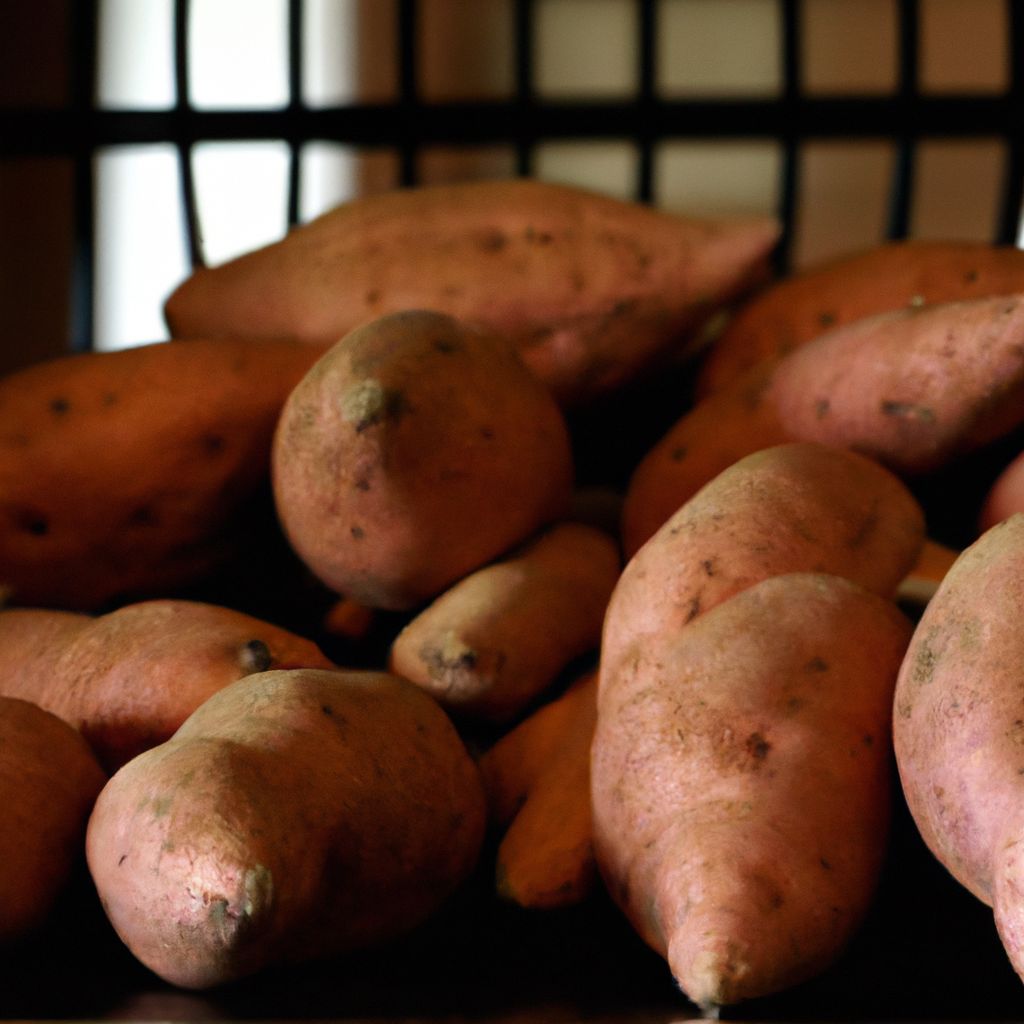
Turnips are an ancient vegetable that have been cultivated for thousands of years. Originally grown in Europe, these hearty root vegetables were a staple food source throughout history, valued for their versatility and adaptability. Today, growing turnips at home remains a fun and easy way to keep a bountiful supply of this nutritious and delicious vegetable.
Growing Turnips at Home
Turnips are an ideal vegetable for home gardening. These undemanding plants thrive with minimal care and effort. Growing your own turnips provides you with access to fresh, organic produce while saving money at the grocery store. There are many excellent reasons to grow turnips in your own vegetable garden:
- Cost Savings – Purchasing turnip seeds and growing your own crops is far less expensive than buying turnips at the market.
- Convenience – With homegrown turnips, you’ll always have these tasty vegetables close at hand to use in recipes.
- Organic – You control precisely what goes into the soil, avoiding pesticides and chemicals.
- Adaptability – Turnips grow well in both containers and garden beds, making them a versatile choice.
- Nutrition – Freshly harvested turnips contain more vitamins and minerals than store-bought varieties.
The History of Turnips
Turnips have a long and fascinating history as a nutritious food source. Here are some highlights of the origins and usage of turnips throughout history:
- Turnips are believed to have originated in Northern Europe around 1500 BC. Both the roots and greens were used for food.
- Ancient Greeks and Romans cultivated turnips and used them medicinally as a digestive aid and stimulant.
- In medieval times, turnip lanterns were made by cutting faces into turnips and placing a candle inside on Halloween.
- Turnip varieties were an important staple crop during famines and harsh winters in European history. Their storage ability provided sustenance.
- In colonial America, turnips were a common garden vegetable among settlers and provided an important source of nutrients over winter.
- During World War I, turnips were widely promoted as a replacement for potatoes in Europe. Plentiful harvests fed troops and civilians.
- Today, turnips are still used in many classic dishes across Europe such as Irish stew and Scandinavian soups.
- Their high vitamin C content made turnips important to prevent scurvy for early ocean voyagers sailing without access to citrus fruit.
- Hakurei turnips were developed in Japan in 1950s and are now popular specialty white salad turnips.
Understanding the deep roots of turnips through history gives insight into their enduring importance as a nutritious, hardy, and versatile crop.
Getting Started with Turnips

Growing turnips is simple, but does require some planning and preparation for success:
Choosing Varieties
Select turnip varieties optimized for your climate and maturity timeline. Popular options include:
- Purple Top – A mild-flavored variety with purple/red tops and white bottoms. Matures in 45-55 days. Great for stews and roasting.
- Golden Ball – Bright yellow turnips with a sweet, delicate flavor. Ready to harvest in 50-60 days. Excellent for salads and pickling.
- Tokyo Cross – A hybrid variety that produces smooth, crisp, white turnips. Matures quickly in just 35-40 days.
- Scarlet Queen – Vibrant red turnips with crisp white interiors and a mildly spicy zing. Matures in 45-50 days.
Consider days to maturity, color preferences, flavor profile, and intended use when selecting turnip varieties.
Preparing Soil
Turnips prefer loose, nutrient-rich soil with a pH between 6.0-7.0. To prepare an optimal growing medium:
- Loosen the top 6-12 inches of soil using a tiller or garden fork. Break up compacted areas.
- Incorporate 2-3 inches of compost or well-rotted manure. Mix thoroughly into soil.
- Test soil pH and amend with lime or sulfur as needed.
- Dig in a balanced fertilizer, such as 10-10-10, following package instructions.
- Rake soil smooth before planting.
Planting Seeds
Turnips can be grown in early spring as soon as soil can be worked, and again in late summer for fall harvesting. To plant:
- Direct sow seeds 1/2 inch deep, spacing 2-4 inches apart in rows 12-18 inches apart.
- To accelerate germination, soak seeds in water for 12 hours before planting.
- Maintain even soil moisture, watering daily to ensure proper germination.
- Thin seedlings when they reach 3 inches tall, leaving the strongest plants 4-6 inches apart.
- Consider Companion planting with peas, beans, onions or garlic to deter pests.
Caring for Plants
Proper care while plants are growing will maximize turnip crop quality and yields:
- Watering – Supply 1-2 inches of water per week. Avoid overhead watering.
- Weeding – Remove weeds to prevent competition for water and nutrients.
- Fertilizing – Side dress growing plants with a nitrogen fertilizer according to package rates.
- Mulching – Apply 2-3 inch layer of straw or leaves around plants to retain moisture and reduce weeds.
- Pest Control – Inspect for pests like aphids, cabbage worms, flea beetles. Remove by hand or use insecticidal soap sprays.
Harvesting Turnips
Turnips reach maturity and full flavor within 45-60 days of planting. Use these guidelines for harvest:
- Time to harvest when roots are 2-3 inches in diameter.
- Loosen soil with fork, then pull up plants by leaf tops.
- Cut off green tops, leaving 1 inch of stem.
- Clean off soil, but don’t wash until ready to use.
- Remove any damaged or split turnips, using the remainder promptly.
- Store unwashed turnips in plastic bags in the refrigerator for 2-3 weeks.
Common Problems Growing Turnips

Turnips are relatively hardy but can encounter problems like:
Bolting
- Causes – Temperature fluctuations, sowing too early, variety susceptibility
- Prevention – Choose bolt resistant varieties, plant at appropriate times, consistent watering
- Treatment – Promptly harvest any that bolt. No way to reverse once started.
Skinny Roots
- Causes – Rocky or shallow soil, overcrowding, dry soil
- Prevention – Prepare deep soil, proper spacing, consistent watering
- Treatment – Carefully dig and transplant singly into deeper soil if not overcrowded.
Hollow Heart
- Causes – Fast growth spurts, uneven watering, high temperatures
- Prevention – Maintain steady growth with consistent soil moisture. Control watering.
- Treatment – No fix once hollow heart occurs. Harvest promptly and discard severe cases. Still edible if mild.
Insect Damage
- Causes – Cabbage worms, cutworms, flea beetles, root maggots
- Prevention – Use row covers, control weeds, crop rotation, beneficial insects
- Treatment – Manually remove pests. Target them with Bt or insecticidal soap. Remove badly damaged plants.
Damping Off
- Causes – Fungal disease, poor drainage, overcrowding, excessive moisture
- Prevention – Avoid overwatering, increase airflow, spread plants out
- Treatment – Improve soil drainage. Remove and destroy affected seedlings. Re-sow seeds.
Downy Mildew
- Causes – Fungal infection, cool humid weather
- Prevention – Avoid wet foliage, space/thin plants, improve air circulation
- Treatment – Remove infected leaves promptly. Apply copper fungicide if severe.
Clubroot
- Causes – Fungal disease in soil
- Prevention – Avoid planting where present, lime soil, long rotations
- Treatment – No cure once plants infected. Solarize soil to kill spores before replanting.
By selecting resistant varieties, practicing crop rotation, and properly preparing soil, you can avoid many common problems with turnips. Consistent care and quick treatment of issues leads to healthy plants and bountiful harvests.
Troubleshooting Turnips
Turnips are relatively trouble-free, but may face occasional issues:
Pests
Common turnip pests and control methods:
- Aphids – Knock off with water spray or introduce ladybugs or lacewings.
- Cabbage Worms – Remove by hand or apply Bacillus thuringiensis.
- Flea Beetles – Protect young plants with floating row cover fabric.
- Cutworms – Prevent with collars around seedlings made of cardboard.
Diseases
Reduce disease issues by improving air flow and reducing foliage moisture:
- Clubroot – Avoid planting in infected soil. Lime soil to raise pH above 7.2.
- Downy Mildew – Space plants properly and avoid overhead watering.
- Black Rot – Quickly remove and dispose of diseased plants.
- Fusarium Wilt – Disinfect tools and rotate planting areas to prevent spread.
Nutrient Deficiencies
Identify deficiencies and amend soil appropriately:
- Nitrogen – Apply compost or manure before planting, side dress with nitrogen fertilizer.
- Phosphorus – Add bone meal or rock phosphate fertilizer to soil prior to planting.
- Potassium – Mix in wood ash or potash fertilizer. Crushed eggshells also provide potassium.
- Calcium – Lime soil to raise pH. Gypsum and eggshells also add calcium.
- Iron – Correct iron deficiencies with iron-rich fertilizers or foliar sprays.
With proper site selection, crop rotation, and attentive care, you can avoid many issues with turnips. But being prepared to troubleshoot problems quickly will help ensure a successful harvest.
Growing Turnips from Seedlings vs. Seeds

There are two main methods for planting turnips – starting with seeds or seedlings. Each has advantages and disadvantages:
Seeds
Planting turnip seeds directly in the garden bed is a common method.
Pros
- Less expensive than buying seedlings
- Turnips strongly prefer not to be transplanted. Seeds sprout well in place.
- Wide variety of turnip seed varieties readily available.
- Can continually sow seeds for staggered harvests.
Cons
- Takes 45-60 days for full mature turnips.
- Need to properly thin crowded seedlings.
- Seeds are small and can be challenging to space properly.
- Requires good soil preparation before sowing.
Seedlings
Some gardeners prefer to start turnip plants indoors and transplant seedlings.
Pros
- Matures plants faster, since seedlings get a head start indoors.
- Easier to control growing environment and protect young plants.
- Gives ability to choose strongest, healthiest plants for transplanting.
Cons
- Turnip roots often stunted by being transplanted.
- Seedlings prone to going into premature flowering.
- Much smaller variety of turnip seedlings available.
- Transplant shock can set plants back.
For many home gardeners, direct sowing seeds is the simplest approach with greatest success for turnips. But using seedlings can speed harvests in short growing seasons.
Growing Turnips from Scraps
Don’t discard those turnip scraps – they can re-sprout and grow into new plants! Follow these steps:
- Start with a healthy turnip root with a few inches of stem and leaves attached.
- Suspend the bottom half of the turnip over a glass jar filled with water, cut side down. The stem end should be submerged.
- Place in a sunny window and change the water daily to prevent bacteria growth.
- Within a week, small roots will begin protruding from the bottom of the turnip and the leaves will grow larger.
- When the new root system is 1-2 inches long, cut the original turnip off, leaving just the new roots and shoots.
- Transplant the regrown turnip plant into a container or garden bed with rich potting mix. Water regularly and feed with liquid fertilizer.
- The transplanted turnip will establish a strong root system and grow as a normal plant. Harvest when it reaches mature size in a couple months.
Regrowing turnips is an easy and fun way to enjoy additional harvests from kitchen vegetable scraps!
Growing Turnips in Containers
Limited on garden space? You can easily grow turnips on a balcony or patio in containers. Follow these tips:
- Select variety – Choose an early, compact variety suited to containers like ‘Purple Top White Globe’ or ‘Just Right’. Avoid long rooted types.
- Pot size – For one plant, use a 5-gallon bucket or pot, at least 12 inches wide and deep. Make drainage holes in bottom.
- Soil mix – Use a quality potting mix enriched with compost. Turnips need loose, fertile soil.
- Fertilize – Turnips are heavy feeders. Add controlled-release fertilizer to the soil mix before planting.
- Plant seeds – Sow 4-6 turnip seeds 1/2 inch deep in the container. Thin later to the strongest 2 seedlings.
- Water – Check soil daily and water when surface is dry. Don’t let plants wilt.
- Location – Place pot in full sun. Move to a sheltered spot if temperatures exceed 85°F.
- Rotate pots – Reposition the container occasionally so plants grow evenly rather than leaning toward sunlight.
With the right variety and care, you can grow productive turnip plants on a patio or balcony for a continuous harvest.
How to Grow Giant Turnips

Want to grow huge, prize-winning turnips? Here are some tips:
- Select giant cultivars – Choose an heirloom giant variety such as ‘Atlantic Giant’ which can reach up to 20 pounds.
- Plant in deep soil – Loose, deep topsoil at least 12 inches deep gives roots room to expand.
- Prepare soil – Incorporate ample compost and fertilizer to provide nutrients.
- Give them space – Plant seeds farther apart, at least 6 inches, to prevent crowding.
- Hill the soil – Gradually mound up soil around the swelling roots to continue covering emerging shoulders.
- Water deeply – Give plants at least an inch of water per week as roots grow deeper.
- Side dress fertilizer – When tops reach 6 inches, add nitrogen fertilizer to boost rapid growth.
- Mulch around plants – Insulate roots and conserve moisture with straw or leaves.
- Harvest late – Wait as long as possible before harvesting for maximum size.
- Select best specimens – Carefully dig up and enter your largest, most perfectly formed turnip in county fair competitions!
With the right variety, soil conditions, and care, you can amaze family and friends with giant turnip specimens weighing ten pounds or more.
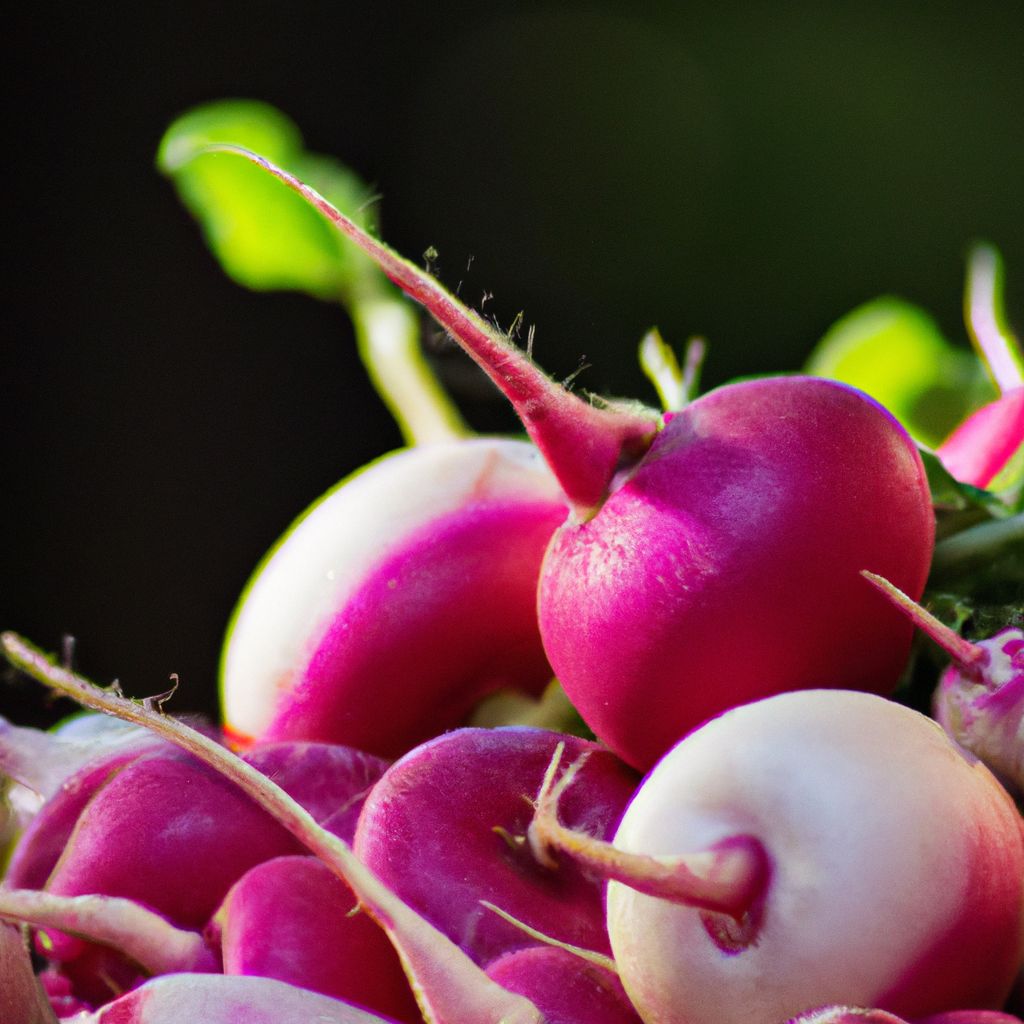
Companion Planting for Turnips
Companion planting turnips with other veggies can have beneficial effects:
- Lettuce – Shade from lettuce leaves helps keep turnip soil cool. Lettuce benefits from shade of maturing turnip foliage.
- Peas – Pea vines provide structural support for turnip plants. Peas add nitrogen to soil.
- Radishes – Radishes grow fast and break up compacted soil. Mature at different times than turnips.
- Garlic and Onions – Help repel pests like cabbage worms and aphids. Onions confuse pests with similar smell.
- Spinach – Thrives in similar cool conditions. Spinach has shallow roots while turnip roots grow deep.
Avoid planting turnips with:
- Potatoes – Both susceptible to scab. Don’t rotate these crops together.
- Tomatoes and peppers – Require different soil pH levels than turnips.
- Beans and peas – Can stunt growth. Leave plenty of space between.
- Mustard greens – Compete for resources and are in same plant family.
By selecting suitable companion plants, you can maximize growth, deter pests, improve flavor, and increase yields in your turnip patch.
How to Store Turnips Long Term
Want to keep turnips fresh for months? Here are some long term storage tips:
- Harvest when mature – Don’t harvest turnips too early. Allow them to reach full maturity for longest viability in storage.
- Cure turnips – Let freshly dug turnips sit at room temp for 1-2 weeks. This toughens skin and heals nicks/cuts.
- Remove tops – Cut off all green tops, leaving just 1 inch stem attached to the root. Tops draw moisture from the root.
- Brush dirt off – Gently brush off loose soil but don’t wash yet. Washing removes natural protective skin coating.
- Check for damage – Inspect each turnip and discard any with cuts, cracks or dark spots which can lead to decay.
- Choose proper storage – A cold cellar, unheated basement, root cellar or similar location that maintains 32-40°F temps and high humidity is ideal. Avoid freezing.
- Pack in containers – Place turnips in plastic buckets, wooden crates or mesh bags with good air circulation. Don’t crowd together turnips.
- Check periodically – Regularly inspect stored turnips and remove any that show signs of shriveling or spoilage.
Stored properly under cool, humid conditions, turnip roots will remain fresh and edible for 4-6 months.
Cooking with Turnips
Beyond simply boiling, there are many tasty ways to cook turnips:
Roasted Turnips
Toss cubed turnips in olive oil, salt, and pepper. Roast at 400°F, stirring occasionally, until browned and tender, about 30 minutes. Serves as a savory side or topping for salads and grain bowls.
Turnip Soups/Stews

Dice turnips and add to flavorful soups and stews during the last 15-20 minutes of cooking. Turnips pair especially well with chicken or beef broth.
Pickled Turnips
Boil quartered turnips for 2-3 minutes until partially cooked but still crunchy. Pickle in a hot brine of vinegar, sugar, and spices. Enjoy as a tangy, crispy condiment.
Turnip Fries
Cut raw turnips into thick fries or wedges. Toss with oil, salt and pepper. Bake at 425°F for 15-20 minutes until crispy on the outside, tender inside. Kids love them!
Mashed Turnips
Boil cubed turnips until very soft. Drain and mash with butter, cream, salt, and pepper for a twist on mashed potatoes.
Turnip Hash
Sauté diced turnips with potatoes, onions, garlic, herbs, and oil. Cook until browned and tender. Top with over easy eggs for a hearty breakfast.
With their mild and sweet flavor, turnips lend themselves to both savory and sweet applications. Try substituting turnips in recipes that call for potatoes, carrots, or parsnips for new dimensions of flavor. The possibilities are endless!