Daffodils are a sure sign of spring, emerging right after the frost melts to bring cheerful color with their bright yellow, white, pink or orange blooms. Besides their beauty, daffodils are easy to grow and low maintenance once established. By following some simple cultivation guidelines, you’ll be rewarded with drifts of daffodils that bloom year after year. This guide will walk you through the entire daffodil cultivation process, from selecting a site to troubleshooting any issues. Let’s get started growing these harbingers of spring.
Selecting the Right Location
Choosing the optimal location is key for a thriving daffodil patch. Daffodils thrive in full sun, needing at least 6 hours of direct sunlight daily for best blooming. Select a site that gets sun from mid-morning through the afternoon. Morning sun helps dry dew from the foliage, preventing disease. Daffodils tolerate partial shade but may not bloom as prolifically.
In terms of soil, daffodils thrive in well-draining soil and will rot in heavy, soggy soil. Test your drainage by digging a 12-inch deep hole and filling it with water. If the water doesn’t drain in 12 hours, improve the drainage before planting. Daffodils prefer a soil pH between 6.0-7.0. Have your soil tested to determine the pH.
Shelter your daffodils from excessive wind, which can shred the foliage and blooms. A location protected by a structure, hedge or fence is ideal. Avoid low-lying frost pockets, as late frosts can damage emerging plants. With the right location, your daffodils will flourish.
Factors to Consider for Location
When selecting the planting location for your daffodils, keep these factors in mind:
- Sunlight: Daffodils need full sun, at least 6 hours of direct sunlight daily. Morning sun is especially important.
- Soil drainage: Well-draining soil is essential to prevent rot. Heavy, soggy soil will cause bulb rot.
- Wind protection: Shelter daffodils from strong winds which can damage foliage and blooms.
- Soil pH: Test soil pH, daffodils thrive in slightly acidic to neutral soil, pH 6.0-7.0.
- Frost pockets: Avoid low areas where frost collects since late frosts can damage plants.
Choosing a site that meets these requirements will set your daffodils up for success. Pay close attention to sunlight and soil drainage when selecting the planting area.
Preparing the Soil
Preparing the soil properly lays the foundation for success. Start by loosening the top 12 inches of soil with a spade or tiller. Clear the area of weeds, rocks and debris that could impede growth.
Next, mix in 2-3 inches of aged compost or well-rotted manure to enrich the soil. Compost improves drainage in heavy clay soil. Incorporate a balanced organic fertilizer by following package directions. Daffodils are heavy feeders, thriving with a fertilizer higher in phosphorus and potassium.
Shape the soil into raised beds 5-8 inches high to improve drainage if you have heavy soil. Space rows 2-3 feet apart. Daffodils planted in groups create a bigger impact compared to single plants scattered about.
Soil Preparation Steps
Follow these important steps when preparing soil for daffodil planting:
- Loosen soil to a depth of 12 inches using a spade or tiller
- Remove weeds, rocks and debris
- Mix 2-3 inches of compost into soil to enrich
- Incorporate balanced organic fertilizer, higher in phosphorus and potassium
- Create raised beds 5-8 inches high to improve drainage (for heavy soils)
- Space rows 2-3 feet apart for proper air circulation
- Plant bulbs in groups for greater visual impact
Properly preparing the soil gives daffodil bulbs the best chance to thrive. Invest time into creating ideal growing conditions for a healthy daffodil patch.

Choosing Bulbs
Select large, firm bulbs without mold, rot or other defects from a reputable grower. The bulbs size indicates their maturity, with larger bulbs producing more blooms. Choose bulbs based on your preferred bloom time. Early, mid and late season varieties extend the bloom period from early spring through May.
Popular early bloomers include February Gold and Rijnveld’s Early Sensation. Mid season favorites include the fragrant Pink Charm and vivid Jetfire. For late season bloom, consider the elegant Thalia or cheerful Barrett Browning. Mixing early, mid and late varieties together results in weeks of color.
What to Look for When Selecting Bulbs
Keep these tips in mind when choosing daffodil bulbs for planting:
- Size – Select large, firm bulbs which produce more flowers. Avoid small, shriveled bulbs.
- Condition – Check for mold, damage, or rot. Choose clean, blemish-free bulbs.
- Reputation – Purchase from reputable growers for highest quality bulbs.
- Bloom season – Pick early, mid and late season varieties to extend bloom times.
- Compatibility – Choose bulbs suitable for your climate and growing conditions.
Taking the time to start with top-notch bulbs will pay off with a stellar daffodil display for years to come. Invest in the best bulbs you can afford.
Planting Bulbs
Daffodils bloom best when planted in fall about 6-8 weeks before a hard frost. This allows the bulbs to establish roots before winter dormancy. Plant the bulbs 4-6 inches deep and 4-6 inches apart in well-draining soil. Space smaller bulbs like Tete a Tete 2-3 inches apart. Place bulbs with the pointed end up.
After planting, water well and continue watering until the ground freezes. Apply 2-3 inches of mulch like straw or pine needles over the planting area to insulate the soil. Remove the mulch in spring after the threat of hard frost has passed. With proper planting depth and timing, you’ll have spring flowers.
Step-by-Step Bulb Planting Instructions
Follow these steps for proper daffodil bulb planting:
- Prepare soil – Loosen soil to 12 inch depth, remove weeds/debris, mix in compost
- Dig holes – 4-6 inches deep and 4-6 inches apart (2-3 inches for smaller bulbs)
- Place bulbs – Plant with pointy end facing up, flat bottom down
- Cover bulbs – Backfill holes, firm soil gently around bulbs
- Water thoroughly – Ensure even moisture after planting
- Mulch – Apply 2-3 inch layer of mulch over planting area
- Timing – Plant 6-8 weeks before hard frost for root growth
Proper planting techniques give bulbs their best start. Follow these steps closely for optimal growth and flowering.
Caring for Daffodils
Fortunately, daffodils are one of the easiest bulbs once established, with minimal care needed. Keep soil moist but not soaked for the first year while roots develop. Mature plants tolerate dry periods but thrive with 1 inch of water weekly during growth and blooming.
Apply a balanced organic fertilizer or bulb fertilizer after bloom when the foliage is green. Avoid high nitrogen fertilizers that produce lush foliage at the expense of flowers. Scatter the fertilizer evenly and water in well.
Deadhead spent blooms to conserve energy and snip off any damaged foliage. Leave the foliage intact for 6 weeks after blooming so the leaves can nourish the bulbs for next year’s flowers. Once the foliage turns yellow, cut it back or let it die back naturally.
Daffodil Cultivation After Planting
- Watering – Keep soil moist first year, 1 inch weekly when mature. Avoid overwatering.
- Fertilizing – Use balanced fertilizer after blooming. Avoid high nitrogen types.
- Deadheading – Remove faded blooms to base of plant. Leave foliage intact.
- Pest/disease control – Practice good sanitation, remove affected parts promptly.
- Dividing – Divide congested clumps every 2-3 years to rejuvenate.
- Foliage – Allow foliage to die back naturally before removing fully.
Giving daffodils a little TLC will keep them flowering profusely year after year. Develop a regular care routine.
Sunlight Needs
Abundant sunlight is key to vigorous daffodil growth and maximum blooms. Daffodils require full sun, meaning at least 6 hours of direct unfiltered sunlight daily. Morning sun is especially important. Daffodils tolerate light afternoon shade but should never be in all day shade.
When planted in too much shade, daffodils expend energy reaching for sunlight, resulting in small, sparse flowers on stretched stems. Insufficient sun also increases disease. Evaluate sunlight patterns in your yard and select the sunniest spot. Trim back encroaching tree branches or structures that cast shade on your daffodils. Proper sunlight keeps your daffodils flowering year after year.
Ensuring Adequate Sunlight for Daffodils
To provide enough sun for vigorous growth, keep these tips in mind:
- Choose the sunniest location in your yard, with 6+ hours direct sun daily
- Prioritize morning sunlight, critical for drying dew on foliage
- Avoid areas that get sun only in afternoon or are shaded all day
- Monitor sunlight over time and adjust area if needed
- Trim back trees/shrubs that begin to shade the daffodils
- Replace plants that decline from insufficient sunlight
The sunniest areas in your landscape offer the best homes for daffodils. Provide ample sunlight and they’ll thank you with an abundance of cheery blooms.

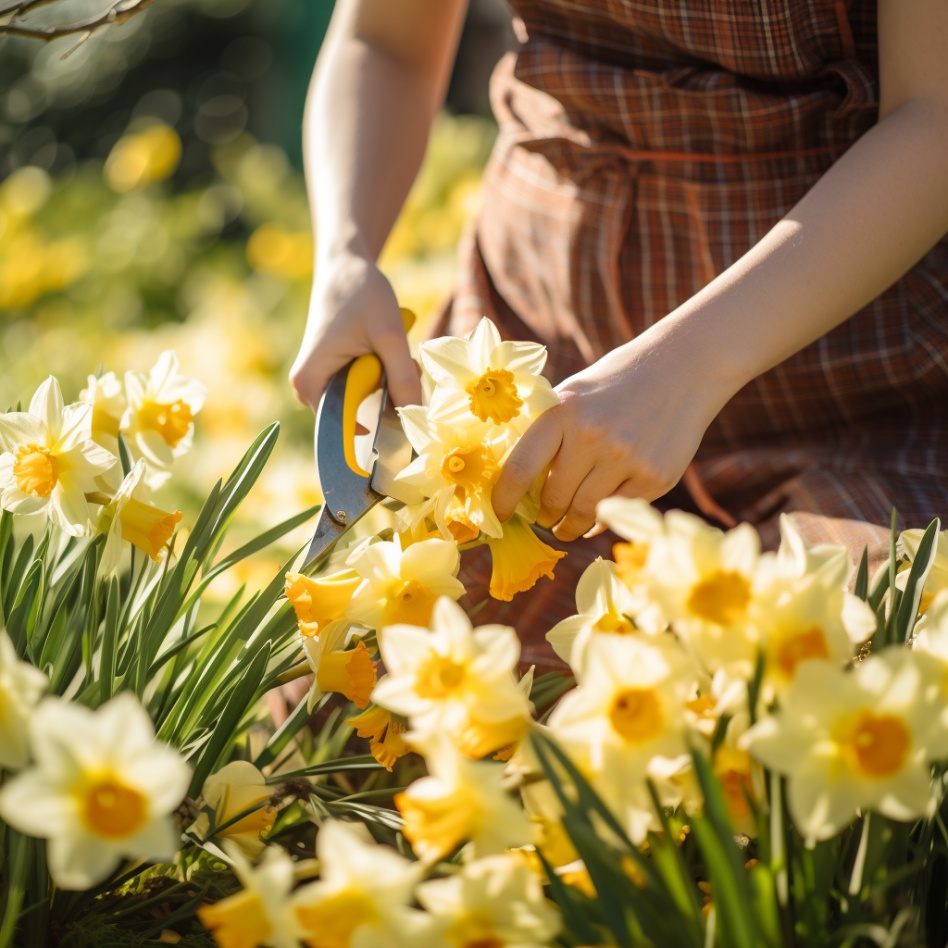
Deadheading Spent Blooms
Deadheading, or removing spent blooms, neatens up plants and conserves energy. To deadhead, use clean, sharp scissors or pruning shears when blooms fade. Cut each flower stalk back to the base just above the topmost foliage. Avoid cutting the foliage, as it is needed to nourish the bulb until it naturally yellows. Discard the deadheads promptly.
Deadheading prevents seed head formation, allowing plants to put energy into bulb growth instead of seed production. It also improves the plant’s appearance. Timely deadheading results in more beautiful blooms next spring.
How to Deadhead Daffodils
Follow these guidelines when deadheading daffodil blooms:
- Use clean, sharp scissors or shears to prevent disease transmission
- Allow blooms to fade completely before deadheading
- Cut each flower stalk off at the base of the plant
- Avoid damaging the foliage which is still nourishing the bulb
- Discard deadheaded blooms promptly, do not compost
- Deadhead before seed pods can form to conserve energy
- Deadhead consistently through entire bloom period
- Stop deadheading once foliage turns yellow and begins to die back
Proper deadheading technique improves plant health and the next season’s display.
Dividing Overgrown Clumps
To maintain the vigor of daffodils, congested clumps should be divided every 2-3 years. Follow these tips for dividing daffodils:
When to Divide
- Divide after foliage fully dies back, usually 2-3 months after blooming finishes
- Late summer or early fall is ideal timing
How to Divide Daffodil Clumps
- Carefully dig up entire clump with a garden fork, keeping roots intact
- Gently pull bulbs apart with your hands into smaller clusters
- Replant clusters immediately at same depth,spaced 4-6 inches apart
- Water thoroughly after replanting and continue care as normal
- Discard any bulbs that appear damaged or diseased
Dividing overcrowded clumps rejuvenates daffodils, yielding more flowers.
Storing Bulbs
If you wish to store some of your daffodil bulbs for replanting in the future, follow these tips:
When to Harvest Bulbs
- Allow foliage to yellow and die back fully before harvesting bulbs
- Dig bulbs up 2-3 months after blooming finishes
How to Store Bulbs Properly
- Gently clean bulbs by hand, avoid washing which can damage
- Discard any bulbs with signs of rot or damage
- Place bulbs in breathable mesh bags or open crates
- Store bulbs in a cool, dry place with good ventilation
- Avoid storage areas with fruit which emit ethylene gas
- Ideal storage temperature is 35°-45°F
- Label bags with bulb variety and harvest date
Proper harvesting technique and storage conditions prevent bulb damage. Stored correctly, bulbs can be successfully replanted in future years.
Extending Bloom Time
You can prolong the spring blooming season of daffodils by using these techniques:
- Choose early and late varieties – Mixing early bloomers with late bloomers extends overall bloom period
- Provide proper care – Consistent water and proper nutrition encourages more flowering
- Deadhead diligently – Deadheading prevents seed heads which stops blooming
- Protect from harsh weather – Shelter blooms from severe cold, wind, rain or heat
- Divide clumps routinely – Prevent overcrowding which reduces blooming
- Force bulbs – Force bulbs indoors for earlier winter blooms
- Stagger plantings – Plant small batches of bulbs every 2-3 weeks in fall
- Fertilize – Feed with bloom booster fertilizer when buds appear
With some planning and care, you can enjoy daffodils up to 6 weeks or more!

Troubleshooting Problems
Even when properly cared for, daffodil cultivation can occasionally encounter issues. Here are some common problems and solutions:
Daffodils Not Blooming
Causes
- Too much shade or insufficient sunlight
- Overcrowded bulbs competing for nutrients
- Excessive moisture causing bulb rot
- Rodent or pest damage to bulbs
- Low temperatures or late frost damage
Solutions
- Ensure location has at least 6 hours direct sun daily
- Divide and replant overcrowded clumps
- Improve soil drainage and avoid overwatering
- Apply rodent/pest deterrents around planting area
- Cover plants if late frost is predicted
Leaves Yellowing Prematurely
Causes
- Insufficient watering or drought conditions
- Poor soil nutrition
- Damaged roots unable to uptake nutrients
- Disease or fungus present
Solutions
- Water plants thoroughly to evenly moist soil
- Test soil and amend with compost/fertilizer
- Check bulb roots for damage from pests/rodents
- Remove and destroy infected foliage
Fungal Diseases
Prevention
- Avoid overcrowding bulbs and improve air circulation
- Water early in the day allowing foliage to dry out
- Disinfect tools between plants to prevent spread
- Remove and dispose of all infected plant material promptly
- Rotate plantings to new area to prevent disease buildup
Slugs or Snails
Control
- Remove by hand and dispose of any pests found
- Use organic slug/snail bait according to label
- Set out beer traps in adjacent soil which attracts and drowns them
- Use copper tape as barrier around planting beds
With observation and quick action, most daffodil problems can be resolved, restoring plant health.
Enjoying Daffodils in Your Garden
Cheery daffodils herald spring with optimism and joy after gloomy winter days. With their bright hues of yellow, white and orange, daffodils bring the landscape to life. Their nodding blooms dance in spring breezes, spreading their fresh scent.
Daffodils are easy to grow, deer and pest resistant, and thrive for years with minimal care. Plant drifts of these bulbs for a breath of fresh air after winter. Soon you’ll look with anticipation for those green shoots poking up, followed by vibrant blooms. The golden glow of daffodils brings happiness along with spring.

Bringing Daffodils Into Your Garden
Here are some final tips for successfully incorporating daffodils into your garden:
- Choose a sunny location with well-draining soil for best results
- Plant bulbs in fall 6-8 weeks before first frost for root growth
- Mix early and late blooming varieties for an extended color display
- Deadhead spent blooms and let foliage die back naturally to feed bulbs
- Lift and divide crowded clumps every 2-3 years to maintain vigor
- Be patient – it may take 2-3 years for bulbs to fully establish and flower strongly
- Protect emerging shoots from slugs and rodents which can damage
- Weed diligently to prevent competition for nutrients and water
With proper care, daffodils will give you years of cheerful spring blooms. The golden glow of daffodils brings happiness along with spring.