


Cultivating oats at home can provide many rewards. From nourishing your body to satisfying your soul, read on to discover the joys and benefits of growing your own oats.
Benefits of Growing Oats at Home
- Nutritional value: Oats offer exceptional nutritional value. Packed with fiber, protein, vitamins, and minerals, oats can boost heart health, aid digestion, stabilize blood sugar levels, and more. Growing oats yourself gives you control over their freshness and quality.
- Cost savings: Growing your own oats is cost-effective compared to purchasing oats. You can enjoy an abundant supply without needing to buy oats regularly.
- Avoid chemicals: When growing oats at home, you can avoid pesticides, herbicides, and other chemicals used in commercial oat production. This gives you peace of mind about the purity of your oats.
- Reduce waste: Growing oats yourself minimizes waste from oat packaging. This reduces your environmental impact.
- Lower carbon footprint: By growing oats at home, you lower the carbon emissions related to transporting commercially packaged oats. This benefits the planet.
- Educational: Cultivating oats is an educational and fulfilling activity for gardeners of all ages. It allows you to learn about oat growth cycles and sustainable food production.
- Connection to nature: Growing oats fosters a meaningful connection with nature. You can enjoy watching the oats grow through the seasons.
Nutritional Value of Oats
Oats provide a wealth of nutritional benefits:
- Fiber: Oats contain soluble fiber called beta-glucan, which can help lower LDL cholesterol levels and improve heart health.
- Protein: Oats are a source of plant-based protein, containing more protein than many common grains.
- Vitamins and minerals: Oats contain manganese, phosphorus, magnesium, iron, zinc, folate, and more. These provide a variety of health benefits.
- Antioxidants: Oats contain polyphenols and avenanthramides, which are antioxidants that help reduce inflammation and oxidative stress.
- Blood sugar regulation: The fiber in oats helps slow digestion, leading to a slower rise in blood sugar. This aids blood sugar control.
- Satiety: Oats are very filling and can suppress appetite due to their fiber content. This assists with weight management.
- Gluten-free: Certified gluten-free oats are a safe grain choice for those with celiac disease or gluten sensitivity.
Why Consider Growing Oats?
There are many compelling reasons to consider growing your own oats:
- Obtain the freshest oats possible: Freshly harvested oats have superior taste and texture compared to store-bought oats.
- Select ideal varieties for your climate: You can choose oat varieties best suited to your growing conditions and preferences.
- Cut costs: Homegrown oats can save you money compared to purchasing oats. The initial investment pays off over time.
- Avoid chemical residues: You control what gets sprayed on your oat crop. Homegrown oats avoid chemical residues from commercial farming.
- Reduce environmental impact: Growing oats yourself decreases transport emissions associated with packaged oats. It also reduces plastic waste from packaging.
- Teach children where food comes from: Involving kids in oat cultivation educates them on gardening, nature, and agriculture.
- Gain independence: Cultivating your own oats allows you to become more self-sufficient and less reliant on stores.
- Enjoy versatility: Fresh oats can be used in diverse recipes like oatmeal, granola, cookies, bread and more.
- Connect with the land: Growing oats fosters a meaningful bond with the land. It provides an enriching outdoor activity.
Getting Started with Growing Oats
Growing your own oats is easy and rewarding with proper planning and care. Follow these guidelines to help ensure success.
Choosing the Right Oat Variety
- Consider your growing zone and climate when selecting oat varieties. Some important factors are average low temperatures, first and last frost dates, and precipitation patterns.
- Naked oats, steel cut oats, and rolled oats are common home gardening varieties. Each has slightly different characteristics.
- Look for disease-resistant, high-yielding varieties recommended for your region. Consult local university extension offices for suggestions.
- Heirloom and hull-less varieties also present unique options, though may be lower yielding.
- For gluten-free oats, look for packages certified gluten-free to avoid cross-contamination.
Preparing the Soil
- Oats grow best in full sun. Choose a location with at least 6 hours of direct sunlight daily.
- Test the soil pH. Oats prefer a pH between 6.0-7.0. Add lime if soil is too acidic or sulfur if too alkaline.
- Improve drainage by tilling in compost. Oats do not tolerate water-logged soils.
- Oats are not very nutrient-demanding. Incorporate a balanced fertilizer or compost before planting.
- Use a rake to create a fine, crumbly soil texture. This allows seeds make good contact with soil.
- If soil is heavy clay, add organic matter like compost to improve texture prior to planting.
Sowing Oat Seeds
- Sow seeds directly in the ground 2-3 weeks before the last expected frost.
- Space rows about 8-12 inches apart. Sow seeds 1 inch deep and 2 inches apart within rows.
- For small spaces, broadcast sowing evenly over soil may work better than rows.
- Gently rake seeds into soil, then water lightly to settle soil. Avoid over-watering.
- Expect germination in 4-10 days once soil temperature reaches at least 40°F.
- Can also plant in late summer or fall 6-8 weeks before first expected frost for an early summer harvest.
Caring for Oat Plants
Give your growing oats attentive care and they will reward you with vigorous growth and abundant yields.
Watering Oats
- Oats require about 1-1.5 inches of water weekly. Adjust as needed based on rainfall.
- Water early in the morning to allow leaves time to dry out, preventing disease.
- Avoid overhead watering that can promote foliar diseases. Use drip irrigation instead.
- Check soil moisture before watering. Overwatering encourages shallow roots and disease.
- Drought stress during grain fill stage can severely reduce yields.
Fertilizing Oats
- Conduct a soil test to determine fertilization needs. Oats are not heavy feeders.
- Apply 1 lb nitrogen per 1,000 sq ft before planting. Top dress with an additional 1 lb nitrogen once plants are established.
- Fish emulsion, blood meal, and compost are organic nitrogen fertilizer options.
- Work compost or manure into soil before planting to increase fertility and nutrition.
- Potassium supports disease resistance in oats. Apply potash fertilizer if soil is deficient.
Controlling Weeds
- Mulch after seeding with clean straw. This smothers weeds and conserves soil moisture.
- Carefully hand pull weeds, especially in early growth stages while plants are small.
- Hoe the area shallowly to disrupt emerging weeds, taking care not to damage oat roots.
- Oat plants grow rapidly and will outcompete most weeds once established.
- Prevent weeds from going to seed in and around the oat growing area.
Preventing Pests and Diseases
- Major oat diseases include leaf blotches, rusts, powdery mildew, and smuts. Variety selection and crop rotation help avoid disease.
- Common oat insect pests include aphids, armyworms, wireworms, thrips and cereal leaf beetles. Monitor plants and hand pick or use organic sprays if infestations occur.
- Birds and mammals are also often pests for oats and should be controlled.
- Remove any diseased plants immediately to prevent disease spread.
- Avoid excess fertilization and dense planting, which can increase oat susceptibility.
- Cut back oat stalks after harvest and till under crop debris to reduce overwintering pest habitat.
Harvesting and Storing Oats
With proper harvesting and storage techniques, you can enjoy your homegrown oats for months to come.
When and How to Harvest
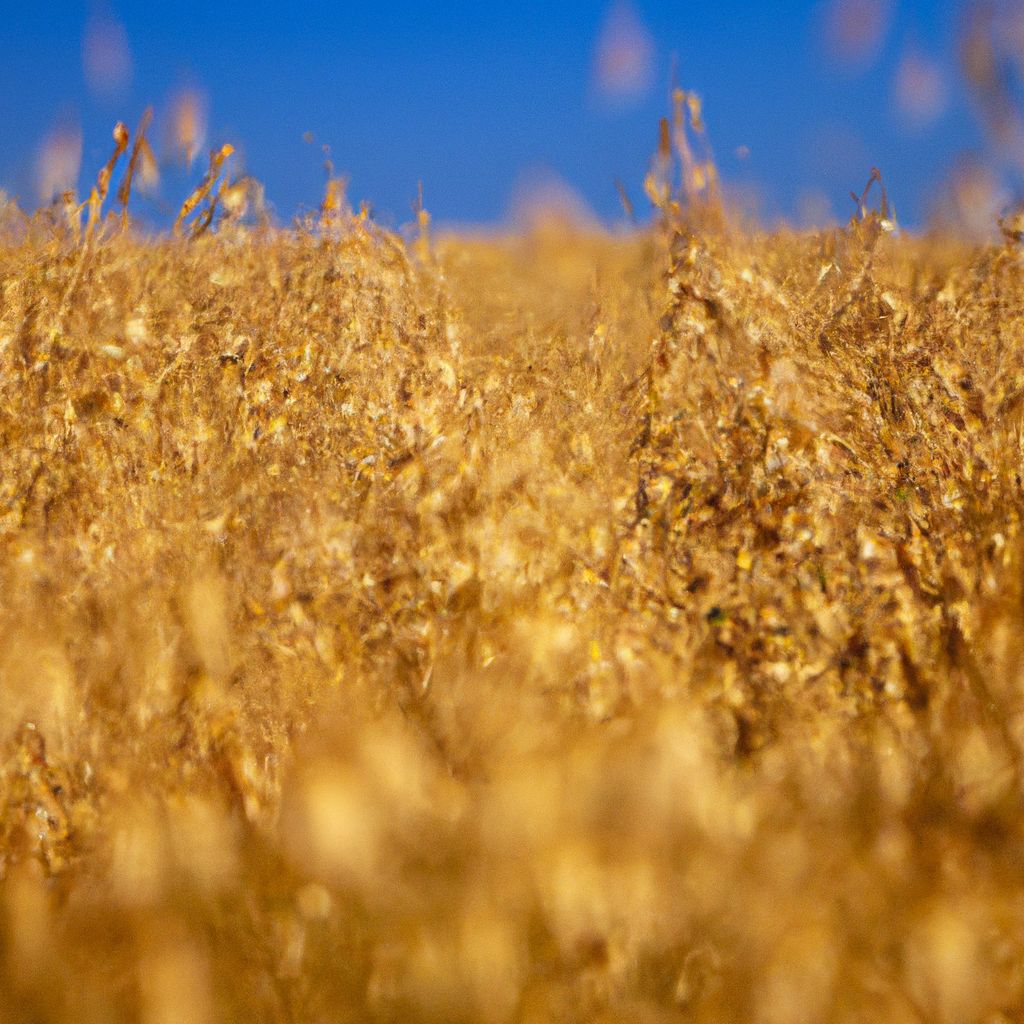
- Oats are ready for harvest when straw is yellow and dry and hulls are plump and golden brown. Grain should be hard.
- Check grain moisture level using a meter. Ideal is 12-14% moisture.
- Cut stalks using a scythe or sickle, 2-3 inches above soil surface once majority are mature.
- Gather cut plants into bundles and tie with twine. Hang bundled plants upside down in a dry, well-ventilated area to dry.
- Once fully dry in 2-3 weeks, rub heads vigorously over a tarp to remove grains.
- Winnow grains by pouring from container to container in front of a fan to remove chaff.
Drying and Storing Oats
- Spread harvested grains in a single layer on screen or tarp to dry for 1-2 weeks if needed. Turn grains regularly.
- Ensure moisture content is 12% or less before storage to prevent spoilage.
- Store dried oats in food grade plastic buckets, glass jars or airtight containers. Avoid sunlight, rodents and moisture.
- Cool, dark storage below 50°F is ideal. Refrigerate or freeze grains for long term storage over 6 months.
- Monitor stored grains occasionally for moisture and signs of insects. Discard any compromised oats.
Enjoying Your Homegrown Oats
Reap the tasty rewards of your oat harvesting efforts by finding creative ways to enjoy your homegrown grains in delicious recipes.
Oat Recipes
- Enjoy classic oatmeal or overnight oats with fruits, nuts, milk or yogurt for a nutritious breakfast.
- Bake with oat flour or add rolled oats to cookies, breads, muffins and granola bars.
- Use oats as a filler in meatballs or loaves. They act as a healthy binder.
- Make granola or homemade energy bars by baking oats with nuts, seeds, coconut, dried fruit, nut butter and honey.
- Add oats to smoothies or blend with water to make oat milk.
Other Uses for Oats
In addition to cooking, oats have many other applications:
- Create an exfoliating facial scrub by grinding oats into a fine powder and mixing with water or yogurt.
- Soothe itchy skin, sunburn or eczema by placing oats in a clean cloth and applying as a compress.
- Use as wild bird food. Set out in feeders or spread on ground.
- Scatter oat seeds when planting a new lawn for a nurse crop that crowds out weeds.
- Dump oat straw as mulch or pathways in garden beds. It breaks down into rich organic matter.
- Grow oats as a cover crop and till back into soil to increase organic content.
Frequently Asked Questions
How much space do oats need?
Oats can thrive in small spaces. A 10×10 ft garden bed can produce 5-10 lbs of oats. For larger yields, each acre can produce 1,500-4,000 lbs.
What are the best oat varieties for my climate?
Consult local university agricultural extensions for the best oat varieties for your USDA hardiness zone. Factors like season length, disease resistance, and yield should guide variety selection.
Can oats be grown without full sun?
Oats require full sun – at least 6 hours of direct sunlight per day. With insufficient sunlight, they will be spindly and low yielding.
How long does it take to grow oats?
Oats take around 100-120 days to reach maturity and be ready for harvest. Planting in spring, they are ready by late summer. Planting in late summer, they mature the following summer.
What is the best way to sow oat seeds?
You can sow oat seeds by hand in rows or broadcast them evenly over the prepared soil area. Plant seeds 1 inch deep and 2 inches apart in rows spaced 8-12 inches apart.
How often should I water my oat plants?
Oats need about 1-1.5 inches of water per week. Water early in the morning and check soil moisture before watering again to avoid overwatering.
How can I boost oat nutrition?
- Choose heirloom or hull-less varieties. These contain more overall nutrients than traditional oats.
- Allow oats to fully ripen on the stalk before harvesting. Maximum nutrition develops in mature oat grains.
- Dry freshly harvested oats with low, indirect heat to protect nutrients. Avoid over-drying.
- Store oats in airtight containers in a cool location to preserve nutrients. Refrigerate for long-term storage.
- Soak, sprout or ferment oats before eating. This increases bioavailability of nutrients.
- Grow oats organically using compost instead of synthetic fertilizers for increased antioxidants.
- Consume oats within a year for best nutrition. Rancidity increases with longer storage times.
What are the different types of oats?
There are several major types of oats defined by how the oat groats are processed:
- Rolled oats – Groats are steamed and flattened into flakes by large rollers. Common in breakfast cereals.
- Steel-cut oats – Groats are cut into pieces but not rolled. They have a chewy texture.
- Scottish oats – Stone-ground oat groats creating a mealy texture. Popular in Scotland.
- Oat bran – Outer layer of the oat groat containing high fiber. Often used in baking.
- Oat flour – Oat groats ground into a fine flour. Works well in many baked goods.
- Oat groats – Hulled, whole oat grains. Can be eaten cooked as cereal or added to recipes.
- Quick oats – Cut groats pressed thin and cut into small pieces for faster cooking.
Should I fertilize my oat crop?
Oats are not heavy feeders, but fertilizer can optimize growth and yields. Apply 1-2 lbs of nitrogen per 1000 sq ft before planting. Top dress with 1 lb nitrogen once plants are established. Organic fertilizers like compost, blood meal and alfalfa meal also supply nutrition. Conduct a soil test to determine any nutritional deficiencies before planting.
How much can oat plants tolerate frost?
Oats are quite frost hardy. They can withstand frosts in the low 20°s Fahrenheit early in development and survive temperatures as low as the mid teens when more mature. However, colder temperatures below 24°F may damage young seedlings. Some oat varieties have better frost resistance than others.
What are some things to avoid when growing oats?
- Avoid overwatering which encourages root diseases. Allow soil to partially dry out between waterings.
- Don’t over fertilize with nitrogen which produces lush foliage but lower yields. Follow soil test recommendations.
- Avoid planting in tightly compacted soils that restrict root development.
- Don’t delay harvesting once oats are mature and dry. This can lead to grain loss from shattering.
- Refrain from storing oats in warm places or in permeable containers where they are exposed to pests, rodents, or moisture.
- Don’t purchase oat seed that is old, moldy, or insect-infested. Check for quality before planting.
What’s the difference between spring and winter oats?
- Spring oats are planted in early spring and mature in late summer of the same year, taking about 3-4 months to grow. Winter oats are planted in fall and overwinter while going dormant. They resume growing in spring and are harvested in mid-summer, taking about 10-11 months total to mature. Winter oats generally produce higher yields. But spring oats avoid the risk of winterkill in colder climates. Know your climate when choosing spring or winter oat varieties.
How do I know if oats are ready for harvest?
Check if oat grains are plump, hard, and golden brown. Gently squeeze grains between fingers or use a grain moisture tester to determine if grain moisture is between 12-14%. The oat stalks will turn yellow and dry when mature and ready for harvest. Harvest oats promptly once mature to avoid losses from shattering.
What’s the best way to dry oats after harvest?
Use low, indirect heat to dry oats gently. Spread grains out in a single layer on screens or tarps. Turn grains regularly to prevent spoilage. Make sure moisture content is 12% or below before storing. You can also hang cut stalk bundles in a dry, well-ventilated area to dry for 2-3 weeks. Avoid direct sunlight to prevent losing nutrients. Proper drying preserves freshness and flavor.
How do I separate oat grains from stalks?
Once oat stalk bundles are thoroughly dried, you can thresh the grains from the stalks by beating the seed heads with a stick or flail over a tarp. For small volumes, rubbing the stalks vigorously between your hands over a container can remove the grains. Winnowing, or pouring grains from one container to another in front of a fan, will separate the lighter chaff from the oat grains.
What are some common pests and diseases of oats?
Pests:
- Aphids – Small sap-sucking insects that feed on plants. Can spread viruses.
- Armyworms – Larvae of moths that chew on foliage.
- Wireworms – Larvae of click beetles that bore into stems and grains.
- Thrips – Tiny insects that feed on leaves and can spread viruses.
- Cutworms – Caterpillars that cut down young seedlings.
- Slugs – Feed on seedlings and can devour entire plants.
Diseases:
- Rust – Fungal disease that causes reddish-brown powdery growth on leaves and stems.
- Powdery mildew – White fungal growth on leaves, stems and grains.
- Crown rust – Fungal disease creating orange pustules on leaves and stems.
- Leaf blotches – Fungal diseases that cause lesions and blight.
- Root rot – Fungal disease that decays roots and causes wilt.
- Smuts – Fungal disease creating black powdery spores that replace grains.
- Barley Yellow Dwarf Virus – Causes yellowing, stunted plants. Spread by aphids.
When is the ideal time to plant oats?
Spring – Plant 2-3 weeks before the average last spring frost once soil reaches at least 40°F.
Fall – Plant 6-8 weeks before the average first fall frost for an early summer harvest the following year.
The timing depends on whether growing spring or winter oats. Adjust planting dates based on your local frost dates and climate.
What’s the best way to use fresh oat straw?
The uses for nutrient-rich oat straw are abundant:
- Spread as mulch around plants to retain moisture and smother weeds
- Incorporate into compost piles as a source of carbon
- Use as bedding material for livestock
- Lay as a path or casual walkway in the garden
- Make into decorative baskets or bind into wreaths for wall art
- Add to soil as a moisture retaining amendment in vegetable gardens
- Use as a weed blocking material when creating new planting beds
- Work lightly into top few inches of soil in empty beds to increase organic matter
What rotation crop schedule should I follow with oats?
Follow a 2-4 year crop rotation schedule:
- Oats, soybeans, oats, corn
- Oats, alfalfa, corn, soybeans
- Oats, peas, sweet corn, squash
- Oats, beans, tomatoes, lettuce
Rotating oat crops reduces disease, pest, and weed pressures. Avoid following oats with wheat, barley, rye or triticale, which share diseases with oats.
What are some potential challenges growing oats?
- Lodging – Heavy rain or wind can cause oat stalks to flatten or “lodge.” Good straw strength varieties can help avoid lodging.
- Drought – Oats have shallow roots and are prone to drought stress. Adequate, consistent moisture is key.
- Weed pressure – Oats grow slowly at first, leaving them vulnerable to early weed competition. Mulching helps suppress weeds.
- Fungal diseases – Leaf blotches, rusts, and mildews can spread quickly in humid climates. Resistant varieties and crop rotation helps manage diseases.
- Shattering – Seed heads shatter and drop easily if harvest is delayed past maturity. Timely harvest prevents grain losses.
- Insects – Aphids, thrips, armyworms, and wireworms can damage plants and reduce yields if infestations occur. Monitor for pests.
- Frost – Cold tolerant, but early spring frosts can damage young plants. Avoid planting too early before soil has warmed sufficiently.
What are some health benefits of eating oats?
- Lower cholesterol – Soluble fiber helps remove LDL cholesterol from the body.
- Stabilize blood sugar – Slow digestion keeps blood sugar from spiking.
- Reduce blood pressure – Fiber and plant compounds improve heart health.
- Aid digestion – Fiber promotes healthy gut function and regularity.
- Provide lasting energy – Complex carbohydrates provide steady energy.
- Support weight loss – Fiber increases satiety and curbs overeating.
- Reduce inflammation – Avenanthramides have anti-inflammatory effects in the body.
How can I incorporate more oats into my diet?
- Cook oatmeal, overnight oats or muesli for breakfast. Add fruits, nuts or spices.
- Make granola bars, cookies or bread with rolled oats.
- Use oat flour for baking muffins, waffles, pancakes or scones.
- Add steel cut oats to soups for thickness and nutrition.
- Make homemade oat milk for cereal, smoothies or coffee creamer.
- Coat fish or chicken with crushed oats before baking.
- Make oat burgers or meatballs using oats as a binder.
- Use oats as filler in meatloaf or combined with beans in vegetarian patties.
- Add oats to fruit and yogurt parfaits for crunch.
- Sprinkle oats on ice cream, custards or puddings.
Time to Begin Your Journey of Growing Oats at Home
By cultivating oats at home, you can enjoy their stellar nutritional profile in the freshest, purest form possible. With proper planning and care, growing oats can be an extremely rewarding undertaking for gardeners of all skill levels. The journey from seed to harvest brings immense satisfaction along with nourishing, homegrown grains.


