Looking to add vibrant colors and elegance to your garden? Consider iris farming! Irises are relatively easy to grow, come in a stunning array of hues, and provide multiple rewards for backyard gardeners. This comprehensive guide covers everything you need to know about cultivating gorgeous irises, from choosing the best varieties and planting techniques to expert care advice for nurturing abundant blooms. Let’s dive into the vibrant world of iris farming!
Why Grow Irises?
Irises offer numerous benefits that make them a joy to farm:
Gorgeous, Long-Lasting Blooms
- Irises bloom in spring and early summer, ushering in the warmer months with their lively colors
- Flowers last up to two weeks individually, while the collective blooming period stretches over a month
- Reblooming iris varieties flower more than once from early spring to fall
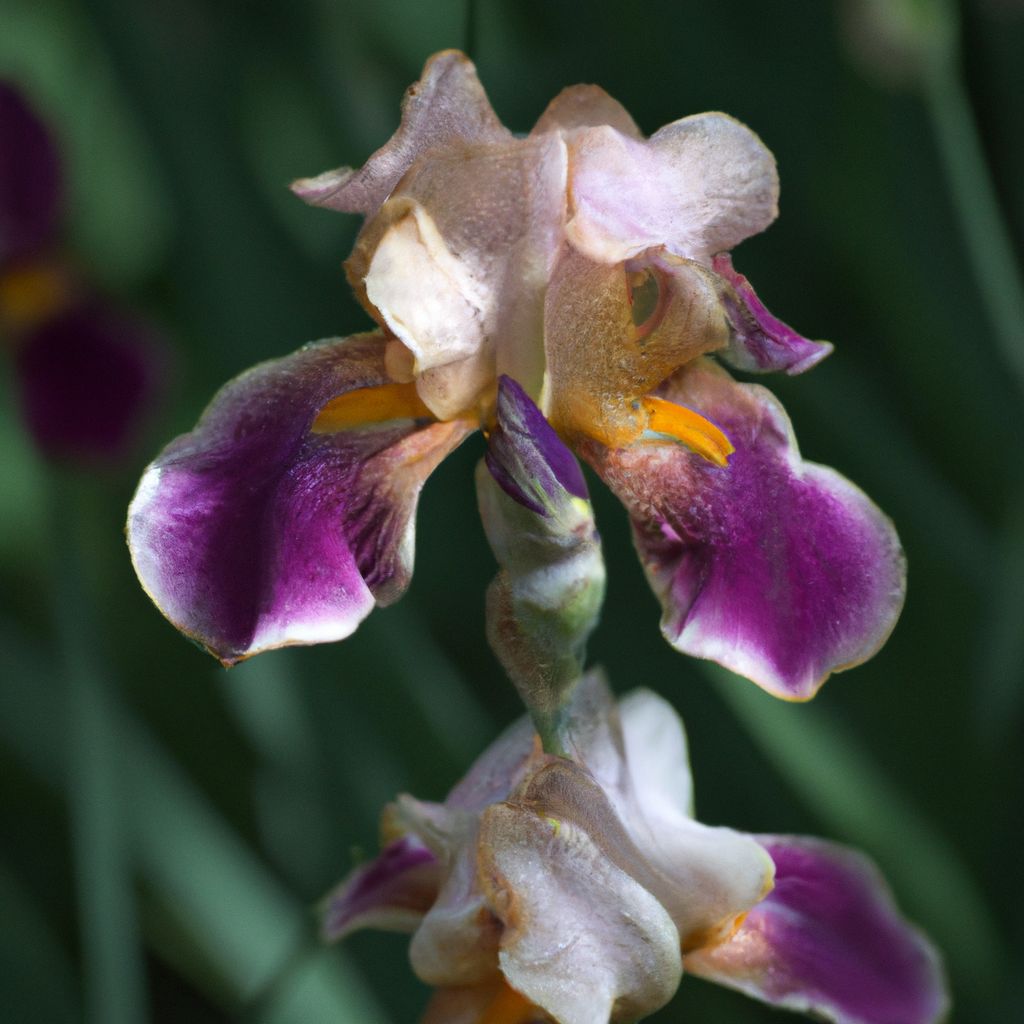
- Striking blooms in shades of purple, yellow, pink, white, blue, burgundy, and multi-colors
Attract Pollinators
- Bees, butterflies, hummingbirds, and other pollinators flock to iris blooms for their sweet nectar
- Watch in delight as vital pollinators animate your landscape
- Promote ecological diversity right in your backyard
Drought-Resistance
- Once established, iris rhizomes and roots are quite drought-tolerant
- Their sword-shaped foliage also adapts well to dry conditions
- Ideal for low-maintenance and xeriscape gardens
Tailor Garden to Your Aesthetic Taste
- Choose from a diverse palette of iris varieties to create your vision
- Complement other garden plants for harmonious designs
- Use iris height variation to add depth and architecture
Sense of Joy and Reward
- Taking part in nature’s beauty elicits childlike wonder and contentment
- Achieve a sense of pride, purpose, and peace from nourishing your plot
Getting Started with Irises
When embarking on iris farming, first consider which varieties suit your site and personal tastes. The time and effort spent properly preparing the soil makes all the difference in successfully establishing your iris patch.
Choosing Iris Varieties
With over 300 diverse iris species, selecting the right iris types comes down to your growing zone, landscape style, bloom season, color preferences, and growing conditions.
Popular iris variety options include:
Bearded Irises
- Feature distinctive fuzzy “beards” on falls (lower petals)
- Encompass several hybrid classes – tall bearded, median, dwarf
- Bloom in late spring / early summer
- Extremely hardy, easy to grow
- Cut flowers, borders, mass planting
- Huge array of colors and patterns
Siberian Irises
- Slender, grassy foliage with delicate, orchid-like flowers
- Shades of blue, purple, pink, white, or bi-colors
- Bloom in early summer
- Withstand cold winters, wet soil
- Naturalize well, good for borders
Japanese Irises
- Produce lush blooms up to 10″ wide in summer
- Ruffled petals in blue, purple, maroon, pink, white
- Prefer consistently moist soil
- Stunning in borders, ponds, and containers
Dutch Irises
- Among first irises to bloom in spring
- Originally cultivated in Holland
- Come in blue, yellow, white, and bi-colors
- Naturalize well in borders and rock gardens
Louisiana Irises
- Native to Southern swamplands
- Highly unique, exotic blooms in striking colors
- Tolerate wet conditions; also do well in drier soil
- Versatile for mixed beds and ponds
Expert tip: Blend iris varieties in stunning color palettes, alternating heights for visual interest. Group early, mid and late season bloomers together to enjoy months of flowers!
Preparing Your Soil
As irises spend years in a permanent spot, properly preparing the soil gives them the best start. Well-draining, nutrient-rich soil with a slightly acidic pH of 6.0-7.0 is ideal.
Here’s how to set the stage for success:
Pick a Sunny Spot
Irises need at least 6 hours of direct sun daily for vigorous growth and abundant blooms.
Boost Drainage
- Loosen soil 12-18 inches deep using a spade fork
- Break up and remove any hard pan or dense layers
- Incorporate organic compost, peat moss, rotted manure to improve moisture retention and nourishment
- Consider raised beds for better drainage
Weed Vigilantly
Eliminate competing weeds that steal water, light and nutrients.
Smooth and Level Surface
Rake bed evenly with a flat topography. Mounded areas promote soil erosion.
pH Test
Test runoff water or soil sample to determine pH. Adjust to slightly acidic zone of 6.0-7.0 by adding elemental sulfur or aluminum sulfate.
Moisten Thoroughly
Water deeply to saturate soil before planting.
With careful prep, you’ll give your irises the enriching, welcoming home they deserve!
Planting Your Iris Rhizomes
timing and technique for planting iris rhizomes impacts how quickly they establish and flower. Here is a foolproof process:
When to Plant Irises
Late summer to early fall is prime iris planting time in most zones. This gives rhizomes a few months to develop robust roots before winter dormancy. Spring planted irises often struggle with summer heat before becoming established.
If fall planting is not feasible, early spring planting can work as well. Shelter tender shoots if late frosts threaten in your area. Those in extremely cold zones can pot rhizomes for winter protection.
How to Plant Iris Rhizomes
- Select Site – Choose a prepared, permanent sunny spot with good drainage and fertile soil.
- Dig Holes – Excavate holes or trenches 4-6 inches deep and 12-18 inches apart. Enrich backfill soil if needed.
- Prep Rhizomes – Trim away rotted or dead material. Shorten leaves by 1/3 to reduce moisture loss.
- Arrange Rhizomes – Place in holes with roots down and tops just at soil surface. Pack soil firmly around rhizome.
- Water Well -Hydrate thoroughly after planting. Aim for 1-2″ of water per week from rain/irrigation.
- Apply Mulch – Surround plants with 2-3 inch organic mulch layer to retain moisture and reduce weeds.
- Monitor Growth – Check for new green shoots. Protect from frost and wind as needed.
Be patient with first year plants. Many will not flower until the following season as energy goes to root development initially. But once established, your irises will flourish magnificently for years to come.
Caring for Your Irises
With proper care and attention, your irises will thank you with vigorous good health and bountiful blooms. Prioritize consistent moisture, timely feeding, pest prevention and occasional division for iris success.
Smart Watering Techniques
Inconsistent moisture is the downfall of many iris plantings. Master these best practices for hydrating your irises perfectly:
- Water Deeply 1x Week – One longer soak encourages deep roots, while frequent shallow watering leads to root rot over time.
- Let Soil Partly Dry Out – Wait for top few inches of soil to dry before soaking again. Tip: Use a moisture meter to check lower levels.
- Water Early Morning – Allow damp foliage to dry out fully to prevent diseases. Night watering promotes fungus and mildew.
- Consider Drip Irrigation – Emitters deliver water slowly and directly to the root zone, avoiding leaf wetness.
- Always Monitor Soil – Clay, sandy, and raised beds have differing needs. Account for climate shifts like heat waves or downpours as well.
- Mulch Mulch Mulch! – Maintain 2-3″ organic mulch buffer to significantly reduce water needs and moderate soil temperature.
A bit of attention ensures your irises get the hydration they crave without danger of overwatering.
Strategic Iris Fertilization
While irises thrive in average soil fertility, boosting nutrients with annual feedings fuels strong roots, vigorous foliage, and thousands of plentiful blooms.
Here’s how to fertilize irises for maximum growth and flowers:
- When to Feed – Apply fertilizer twice yearly – early spring and September. These periodic bursts avoid excessive foliar growth vulnerable to wind damage.
- What to Use – Choose a balanced granular fertilizer with an NPK ratio like 10-10-10 or 5-10-5. Organic options include bone, blood, or fish meal.
- How to Apply – Lightly scratch fertilizer into soil surface around plants at recommended rate, taking care to avoid contact with foliage
- Water It In – Gently soak area after fertilizing to move nutrients into root zone. Avoid runoff.
- Reapply Annually The effects of fertilizer diminish over the year. Set reminders to feed each spring and fall.
With the right regimen of nourishment, your irises will reward you generously!
Keeping Pests and Diseases at Bay
When caring for irises, it’s imperative to safeguard their health through smart integrated pest management and disease prevention. Catch issues early and control problems without harsh chemicals.
Effective Preventative Measures
- Inspect plants frequently for early signs of damage – chewed leaves, spots, unusual growths
- Remove and destroy infected plants or plant parts
- Promote airflow and avoid overcrowding
- Water at the base, keeping moisture off leaves
- Use drip irrigation to isolate each plant’s water needs
- Apply new mulch yearly to prevent fungus habitat
- Sterilize and sharpen tools between plants
- Rotate annual crops in shared beds to disrupt pest life cycles
Non-Toxic Pest Control Options
- Row covers or garden fabric as physical barriers
- Sticky traps for monitoring and reducing populations
- Horticultural soaps or oils to suffocate soft-bodied insects
- Organic Neem oil as an anti-feedant and oviposition deterrent
- Diatomaceous earth to shred exoskeletons of crawling pests
- Predatory beneficial nematodes targeting soil-dwelling grubs
- Blast aphids off foliage with a strong jet of water
Cultural Disease Prevention
- Improve light and airflow circulation
- Promote rapid foliage drying by proper spacing and watering
- Apply potassium supplements to strengthen cell walls
- Introduce beneficial microbes via compost tea to outcompete pathogens
With preventative practices, prompt responses, and zero-waste solutions, you can protect your precious irises naturally.
Dividing and Transplanting Irises
To sustain plant vigor over time, iris rhizomes must be divided and transplanted to less crowded conditions every few years. This revitalizing technique is quite straightforward.
When to Divide Irises
Tackle iris division in mid to late summer after bloom period ends. Early fall works too. Avoid interrupting the spring growth and flowering cycle.
How to Divide and Replant Iris Clumps
- Lift entire iris clump with garden fork, gently shaking off excess soil
- Using two forks back-to-back, split rhizome mass into smaller divisions with ample roots and a fan of leaves
- Examine divisions and trim any rotting sections with a clean knife
- Replant healthy divisions 2 feet apart in freshly prepared soil
- Water thoroughly and monitor new transplants
As older rhizome sections at the clump’s center lose vigor, the younger, exterior rhizomes sustain the plant. By dividing irises every 2-3 years, you encourage revitalized growth and prevent overcrowding. Plus, extras can be gifted or traded!
Enjoying Irises to the Fullest
After investing such dedication into raising irises, be sure to fully soak up the sweet rewards of your efforts! From boosting bloom power and crafting artistic arrangements to sharing knowledge and finding therapeutic peace, irises enrich life exponentially.
Coaxing More Iris Blooms
With attentive care tailored to their needs, your irises will thank you with a dazzling extended floral display:
Sun Exposure – Ensure iris beds receive at least 6 hours of direct hot sun. Morning light is especially valuable.
Soil Preparation – Keep soil loose and enriched with 1-2″ compost or aged manure worked 12″ deep to encourage excellent drainage and moisture retention.
Ideal Planting Depth – Set rhizomes just at or slightly below soil surface when planting, covering with 2-3″ of earth. Burying too deeply stunts growth.
Consistent Moisture – Water irises 1″ per week from rain or irrigation during growing season. Drought drastically reduces blooms.
Strategic Fertilization – Feed irises in early spring and September with balanced granular fertilizer to fuel growth all season.
Deadheading for Rebloom – Snip off faded blooms down to the nearest leaf node. This redirects energy into new buds instead of seed production. Chop flower stalks back after all blooms finish.
With attentive soil, moisture, and nutrition management, your happy irises will produce a spectacular floral display!
Creating Stunning Iris Displays
To highlight iris beauty indoors, follow these simple tips for crafting show-stopping bouquets and arrangements:
Gather Gorgeous Blooms – Select long, sturdy stems with at least 2-3 unopened buds, cutting in early morning when turgid. Choose a vibrant color palette.
Use Clean Containers – Arrange in vases with fresh water and floral preservative. Replace water every 2 days.
Trim Stems – Cut each stem on a sharp diagonal with a knife just before placing in water. Remove lower leaves that would sit below water line.
Play With Color and Height – Complement iris colors with other flowers like peonies or poppies. Vary stem lengths for added dimension.
Consider Foliage Accents – Iris leaves die quickly after cutting, so enhance your bouquet with lush greens like fern fronds or hosta shoots.
Embellish With Contrast – Try combining smooth iris petals with fluffy flowers or spiky stems for an unexpected look.
Display in Cool Spot – Avoid window sills or heat sources that accelerate wilting. Enjoy arrangements for 7-10 glorious days!
Grace your home with joyous works of floral art featuring the best of your iris harvest!
Spreading the Love: Sharing Iris Passion
Once obsessed with irises yourself, take every chance to share the iris love through education, gifts, and leading by example:
Answer Iris Questions in Public Garden Forums
Share wisdom and experiences with fellow gardening enthusiasts online
Host Iris-Themed Garden Tours
Show off your iris patch while teaching visitors best practices
Lead Hands-on Iris Gardening Workshops
Demonstrate planting, dividing, designing, etc in community classes
Contribute Iris Articles or Blogs
Publish your tips and adventures to help other growers succeed
Produce How-To Iris Care Videos
Bring your advice to life visually for in-depth learning
Gift Iris Divisions to Budding Enthusiasts
Spread cheer through sharing thriving rhizomes from your bounty
Trade Iris Varieties With Other Growers
Exchange cultivars to discover new blossom forms and colors
As your passion plants take root in neighbors’ yards, you’ll feel profound satisfaction seeing your influence blossom across the community.
Finding Peace and Purpose Through Iris Farming
More than just supplying floral beauty to a garden, raising irises also nourishes the soul. The meaningful routine brings stress relief, creative outlet, connection with nature and a sense of purpose and pride.
Stress Relief Through Gardening Therapy
- Taking in fresh air, sunlight and birdsong lifts the spirit
- Physical activity releases feel-good endorphins
- Slowing down to nurture living things invites mindfulness
- Seeing daily progress by your efforts restores mental focus
Creative Expression Through Design
- Blend favorite iris varieties in a signature color palette
- Invent exciting plant combinations that suit your unique vision
- Craft dazzling vase arrangements for indoor enjoyment
Reverence For Nature’s Wonders
- Marvel at the mysterious underground root transformations into glorious flowers
- Appreciate the timely, fleeting beauty of each individual blossom
- Gain perspective from nature’s cycle of dormancy and rebirth
Sense of Purpose and Achievement
- Make a commitment to stewarding something larger than yourself
- Experience satisfaction witnessing your daily nurturing translate into magnificent blooms
- Take quiet pride in successes through the years – overwintering tender new rhizomes, winning a blue ribbon in the annual iris show, seeing your homegrown bouquets elicit joy
By pouring care into your enchanting iris oasis, you receive profound spiritual nourishment in return.
Key Iris Care FAQs
What are the best iris varieties for different garden conditions?
Sunny Beds – Tall bearded, median bearded, Siberian, Japanese, Dutch
Part Sun – Japanese, Siberian, roof, dwarf bearded
Shade – Reticulatas, Japanese roof, crested
Bog Gardens & Ponds – Louisiana, Japanese, blue flag
Naturalizing & Groundcovers – Reticulatas, Siberian
Borders & Rock Gardens – Dwarf bearded, crested, Reticulatas
Containers – Reticulatas, dwarf bearded
How should I amend heavy clay soil for planting irises?
- Loosen soil to 18 inches depth
- Mix in 50% amendment materials like compost, coir or gritty sand
Here are some more tips for amending heavy clay soil for planting irises:
- Incorporate organic matter such as compost, rotted manure, leaf mold, or peat moss, which will improve drainage and moisture retention
- Add gypsum, which will help break up compacted clay and allow better root penetration
- Mix in pumice, perlite, or small gravel, which helps improve soil structure and aerates the soil
- Consider creating raised garden beds and filling them with high quality planting mix if in-ground amendments don’t sufficiently improve the bed
- Test drainage by digging a hole 12″ deep, filling with water, and observing if it drains fully overnight
- Adjust pH into ideal slightly acidic range of 6.0-7.0
- Grow cover crops like legumes which add organic material to the soil as they grow
The key is loosening up heavy clay and incorporating plenty of organic materials to the soil to achieve the crumbly, nutrient-rich, and well-drained composition that irises love.
What causes iris leaves to turn yellow and brown?
There are a few potential causes of iris leaves turning yellow or brown:
- Insufficient soil moisture from drought or intense summer heat
- Poor soil drainage leading to root rot
- Nutrient deficiencies – often low nitrogen
- Sun scorch on exposed leaves
- Thrips insects feeding on leaves
- Bacterial or fungal leaf spot diseases
- Salt buildup from heavy fertilization or overwatering
Boosting water, mulching, monitoring soil pH and nutrients, increasing sunlight exposure, and practicing crop rotation to minimize pests and diseases can all help prevent problematic foliage.
How often should iris rhizomes be divided?
Ideally, iris rhizomes should be divided every 3-5 years. Signs that division is needed include:
- Blooms are smaller and fewer
- Leaves seem overly crowded and cramped
- You notice dieback in the center of foliage clumps
- Overall vigor seems to be declining
Dividing and replanting in new soil allows the rhizomes room to expand and rejuvenates growth. It also helps control iris borer infestations. While annually dividing irises can boost propagation, it may gradually deplete the parent plant over time.
Can I grow irises successfully in pots and containers?
Yes! Many compact iris varieties thrive grown in containers. Here are some tips:
- Choose a pot at least 12-16 inches wide and deep
- Use free-draining planting mix, not garden soil
- Ensure pot has drainage holes at bottom
- Site pot where it receives at least 4 hours direct sun daily
- Water when top inch becomes dry; a moisture meter helps monitor needs
- Feed monthly with balanced liquid fertilizer during growing season
- Repot annually in fresh mix; divide crowded rhizomes every 2-3 years
Enjoy a movable feast of colorful blooms grown in pots perfectly suited to small spaces!


