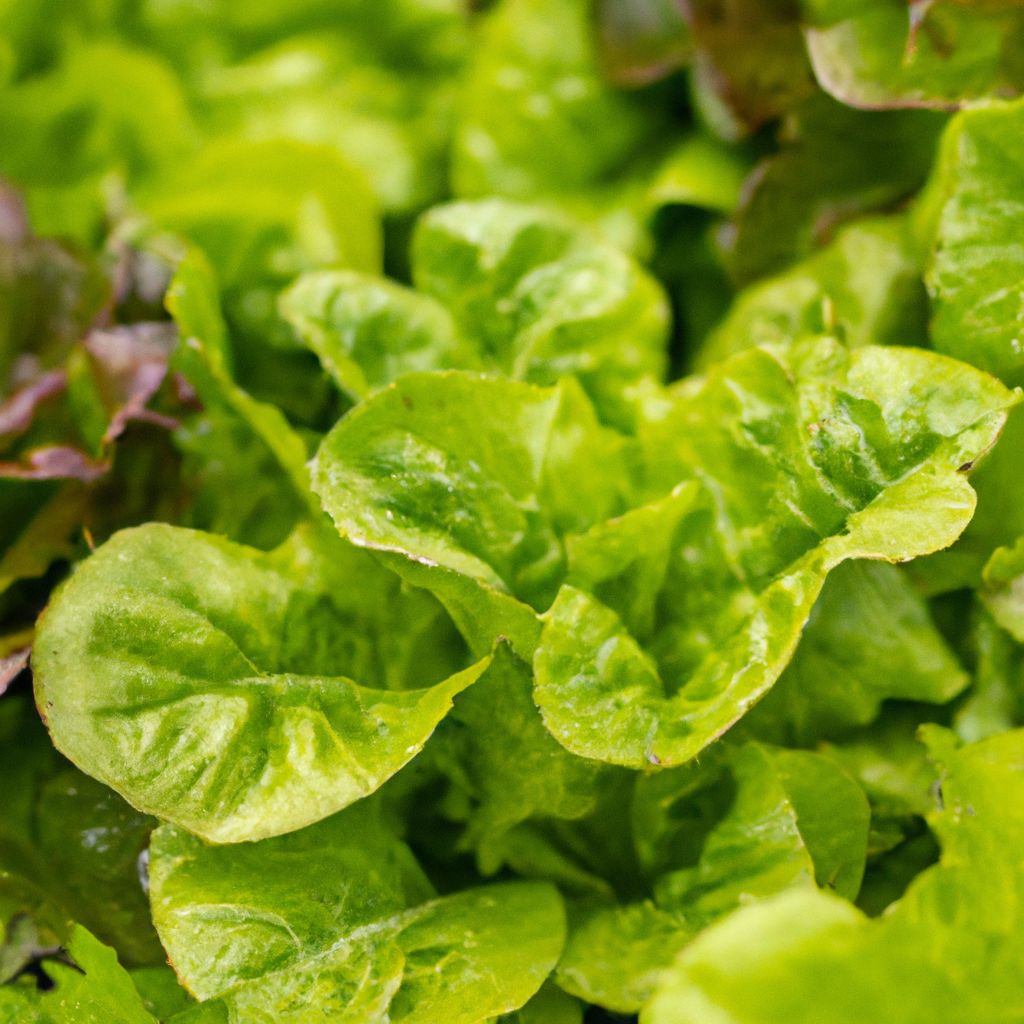
Lettuce is a cool weather crop that thrives when grown in raised garden beds. The improved drainage and soil quality that raised beds provide create an ideal environment for growing crisp, tender lettuce. This comprehensive guide will walk you through everything you need to know to grow lush lettuce in a raised bed garden.
Why Choose a Raised Bed for Growing Lettuce
Raised garden beds provide several key advantages that make them ideal for growing lettuce:
- Better drainage – The loose, friable soil mix in a raised bed improves drainage. This prevents soggy soil conditions that can lead to fungal diseases and root rot in lettuce plants.
- Loose, nutrient-rich soil – Raised beds allow you to create the ideal soil environment for lettuce. You can incorporate rich compost and fertilizers to encourage vigorous growth.
- Easier access – Since raised beds sit higher than ground level, they reduce the need for bending and kneeling to tend the lettuce plants.
- Increased temperature control – The soil in a raised bed warms up earlier in spring, allowing for an early start on growing lettuce. Beds also offer some frost protection in fall.
- Higher yields in small spaces – Raised beds allow for intensive planting of lettuce since the loose soil encourages abundant growth. This makes them very productive, even in a small backyard garden.
Research has shown that growing vegetables in a raised bed can increase yields by up to four times compared to traditional garden rows. So if you want to maximize the productivity of your lettuce patch, raised garden beds are definitely the way to go!
Tips for Preparing Raised Beds for Lettuce
When preparing a raised bed for planting lettuce, consider the following best practices:
Choosing the Right Location
Select a site that receives full sun – at least six hours per day. Lettuce prefers cooler temperatures. Avoid hot, dry areas that receive reflected heat from walls or pavement.
Ensure the bed is convenient to access and positioned close to a water source. Easy access encourages regular care and attention.
Building the Raised Bed Frame
A raised bed should be at least 6 inches deep, but 12-18 inches is ideal. This provides ample root zone for plants to establish.
Use rot-resistant wood like cedar or redwood for the sides of the frame. Pine wood will also suffice but may need replacing sooner.
For an easy-to-assemble option, purchase a pre-fabricated raised bed kit made of wood, plastic composite, or galvanized steel.
Include boards across one end of the frame to create a built-in seat for gardening comfort!

Filling the Bed with Rich Soil
Use a quality potting mix blended with compost and organic fertilizer that has optimal drainage and moisture retention.
Or create your own soil blend. An ideal recipe is equal parts peat moss or coco coir, compost, perlite or vermiculite, and native topsoil. Mix thoroughly before adding to the bed.
Install landscape fabric along the bottom of the bed frame before adding soil. This prevents weeds from below invading the bed.
Incorporating Organic Amendments
Work 2-4 inches of aged compost, well-rotted manure, leaf mold or grass clippings into the top 6 inches of soil to bolster nutrients and organic matter.
Sprinkle a complete organic fertilizer over the bed and mix in according to package directions before planting. Organic fertilizers release nutrients more slowly.
Top dress beds with fresh compost or worm castings 2-3 times each season to continually replenish nutrients used by growing lettuce plants.

Selecting the Best Lettuce Varieties
When choosing lettuce cultivars, consider the following criteria:
Growing Conditions
Match lettuce varieties to your local climate and raised bed growing environment:
- Looseleaf and oakleaf types tolerate summer heat and resist bolting.
- Butterhead and romaine prefer cooler weather and may bolt prematurely in heat.
- Red lettuces are slower growing. Choose these for fall crops in shorter season areas.
- Mini head lettuces work well for interplanting in small beds.
Time to Maturity
Lettuce varieties differ widely in days to maturity, from as little as 30 days for baby greens up to 80 days for full size heads.
Stagger planting dates to ensure a consistent lettuce harvest. Replant every 2-3 weeks with quick growing varieties.
For a continuous cutting lettuce crop, choose looseleaf types that can be harvested leaf by leaf over an extended harvest window.
Pest and Disease Resistance
Seek out lettuce cultivars that carry resistance to common diseases like downy mildew, anthracnose and aster yellows to avoid crop failures.
Lettuce mosaic virus resistance ensures healthy growth. Leaf miner resistance prevents unwanted holes and tunnels through leaves.
Unique Traits
Lettuce comes in a rainbow of colors, leaf shapes and textures. Try different varieties to add interest and flavor to salads.
Ruffled green and red-tinged lettuces provide unique, ornamental qualities in addition to edibility.
Mini heads work well in patio containers. Super crisp varieties stay fresh longer stored after harvest.

Planting Lettuce in a Raised Bed
Starting Lettuce from Seed
The easiest method for most home gardeners is to directly sow lettuce seed into the raised bed. Lettuce germinates best in cooler soil, making early spring and late summer ideal times to plant. Follow these steps:
- Prepare soil by mixing in 1-2 inches of compost and raking smooth. Remove any rocks or debris.
- Refer to seed packet for correct planting depth and spacing for the variety. As a rule of thumb, plant seeds 1⁄4 inch deep and 12 inches apart.
- Sow seeds directly in rows or a grid pattern, marking rows with plant labels for easy identification later.
- Water gently with a fine spray nozzle after planting. Keep soil consistently moist until seeds germinate in 7-14 days.
- Cover beds with floating row cover fabric to retain moisture and protect from heavy rain or birds. Remove when sprouts appear.
- Thin overcrowded seedlings to proper spacing once they reach 2-3 inches tall. Enjoy thinnings in salads!
Transplanting Lettuce Starts
For a quicker harvest, some gardeners opt to start lettuce transplants indoors under grow lights 6-8 weeks before the last expected frost date. Before transplanting outdoors, harden off starts by setting them outdoors in filtered light for a week while monitoring for frost. Transplant on a calm, cloudy day and water transplants immediately with fish emulsion or compost tea to help them establish more quickly. Space transplants 12 inches apart in rows or offset grid pattern.
Caring for Lettuce to Maturity
Lettuce grows best under consistent and diligent care. Implement these raised bed care practices:
Providing Adequate Water
Lettuce has shallow roots and needs frequent irrigation. Supply 1-2 inches of water per week from rain or manual watering.
As midday heat intensifies, switch to daily light watering to maintain soil moisture. Schedule watering for early mornings.
Invest in drip irrigation or soaker hoses to target water directly to the soil around plants. Avoid overhead sprinklers that can spread foliar disease.
Check soil moisture before watering. Dig down 1-2 inches with finger. If soil is dry, it’s time to irrigate.
Reduce watering once cooler weather returns in fall to avoid rotting.
Applying Organic Mulch
Spread 2-3 inches of shredded leaves, straw or grass clippings around lettuce plants as organic mulch to conserve moisture and block weeds.
Replenish mulch anytime bare spots appear. Pull back mulch from direct contact with plant crowns to prevent rot.
At end of season, till spent mulch remains into soil to boost organic matter for next year’s crop.
Side-dressing Fertilizer
Boost vegetable growth midseason by sprinkling all-purpose organic vegetable fertilizer alongside rows. Follow package rates.
Alternatively, prepare compost tea or fish emulsion according to directions and apply around plants every 2-3 weeks.
If lower leaves turn pale yellow with green veins, plants need more nitrogen. Top dress immediately with blood meal or alfalfa meal.
Installing Supports and Trellises
Add bamboo stakes next to lettuce plants. Tie soft plant ties or fabric strips loosely around stems for support as heads become heavy.
Or install wire mesh fencing inside the bed perimeter to allow plants to grow vertically against it.
Controlling Pests and Disease
Check under leaves for slugs, snails and aphids. Remove by hand or use organic baits. Avoid chemical pesticides.
Yellow sticky traps help control lettuce pests. Position near plants and check/replace traps weekly.
At first sight of fungal issues like mildew, remove and destroy affected plants immediately. Do not compost diseased plants.
Preventive measures like drip irrigation, raised beds, crop rotation and adequate garden sanitation are key to avoiding disease issues. Scout beds daily.
Extending the Harvest Window
Interplant heat tolerant lettuces among cool season plants to stretch the harvest into warmer months.
Cover beds with shade cloth tents to reduce temperatures for lettuce during summer heat. Roll up sides during cooler times.
For fall harvests, switch to appropriate lettuce varieties 8-10 weeks before the average first frost date for your area.
Place floating row cover over beds in late fall to protect plants from light frost. Remove during day.
Harvesting and Storing Homegrown Lettuce
Learning when and how to harvest lettuce can mean the difference between tender, delicious greens and bitter leaves gone by. Follow these best practices for raised bed lettuce harvest and storage:
Identifying Peak Harvest Time
- Leaf lettuce – Harvest outer leaves any time after reaching 4-6 inches tall. Center leaves will continue producing.
- Butterhead – Harvest entire head when outer leaves feel tightly packed around a firm center.
- Romaine – Allow to mature to 8-10 inches tall and check for tightness before harvesting.
Timely harvesting is key! Hot weather causes lettuce to bolt and turn bitter. Check variety days to maturity and watch for bolting indicators.
Morning Harvesting
For best flavor and texture, harvest in early morning after dew dries but before daytime heat sets in.
Leaves store water during the night which keeps them hydrated and crisp for harvesting. Warm afternoon sun causes moisture loss.
Proper Cutting Method
Use a sharp knife or garden shears for clean cuts. Slice leaf and head lettuce 1 inch above soil line.
Carefully place harvested lettuce into a basket, bowl or clean sink avoiding bruising delicate leaves.
For looseleaf types, selectively harvest only outer mature leaves as needed and allow center to continue producing more leaves.
Post Harvest Care
Immediately after harvest, plunge lettuce into a basin of cool water to revive tissues and maintain moisture content. Gently dry leaves with a clean towel before storing. Don’t leave wet lettuce sitting out!
For romaine and butterhead varieties, peel off damaged outer leaves if necessary but leave the base intact.
Proper Storage Conditions
All harvested lettuce should be stored promptly in refrigeration. Place leaves or heads loosely in resealable plastic bags or containers. Do not wash lettuce until just before eating!
For best quality, use lettuce within 5-7 days. Butterhead and romaine last up to two weeks refrigerated. Discard any slimy leaves or vegetables past prime.
Troubleshooting Common Lettuce Problems
While raised garden beds offer many advantages for growing robust lettuce, you may still encounter an occasional challenge. Identify the issue early and attempt organic solutions first before considering chemical interventions:
Preventing Bitter, Bolting Lettuce
If lettuce develops elongated seed stems and bitterness before reaching maturity, it is “bolting” triggered by weather, poor growing conditions or variety. To prevent:
- Choose bolt resistant cultivars
- Plant at optimal times for your climate
- Provide shade covers during heat spikes
- Keep soil evenly moist and mulch plants
Correcting Poor Germination Issues
Erratic or poor seed germination usually results from improper planting techniques:
- Sow fresh seed at correct depth and spacing
- Ensure consistent soil moisture, but avoid waterlogged soil
- Cover seeded beds with fabric row covers to retain heat and moisture
- Gently tamp seeds into soil before watering for good seed-to-soil contact
Stopping Slugs and Snails
Prevent slug and snail destruction by handpicking nightly and installing copper barriers around plot edges. Attract beneficial toads or ducks!
Battling Fungal and Bacterial Disease
Minimize disease issues by improving garden sanitation and adopting preventative care like drip irrigation. Identify diseases early and remove entire infected plants promptly. Never compost diseased plant material.
Eliminating Nutrient Deficiencies
Yellow or stunted plants often indicate nitrogen deficiency. Ensure adequate, balanced fertilization and routinely side dress plants with nitrogen-rich amendments as needed per variety.
Avoiding Lettuce Wilting
Lettuce plants often wilt on hot days but recover by evening. Schedule irrigation for early mornings before wilting occurs. Add shade structures if afternoon sun is unrelenting and causing permanent wilting damage.
While lettuce prefers cooler temperatures, concerned gardeners can implement simple solutions like supplemental water, shade structures and appropriate variety selection to grow healthy, thriving lettuce well into summer from the comfort of raised garden beds!
With astute preventative care and prompt troubleshooting as needed, a raised bed lettuce garden is sure to reward you with abundant harvests of homegrown, salad-ready greens. Experiment with different lettuce varieties, succession planting schedules and interplanting with companion vegetables and flowers. Before you know it, you’ll have more lettuce than you can eat – which makes for happy neighbors when you share the bounty!


