Lilies are a beloved flower known for their vibrant colors, sweet fragrances, and versatility in the garden. This comprehensive guide covers all aspects of lily care for home gardeners, from variety selection to planting, watering, fertilization, and overwintering. Follow these tips to grow healthy, thriving lilies that will enhance your landscape with beauty and fragrance for years to come.
Choosing the Right Lily Varieties
When selecting lily varieties, first consider your growing zone to choose types suitable for your regional climate.
Types of Lilies
There are several major categories of lilies to choose from:
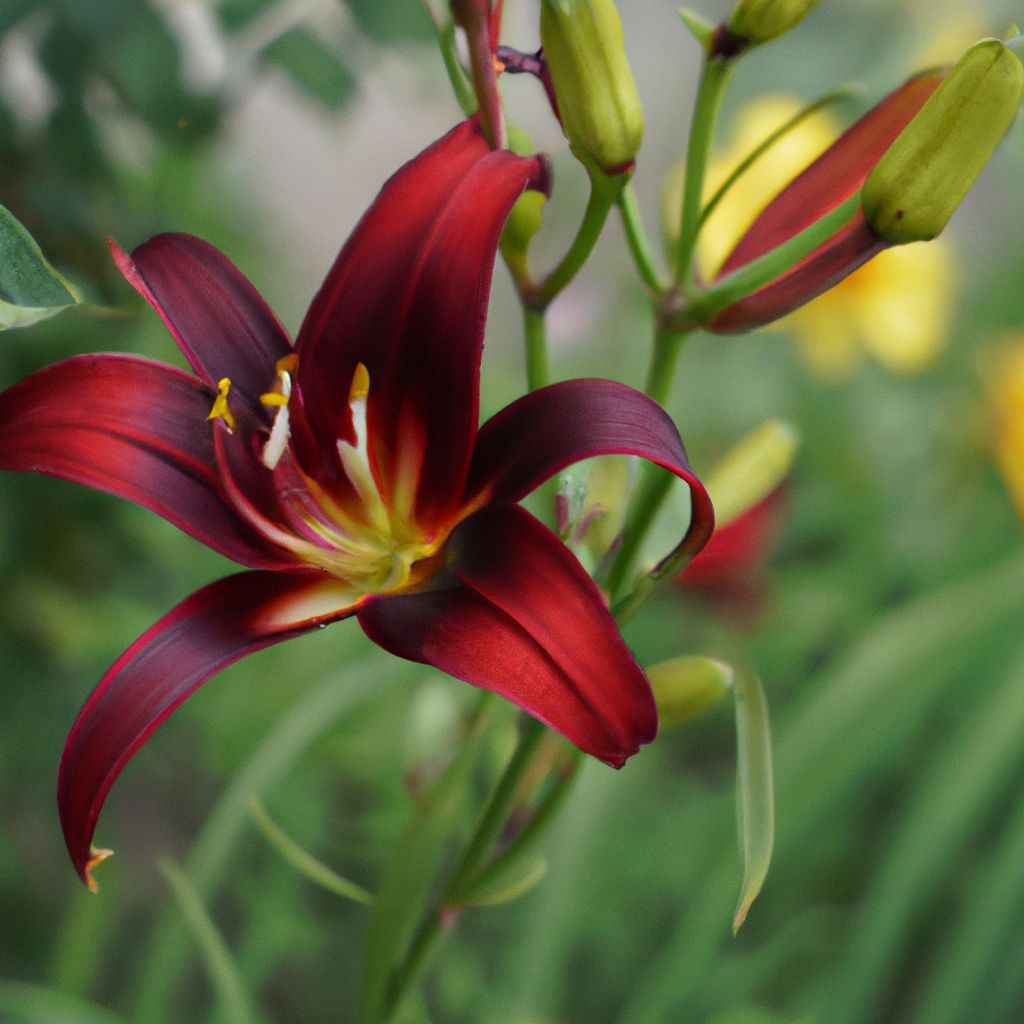
- Asiatic Hybrids: One of the most popular and hardy lily varieties, Asiatic hybrids bloom early in the season and feature brightly colored blooms in shades of red, orange, yellow, white, and pink. They grow 1-4 feet tall and do well in pots and borders. Good beginner choices.
- Oriental Lilies: Known for their intensely fragrant, giant blooms in white, pink, and magenta, Oriental lilies can grow 4-6 feet tall. They bloom mid to late summer and require staking.
- LA Hybrids: This versatile cross between Asiatic and Oriental lilies combines hardiness, early blooms, fragrance, and a wider color palette. Great for cutting gardens.
- Trumpet Lilies: Summer-blooming trumpet lilies produce giant, trumpet-shaped flowers in bold colors like gold, red, and orange on sturdy 4-6 foot stems.
- Tiger Lilies: Hardy, easy to grow tiger lilies bear deep orange flowers heavily speckled with black spots in mid to late summer. They spread rapidly by underground stems.
- Tree Lilies: Reaching heights up to 7 feet, tree lilies bear upward and outward facing flowers in a range of summer colors. Require staking.
Factors to Consider
When selecting lily varieties for your garden, consider these factors:
- Hardiness Zone: Choose lily types suitable for your zone to ensure winter survival. Check tags or plant descriptions.
- Sun Exposure: Most lilies need full sun (at least 6 hours of direct sunlight daily) and well-drained soil.
- Soil & Site Conditions: Check that your soil type and garden conditions match a variety’s preferences.
- Time of Bloom: For continuous color, plant early, mid, and late season bloomers.
- Height & Width: Consider the mature size of varieties to determine best placements and support needs.
- Fragrance: Scented Oriental hybrids perfume the garden. Non-fragrant types allow for versatility.
- Color: Lilies come in almost every color but blue and range from solid tones to exotic bi-colors.
- Special Features: Unique lily attributes like ruffled petals, double blooms, upward facing flowers, speckles, etc.
Good beginner variety choices include Asiatic hybrids like ‘Cancún’, ‘Fortuna’, and ‘Salmon Classic’ for their vigor and bright colors as well as Lilium tigrinum, the hardy and prolific tiger lily. Once you have some experience growing lilies, try venturing into Orientals and tree lilies to explore new fragrances, shapes, and heights.
Preparing the Soil
Lilies thrive in loose, nutrient-rich, and well-drained soil. When preparing a new lily bed or planting area, focus on improving these three factors:
Drainage & Soil Structure
As bulbs, lilies are prone to rot and their roots need space and air to breath. Start by digging down 12-18 inches and loosening the soil using a fork or garden tiller. Break up any compacted layers and remove rocks or debris. Next, work in organic compost, peat moss, leaf mold or rotted manure at about a 3:1 ratio of your native soil to amendments. The ideal finished soil texture you’re aiming for is loose, crumbly, and rich in organic matter.
You can further enhance drainage by:
- Mixing in pumice, perlite, or horticultural sand
- Creating raised planting beds
- Planting lilies on slopes rather than flat ground
Avoid overly heavy clay soils or areas that collect standing water.
Soil Nutrients
While lilies aren’t too fussy, they perform best in soil with good nutrient levels. Have your soil analyzed to pinpoint any deficiencies. In most cases, working plenty of compost or well-rotted manure into the beds provides sufficient nutrients. Standard synthetic fertilizers can be used as well.
Target nutrient levels to reach in lily beds:
- Nitrogen – 75 to 100 lbs per acre
- Phosphorus – 150 lbs per acre
- Potassium – 160 to 200 lbs per acre
Organic options like bone, blood, or fish meal also supply key nutrients.
Soil pH
Test your planting area’s pH using an at-home soil test kit. Lilies prefer a slightly acidic soil pH between 6.0 – 6.8. If your soil is too acidic, add dolomitic lime several weeks before planting. For alkaline soils, mixing in elemental sulfur lowers pH levels.
Planting Lilies
Lily bulbs are typically planted in either spring or fall. Follow this straightforward planting process for success:
When to Plant Lilies
Spring: Plant lilies about 4-6 weeks before the last expected frost once soil temperatures warm to 60°F. Spring planting allows roots to develop through summer before winter dormancy.
Fall: Plant lilies 6-8 weeks before first frost so they can begin root growth. Protect new plantings with a thick mulch layer if needed.
How to Plant Lily Bulbs
- Select a site with full sun to partial shade and amended soil with good drainage.
- Dig holes or trenches 12-15 inches deep and wide enough to fit bulbs without crowding. Space bulbs 6-12 inches apart depending on mature plant width.
- Set bulbs in holes with pointed tips facing up. Cover to a depth of 1 inch above the tops of bulbs.
- Backfill holes gently with native soil and organic matter blended 50/50. Tamp down lightly and water thoroughly after planting.
- Consider mixing in a balanced bulb fertilizer or bone meal in planting holes to give lilies an added nutrient boost.
- Add 2-4 inches of mulch around newly planted bulbs to conserve moisture and discourage weeds.
Ongoing Lily Care
- Water newly planted lilies during dry periods until well established (typically through one growing season).
- Remove faded flowers but leave stems and leaves intact until they naturally yellow in fall.
- Apply an organic bulb fertilizer after bloom period ends to nourish bulbs for next year.
- Allow foliage to die back completely after first fall frost before cutting it down to soil level.
Watering Lilies
Consistent moisture is key throughout the seasons of active lily growth and flowering:
Spring & Summer
Lilies access much of the water they need in spring and summer via their fleshy bulbs and roots. However, supplemental irrigation is still required in most climates, especially during periodic dry spells.
How Often: When top 1-2 inches of soil become dry, it’s time to water. This can mean watering 1-3 times per week depending on climate, soil type, and plant maturity. More frequently in very hot weather.
How Much: Apply approximately 1-1.5 inches of water per week either through rainfall or manual watering. Use drip irrigation or soaker hoses to slowly deliver water to soil level.
Watering Tips:
- Avoid excessive moisture on lily foliage, which can encourage disease
- Water early in the day so leaves dry quickly
- Use mulch to help retain soil moisture
Fall & Winter
After lilies finish flowering in late summer or early fall, allow soil moisture to gradually decline through late fall. When winter rains arrive, the dormant bulbs can absorb moisture again as needed to sustain themselves through winter dormancy until spring growth starts again.
Fertilizing Lilies
Targeted feeding keeps lilies thriving year after year:
What Type of Fertilizer to Use
Choose a fertilizer labeled specifically for bulbs or flowering plants rather than a general purpose or vegetation formula. Ideal NPK ratios to look for are:
- 5-10-5
- 10-10-10
- 15-30-15
You can use either a traditional synthetic fertilizer or organic options:
Synthetic: Balanced granular mixes with an even distribution of nitrogen (N), phosphorus (P), and potassium (K) as well as secondary nutrients and trace elements. Avoid weed and feed types.
Organic: Derived from plant and animal materials. May be slower to release but offer a gentler efficacy for root zones. Excellent options include bone, blood, fish, and seaweed meal, mushroom compost, etc.
When and How Often to Fertilize
Spring: Apply bulb fertilizer shortly after the first sprouts emerge from soil in early spring. This fuels root development and fuels the plant for the blooming season ahead.
After Flowering: Once the last lily flowers fade in summer, fertilize plants again with a bloom-boosting or bulb food. This nourishes the plant to store energy in the bulb all winter long. Stop feeding 6 weeks before expected first fall frost.
Frequency: Fertilize established plantings every 4-6 weeks from early spring through midsummer. First year bulbs should be fertilized very sparingly until well rooted.
Application Method & Amounts
Follow product labels for exact application rates as excessive fertilizer can damage bulbs.
Granular: Scatter dry pelleted fertilizer evenly around the base of plants, keeping it several inches away from bulb tips and stems. Water in well after applying.
Liquid: Dilute solutions more intensely than granular products and apply directly to soil around plants. Don’t allow contact with foliage.
Slow Release: These fertilizers gradually provide nutrition over an extended timeframe, limiting potential burn risk. Mix pods into soil near roots.
Foliar Sprays: Only apply liquid fertilizer formulas labeled for foliar feeding by misting plant leaves. Useful for micronutrients.
Organic: Work dry amendments like bone meal into beds before planting. Compost and manure tea can also be poured around plants.
Preventing Fertilizer Burn
To avoid over-fertilization damage:
- Carefully follow label rates based on plant age and size
- Keep granules from touching bulbs or stems
- Water deeply after applying to dissolve and disperse
- Wash off any foliar sprays contacting leaves
Controlling Pests & Diseases
Lilies have relatively few serious pest and disease problems but can be impacted by:
Most Common Lily Afflictions
Pests:
- Beetles – Feed on leaf tissue, petals, pollen
- Thrips – Cause spots, discoloration & deformities
- Aphids – Distort foliage & transmit infections
- Caterpillars – Skeletonize leaves & flower buds
Diseases:
- Botrytis Blight – Produces brown legions & decay
- Viruses – Cause color breaking & distort growth
- Root & Basal Rot – Decay bulbs from excess moisture
- Fungal Leaf Spots – Circular lesions on foliage
Cultural & Organic Prevention
Sanitation: Remove dropped leaves, stems and flower debris which can harbor pests and diseases over winter.
Air Circulation: Allow adequate space between plants for air to flow, keeping foliage dry.
Crop Rotation: Move lily bed locations every 2-3 years to prevent pathogen levels building up in soil.
Beneficial Insects: Release or attract predatory insects like ladybugs, lacewings, preying mantises, etc to feed on eggs and larvae.
Organic Sprays: Fungicides containing Bacillus subtilis or neem oil deter common problems. Insecticidal soap and horticultural oils control many chewing and sucking insects when applied directly to infested plants.
Resistant Varieties: Choose modern, hybrid lilies which have better genetic pest and disease resilience bred in.
Conventional Pesticides
When cultural methods fail to prevent major attacks, chemical control options include:
Insecticides: Carbaryl, permethrin, malathion, bifenthrin, cyfluthrin
Fungicides: Chlorothalonil, myclobutanil, triforine, maneb
Use minimal applications only when absolutely necessary during bloom stage or heavy infestations. Follow label precautions carefully for handler safety and optimal timing.
Supporting Growth
Lilies can grow quite tall and many varieties benefit from some type of staking for support:
Staking Basics
When: Install stakes when plants reach 1-1.5 feet tall or at time of planting if spacing is tight.
Stake Types: 5-7 foot bamboo, metal, or wood stakes work well. Use green plant supports for discreet staking.
How To Stake: Position 1-2 stakes around perimeter of each plant grouping and gently ease them 6+ inches into soil without damaging bulb roots or stems.
Securing: Use soft ties made of twist ties, stretches, or fabric strips to loosely secure main stems to stakes as they grow. Avoid tight binding.
Checking: Monitor supports over the growing season and adjust ties or add stakes as stems lengthen and gain weight.
Support Options
Cages: Install wire cages over smaller, floppy varieties to hold stems erect.
Frames: Create grid frames of crisscrossed bamboo or wire to support multiple heavy plants at once.
Hoops & Rings: Flexible hoops anchored into soil can sustain and guide falling mid-height varieties.
Trellis: Train certain lilies with flexible stems to climb heavy duty small trellis panels and nets. Favorites include martagon and filifolium lilies.
Proper staking prevents damage to emerging flower buds and results in better displays with more even, upright distribution facing out from centers for maximum visibility.
Pruning & Deadheading
Conscientious pruning and deadheading keeps lilies flowering longer and healthier:
Pruning Lily Plants
Pruning maintenance involves:
- Removing old foliage and stems that yellow after the blooming period ends, known as “senescing”. Simply use clean pruners or scissors to snip dying leaves near their base.
- Cutting back full plants once they go dormant after fall frosts. Trim stems down to around 4-6 inches from soil level once all top growth blackens from cold.
- Thinning crowded clumps every few years after flowering ends. Replant healthy bulblets.
- Eliminating lily beetles, aphids and flower buds infested with pests or disease. Don’t compost debris with active infestations.
Deadheading Spent Lily Blooms
Deadheading is the process of selectively pinching offaging flowers from plants after their beauty fades to:
- Prevent seed head formation which redirects the plant’s energy from maturing seeds back into bulb growth and fueling the production of more flowers.
- Keep plants looking tidy by removing unsightly shriveled blooms. Simply pinch or snip off each spent flower just above its junction with the main stalk.
- Potentially force reblooming later in season with some remontant varieties under ideal conditions. This is most pronounced in Oriental lilies.
Time deadheading carefully according to variety. Many taller lilies only bloom once on each stem even if deadheaded. Continual deadheading can weaken plants blooming in mid to late summer by eliminating food storage reserves they need for overwintering processes. Stop removing spent flowers approximately 6 weeks before your average first fall frost date.
Overwintering Lilies
Caring for dormant lily bulbs planted in the ground over winter involves:
Site Selection
- Choose a spot with soil that drains well before the ground freezes to prevent bulb rots
- Position dormant, winterized bulbs away from areas like gutter downspouts where ice sheets may form and cause frost heaving damage
Winterizing Steps
Follow these simple steps in fall to overwinter hardy lily bulbs:
- Allow all foliage to die back completely after frosts blacken stems and leaves. Avoid prematurely cutting leaves.
- Stop watering plants once they go dormant. Dry soil suits dormant bulbs best.
- Cut back dead, collapsed foliage and stems to around 4 inches above soil level using sterilized shears once fully browned.
- Consider transplanting or dividing congested clumps in fall once foliage recedes.
- Lightly cultivate dormant planting beds to improve winter drainage before ground fully freezes.
- Cover dormant bulbs with 4-6 inches of protective mulch like straw, pine needles, leaves, etc. after a hard frost to insulate soil and prevent premature sprouting if you experience freeze and thaw cycles over winter.
- Consider adding hardware cloth barriers where bulb damage from tunneling rodents may occur.
Spring Revival
- Loosen and remove winter mulch coverings in early spring so new shoots can emerge unobstructed.
- Resume watering when sprouts form and apply an early spring bulb fertilizer or all-purpose plant food.
- Watch for slugs and snails emerging with warmer temperatures and treat if populations threaten tender new growth.
Proper overwintering care results in well established, healthy lily plantings that awaken revitalized come spring.
Harvesting Lily Bulbs
There are two main reasons gardeners harvest bulbs – for propagation or for winter storage:
Lifting & Storing Bulbs
Lily bulbs can be dug up in fall and stored in a cool spot for winter before being replanted the following spring.
When: Lift bulbs once the foliage has died down completely after fall frosts or early winter. Avoid damaging fleshy roots or scale-like bulb covering.
How: Carefully dig bulbs using a garden fork, gently loosening soil to access the underground bulb. Pull bulbs up by hand, trying to keep roots mostly intact. Allow bulbs to dry and cure for 1-2 weeks protected from frost.
Storage: Prepare harvested bulbs for storage by removing dead foliage and roots with sterilized scissors or shears. Place cured bulbs in breathable mesh bags with slightly moist peat or vermiculite media. Store in a dark, cool (40-50°F) place for 2 to 6 months checking periodically for mold or shriveling issues.
Replanting: In early spring after danger of frost ends, prepare planting beds and replace bulbs following the depth and spacing recommendations above. Water thoroughly. Bulbs stored properly pick up where their growth cycle left off the prior year.
Propagating Lily Bulbs
Mature, healthy lily bulbs multiply by forming little bulblets around their perimeter, which can be divided and replanted to propagate more plants.
When: Dig up bulbs when leaves fade in summer or fall once they finish flowering. Select mature specimens 3+ years old with numerous healthy bulblets forming.
Cleaning & Dividing: Carefully separate bulblet clusters from the parent bulb without damaging their thin skin. Retain small portions of roots on each bulblet if possible. Allow divisions to cure for 1-2 weeks.
Replanting: Treat bulblet propagules as you would mature bulbs following earlier guidance on planting depth, spacing, soil preparation and irrigation. It may take 2-3 years for bulblets to grow large enough to flower. Mark locations well since it’s easy to lose track over time.
Getting started with reliable named lily varieties from bulb suppliers or divisions from fellow gardeners allows you to generate a vibrant, expanding patch of these spectacular flowers. Both harvesting methods let you sustain and multiply favorites in the garden over time.
Frequently Asked Questions About Growing Lilies
New lily growers often have some common questions. Here are answers to some frequently asked questions:
Q: Why are some of my lily leaves turning yellow?
A: A small amount of yellowing lower foliage is normal each season. But significant yellowing extending to upper leaves can indicate overwatering, underwatering, nutrient deficiencies, pests, diseases, overcrowding issues, or incorrect planting depth. Assess growing conditions and adjust care as needed.
Q: When should I fertilize my lilies?
A: Fertilize lily plantings in early spring as growth resumes and again after initial flowering ends midsummer to fuel bulb development for the following year. Established plants can be fed every 4-6 weeks during active growth.
Q: How can I get my Oriental lilies to rebloom later in summer?
A: Some Oriental lilies and OT hybrids have a genetic disposition to rebloom if deadheaded promptly after initial flowering ends. Ensure plants are healthy going into summer and deadhead repeatedly to spur secondary flower stalk production if varieties allow it.
Q: Should I cut lily stems back in the fall?
A: Yes, it’s best to trim back collapsed, frosted stems to around 4-6 inches above soil level once lily foliage totally browns and plants go dormant in late fall. This keeps beds tidy and removes places disease can overwinter.
Q: Why do lilies only seem to bloom the first year I plant them?
A: In rare cases, planting depth issues or impaired root development can limit return flowering. But usually when lilies fail to reemerge it is due to bulb desiccation over winter from inadequate moisture before the ground froze coupled with a lack of protective mulch covering dormant plants.
Still have questions? Reach out to other experienced lily growers for advice or speak with staff at your local nursery or garden center for variety recommendations suited to your climate and growing conditions.
Growing vibrant, prolific lilies depends on proper variety selection for your environment followed by ideal planting techniques and care. With attention to critical seasonal maintenance needs from fertilizing to overwintering, lilies will continue gracing gardens with breathtaking elegance for years on end.


