


Hyssop, an unassuming yet captivating herb, has long been cherished for its aromatic foliage, vibrant blooms, and multitude of culinary and medicinal applications. Cultivating this resilient plant in your garden can be a rewarding experience, providing you with a fragrant oasis that not only delights the senses but also offers a wealth of benefits. Read on to discover all of our tips, tricks and other hyssop planting essentials in this comprehensive guide.
Understanding Hyssop
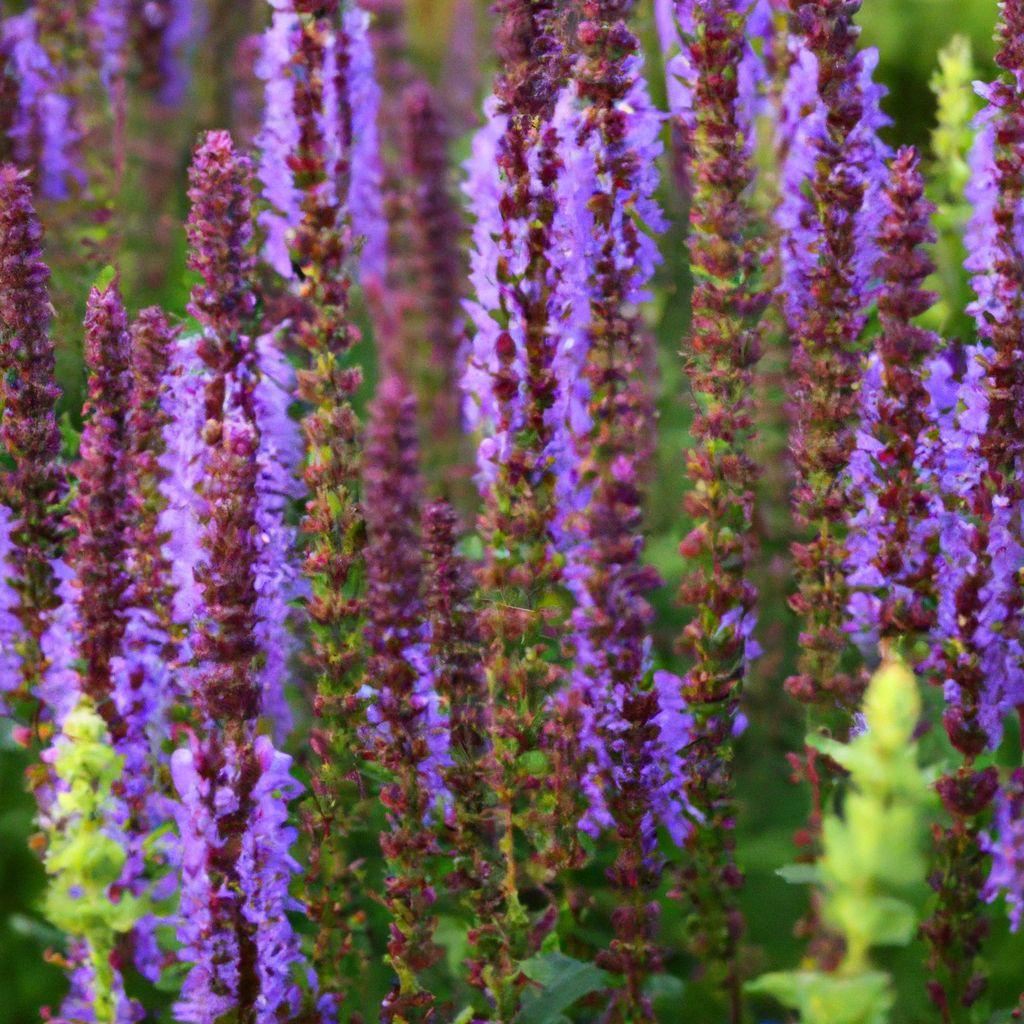
Hyssop (Hyssopus officinalis) is a perennial herb belonging to the mint family. Its compact, bushy form and spikes of blue or purple flowers make it an attractive addition to any garden. Beyond its ornamental appeal, hyssop has been revered for centuries for its versatility in traditional medicine and culinary arts.
What is Hyssop?
Hyssop is a hardy perennial herb that can grow up to two feet tall. Its aromatic leaves and vibrant flowers make it a visually appealing plant, while its medicinal and culinary properties add to its utility. Hyssop has been used for centuries in various cultures for its potential health benefits, including respiratory support and digestive aid.
A Brief History of Hyssop
The use of hyssop can be traced back to ancient civilizations, where it held a prominent place in religious ceremonies and traditional medicine. In the Bible, hyssop is mentioned as a purifying herb used for cleansing rituals. Ancient Greeks and Romans also valued hyssop for its medicinal properties and incorporated it into their healthcare practices.
Throughout history, hyssop has been cultivated and utilized for its numerous benefits, ranging from flavoring food to treating respiratory ailments. Its versatility has made it a staple in many cultures, and its popularity has persisted to this day.
Different Varieties of Hyssop
While the common hyssop (Hyssopus officinalis) is the most widely cultivated variety, there are several other noteworthy types:
Blue Hyssop (Hyssopus officinalis var. caecilii): This variety features blue flowers and a milder flavor than the common hyssop.
Giant Hyssop (Agastache foeniculum): As its name suggests, this variety grows larger than the common hyssop and attracts pollinators with its pink or purple blooms.
Yellow Hyssop (Hyssopus officinalis ssp. aristatus): This variety boasts striking yellow flowers and is grown primarily for ornamental purposes.
Anise Hyssop (Agastache foeniculum): Although not a true hyssop, this plant shares a similar fragrance and is often used in herbal teas and desserts.
Each variety offers its unique characteristics, allowing gardeners to choose the one that best suits their preferences and growing conditions.
Choosing the Right Location
Ideal Growing Conditions
To thrive, hyssop requires full sun exposure, with at least six to eight hours of direct sunlight per day. Additionally, it prefers well-draining soil and a temperature range between 60°F and 80°F (15°C and 27°C). While hyssop is drought-tolerant once established, it benefits from consistent watering during its initial growth phase.
Sunlight Requirements
Hyssop is a sun-loving plant that thrives in full sunlight. Ideally, it should receive at least six hours of direct sunlight per day. In areas with intense summer heat, providing some afternoon shade can help prevent the plant from becoming stressed.
Temperature Requirements
Hyssop performs best in temperate climates with temperatures ranging from 60°F to 80°F (15°C to 27°C). It can tolerate cooler temperatures but may become dormant or experience slower growth during the winter months. In regions with harsh winters, it’s recommended to provide some protection for the plant, such as a layer of mulch or a cold frame.
Soil Drainage
Well-draining soil is crucial for the success of hyssop plants. They are susceptible to root rot in waterlogged conditions, making it essential to ensure proper drainage. Raised beds or amending the soil with materials like sand or gravel can improve drainage and prevent water from accumulating around the plants.
Soil Requirements
Hyssop grows best in slightly alkaline to neutral soil with a pH range of 6.0 to 8.0. Well-draining, sandy or loamy soil is ideal, as hyssop is susceptible to root rot in waterlogged conditions. Amending the soil with organic matter can improve drainage and nutrient availability.
Soil pH
Hyssop prefers slightly alkaline to neutral soil conditions, with a pH range of 6.0 to 8.0. If your soil is too acidic or alkaline, you can amend it by adding lime or sulfur, respectively, to achieve the desired pH level.
Soil Texture
Well-draining soil is essential for hyssop plants, as they do not tolerate waterlogged conditions. Sandy or loamy soils with good drainage are ideal for their growth. If your soil is heavy or clay-based, you can improve its texture by incorporating organic matter, such as compost or aged manure.
Soil Nutrients
Hyssop plants benefit from nutrient-rich soil. Before planting, it’s recommended to amend the soil with compost or well-rotted manure to provide essential nutrients for healthy growth. During the growing season, you can also apply a balanced fertilizer to replenish the soil’s nutrient levels.

Propagating Hyssop
Starting from Seeds
To start hyssop from seeds, sow them indoors eight to ten weeks before the last expected frost. Once the seedlings have developed a few sets of true leaves, transplant them outdoors, spacing them 12 inches apart. Alternatively, you can sow seeds directly in the garden after the last frost.
Seed Starting Indoors
Starting hyssop from seeds indoors is a popular method, especially in regions with shorter growing seasons. Here’s how you can do it:
Fill seed trays or containers with a well-draining seed starting mix.
Sow the seeds on the surface of the soil, as hyssop seeds require light to germinate.
Lightly cover the seeds with a thin layer of seed starting mix.
Water the seed tray gently, taking care not to displace the seeds.
Cover the tray with a clear plastic lid or wrap to maintain moisture.
Place the tray in a warm location with bright, indirect sunlight.
Keep the soil moist but not waterlogged until the seeds germinate, which typically takes 7-21 days.
Once the seedlings emerge, remove the plastic cover and provide them with adequate light and air circulation.
When the seedlings have developed their first set of true leaves, transplant them into individual pots or cell trays, allowing for adequate spacing.
Gradually acclimate the seedlings to outdoor conditions before transplanting them into the garden after the last frost.
Direct Sowing in the Garden
If you live in an area with a long growing season, you can sow hyssop seeds directly in the garden after the last frost. Here’s how:
Prepare the planting area by removing any weeds or debris and loosening the soil.
Sow the seeds on the surface of the soil, spacing them about 12 inches apart.
Lightly cover the seeds with a thin layer of soil or vermiculite.
Water the area gently, taking care not to displace the seeds.
Keep the soil moist until the seeds germinate, which can take up to three weeks.
Once the seedlings emerge, thin them out to maintain the recommended spacing of 12 inches.
Propagating from Cuttings
Hyssop can also be propagated through stem cuttings. Take a 4-6 inch cutting from a healthy plant, remove the lower leaves, and dip the cut end in a rooting hormone. Plant the cutting in well-draining soil, water it thoroughly, and provide it with bright, indirect sunlight until it develops roots.
Taking Cuttings
Propagating hyssop through stem cuttings is a simple and effective method. Here’s how you can do it:
Choose a healthy, vigorous hyssop plant from which to take the cuttings.
Use clean, sharp pruners or scissors to take 4-6 inch stem cuttings from the tips of the plant’s branches.
Remove the lower leaves from the cutting, leaving only a few sets of leaves at the top.
(Optional) Dip the cut end of the stem in a rooting hormone powder or liquid to encourage root development.
Fill a clean container or planting tray with a well-draining potting mix or a mixture of equal parts perlite and vermiculite.
Make holes in the potting mix and insert the cuttings, ensuring that at least two nodes (points where leaves emerge) are buried in the soil.
Gently firm the potting mix around the cuttings to secure them in place.
Water the cuttings thoroughly, taking care not to dislodge them.
Caring for Cuttings
Once you’ve taken the cuttings, it’s important to provide them with the right care to encourage root development:
Place the cuttings in a warm, bright location with indirect sunlight.
Cover the container or tray with a clear plastic bag or dome to create a humid environment. This will help prevent the cuttings from drying out.
Check the soil moisture regularly and water when necessary, taking care not to overwater.
After 4-6 weeks, gently tug on the cuttings to check for resistance, which indicates root development.
Once the cuttings have developed a healthy root system, gradually acclimate them to outdoor conditions before transplanting them into the garden or a larger container.
Tips for Successful Propagation
Here are some additional tips to help ensure successful propagation of hyssop through cuttings:
Take cuttings from new growth, as these stems tend to root more easily than older, woody stems.
Avoid taking cuttings from flowering stems, as they may not root as readily.
Use a sterile potting mix or medium to prevent the introduction of pathogens or pests.
Maintain high humidity levels around the cuttings until they have developed roots.
Provide adequate light, as cuttings require photosynthesis to support root development.
Be patient and persistent. Some cuttings may take longer than others to root, and not all cuttings will be successful.
By following these steps and tips, you can successfully propagate hyssop through stem cuttings, allowing you to expand your collection or share plants with friends and fellow gardeners.

Planting Hyssop
Best Planting Time
The ideal time to plant hyssop is in the spring, after the last frost has passed. This allows the plant to establish itself before the summer heat sets in. If you live in a region with mild winters, you can also plant hyssop in the fall, giving it time to become established before the next growing season.
Spring Planting
Spring is the preferred time for planting hyssop in most regions. Here are some guidelines for successful spring planting:
Wait until the last expected frost date has passed for your area. This is typically in late spring, depending on your location.
Prepare the planting area by removing any weeds or debris and loosening the soil to a depth of 6-8 inches.
Incorporate compost or well-rotted manure into the soil to improve drainage and nutrient content.
If planting seedlings or transplants, space them 12-18 inches apart, depending on the variety and its mature size.
Water the plants thoroughly after planting, and continue to water regularly until they become established.
Fall Planting
In regions with mild winters, planting hyssop in the fall can be an option. Here are some tips for successful fall planting:
Plant hyssop 6-8 weeks before the first expected frost in your area.
Prepare the planting area as you would for spring planting, incorporating compost or well-rotted manure.
Plant the hyssop at the same depth as it was growing in its container or seed tray.
Water thoroughly after planting and continue to water regularly until the ground freezes.
Mulch around the plants with a 2-3 inch layer of shredded bark or straw to insulate the roots during the winter.
Planting Seedlings
When planting hyssop seedlings, choose a sunny location and prepare the soil by loosening it and removing any debris or weeds. Dig holes slightly larger than the root ball of the seedlings, and space them 12 to 24 inches apart. After planting, water the seedlings thoroughly and mulch around them to retain moisture and suppress weeds.
Preparing the Planting Area
Before planting hyssop seedlings, it’s essential to prepare the planting area properly:
Choose a location that receives full sun exposure (at least 6-8 hours of direct sunlight per day).
Remove any existing weeds, grass, or debris from the planting area.
Loosen the soil to a depth of 6-8 inches using a garden fork or tiller.
Incorporate well-rotted compost or aged manure into the soil to improve drainage and nutrient content.
Level the planting area and create a slight raised bed or mound to improve drainage if necessary.
Planting the Seedlings
Once the planting area is prepared, follow these steps to plant your hyssop seedlings:
Dig holes slightly larger than the root ball of each seedling, spacing them 12-24 inches apart, depending on the variety and its mature size.
Gently remove the seedlings from their containers, taking care not to damage the roots.
Place the seedlings in the holes, ensuring that the top of the root ball is level with the surrounding soil.
Backfill the holes with soil, gently firming it around the base of the seedlings.
Water the seedlings thoroughly, ensuring that the soil is evenly moistened.
Apply a 2-3 inch layer of organic mulch around the seedlings, leaving a small gap around the stem to prevent rot.
Caring for Newly Planted Seedlings
After planting the hyssop seedlings, it’s important to provide them with proper care to ensure their successful establishment:
Water the seedlings regularly, keeping the soil evenly moist but not waterlogged.
Monitor the seedlings for any signs of pests or diseases and take appropriate action if necessary.
Once the seedlings have become established (typically after 4-6 weeks), you can reduce the frequency of watering.
Fertilize the plants with a balanced, water-soluble fertilizer every 4-6 weeks during the growing season to promote healthy growth.
Prune the plants as needed to maintain their shape and encourage bushier growth.
By following these steps and providing proper care, your hyssop seedlings will establish themselves quickly and thrive in their new environment.

Hyssop Care
Watering
Hyssop requires consistent watering, especially during its initial growth phase. Water deeply, aiming to moisten the soil to a depth of six to eight inches. Once established, hyssop is drought-tolerant, but it still requires occasional watering during extended dry periods.
Watering Frequency
The frequency of watering will depend on several factors, including the plant’s growth stage, soil type, and weather conditions. Here are some general guidelines:
Newly planted seedlings or transplants: Water daily or every other day, keeping the soil consistently moist but not waterlogged.
Established plants: Water once or twice a week, applying enough water to moisten the soil to a depth of 6-8 inches.
During hot, dry periods: Increase watering frequency to prevent the soil from drying out completely.
During cooler months: Reduce watering frequency as the plant’s growth slows down.
Watering Techniques
To ensure efficient watering, consider the following techniques:
Drip irrigation: Install a drip irrigation system to deliver water directly to the root zone, minimizing water loss through evaporation and preventing moisture from settling on the foliage, which can lead to fungal diseases.
Soaker hoses: Use soaker hoses or leaky pipes buried a few inches beneath the soil surface to slowly deliver water directly to the root zone.
Mulching: Apply a 2-3 inch layer of organic mulch around the plants to help retain soil moisture and reduce water evaporation.
Signs of Overwatering and Underwatering
It’s essential to monitor your hyssop plants for signs of overwatering or underwatering to adjust your watering schedule accordingly:
Overwatering signs: Wilting or yellowing leaves, stunted growth, and the presence of fungal diseases or root rot.
Underwatering signs: Drooping or wilting leaves, dry and crumbly soil, and slower growth.
If you notice any of these signs, adjust your watering schedule and ensure proper drainage to prevent further issues.
Fertilization
Feed your hyssop plants with a balanced, all-purpose fertilizer every four to six weeks during the growing season. This will provide the necessary nutrients for healthy growth and abundant blooms.
Choosing the Right Fertilizer
When it comes to fertilizing hyssop, it’s important to choose the right type of fertilizer. Here are some options to consider:
Balanced fertilizer: A balanced fertilizer with an equal ratio of nitrogen, phosphorus, and potassium (such as 10-10-10 or 12-12-12) is a good choice for overall plant health and growth.
Organic fertilizer: Organic options like compost, manure, or fish emulsion can provide a slow-release source of nutrients while improving soil structure.
Liquid fertilizer: Water-soluble fertilizers are easy to apply and quickly provide nutrients to the plants.
Fertilizing Schedule
Generally, it’s recommended to fertilize hyssop plants every 4-6 weeks during the growing season. Here’s a typical fertilizing schedule:
Early spring: Apply a balanced fertilizer or compost around the base of the plant as new growth emerges.
Mid-spring to late summer: Fertilize every 4-6 weeks with a balanced or organic fertilizer to support growth and flowering.
Fall: Avoid fertilizing in late fall as the plant prepares for dormancy.
Fertilizing Tips
Keep these tips in mind when fertilizing your hyssop plants:
Follow the manufacturer’s instructions for application rates and methods.
Water the plants thoroughly before and after applying fertilizer to help distribute the nutrients and prevent root burn.
Avoid over-fertilizing, as this can lead to excessive growth and potential nutrient imbalances.
Consider using slow-release or organic fertilizers for a more consistent supply of nutrients throughout the growing season.
By providing your hyssop plants with the right nutrients at the right time, you’ll encourage healthy growth, abundant flowering, and overall plant vigor.

Pruning
Regular pruning is essential for maintaining the compact, bushy shape of hyssop plants. Prune them in early spring, removing any dead or damaged stems, and again after flowering to encourage new growth.
Early Spring Pruning
Early spring is the ideal time to prune hyssop plants before they begin their active growth phase. Here’s how to do it:
Wait until you see new growth emerging from the base of the plant.
Using clean, sharp pruners, remove any dead, damaged, or diseased stems from the previous season.
Thin out overcrowded or crossing stems to improve air circulation and shape the plant.
Prune back any remaining stems by about one-third of their length to encourage bushier growth.
Post-Flowering Pruning
After the hyssop plant has finished flowering, it’s a good idea to prune it again to promote new growth and maintain its compact shape:
Wait until the flowers have faded and the plant has finished blooming.
Remove any spent flower spikes or seed heads by cutting them back to the base of the plant.
Lightly prune the remaining stems by trimming back about one-third of their length.
Shape the plant as desired, taking care not to prune too severely.
Pruning Tips
Keep these tips in mind when pruning your hyssop plants:
Use clean, sharp pruners or scissors to make clean cuts and prevent injury to the plant.
Avoid pruning more than one-third of the plant’s growth at a time to prevent excessive stress.
Prune in the morning or evening when temperatures are cooler to reduce stress on the plant.
Remove any debris or clippings from the plant and surrounding area to prevent the spread of diseases.
Regular pruning not only maintains the plant’s shape but also promotes air circulation, which can help prevent fungal diseases and encourage new, healthy growth.
Pest and Disease Management
While hyssop is generally resistant to pests and diseases, it’s essential to monitor for potential issues and take prompt action if necessary. Aphids, spider mites, and root rot are some common problems to watch for. Implementing organic pest control methods and ensuring proper drainage can help prevent and manage these issues.
Common Pests
Hyssop plants can be susceptible to certain pests, including:
Aphids: These small, soft-bodied insects can infest the stems and leaves, causing stunted growth and distorted foliage.
Spider mites: These tiny arachnids can cause yellowing or bronzing of leaves and leave behind fine webbing.
Whiteflies: These small, white insects can congregate on the undersides of leaves, causing yellowing and stunted growth.
Pest Control Methods
If you notice pests on your hyssop plants, try these organic control methods:
Insecticidal soap: Apply a horticultural insecticidal soap spray to the affected areas, taking care to cover the undersides of leaves.
Neem oil: Neem oil is a natural insecticide that can effectively control a variety of pests.
Beneficial insects: Encourage natural predators like ladybugs, lacewings, and parasitic wasps by providing them with suitable habitats.
Hand removal: For minor infestations, you can physically remove pests by hand or with a strong spray of water.
Common Diseases
Hyssop plants can also be susceptible to certain diseases, including:
Root rot: This fungal disease is caused by excessive moisture and poor drainage, leading to root decay and wilting.
Powdery mildew: This fungal disease appears as a white, powdery coating on the leaves and stems, thriving in humid conditions.
Leaf spot diseases: Various fungi can cause brown or black spots on the leaves, potentially leading to defoliation.
Disease Prevention and Management
To prevent and manage diseases in hyssop plants, follow these guidelines:
Proper spacing: Ensure adequate spacing between plants to promote good air circulation and prevent the spread of diseases.
Watering practices: Water at the base of the plant and avoid overhead watering to prevent moisture buildup on the foliage.
Pruning: Regularly prune the plants to improve air circulation and remove any diseased plant material.
Fungicides: As a last resort, you can use organic fungicides approved for use on hyssop to control severe fungal infections.
By implementing these preventive measures and addressing any issues promptly, you can keep your hyssop plants healthy and thriving.

Harvesting and Using Hyssop
Harvest Timing
For culinary or medicinal use, harvest hyssop leaves before the plant flowers, as this is when the leaves are at their most flavorful. If you want to harvest the flowers for decorative purposes or herbal infusions, wait until they are three-quarters open.
Harvesting Leaves
The best time to harvest hyssop leaves is in the morning after the dew has dried but before the heat of the day. Follow these steps:
Use clean, sharp pruners or scissors to avoid crushing the leaves.
Snip off the stems just above a leaf node (where the leaves emerge from the stem).
Harvest the young, tender leaves towards the top of the plant, as they will have the most potent flavor and aroma.
Avoid harvesting more than one-third of the plant’s foliage at a time to prevent over-stressing the plant.
Harvesting Flowers
If you want to harvest the hyssop flowers for decorative or culinary purposes, wait until they are three-quarters open. Here’s how to do it:
Use clean, sharp pruners or scissors to cut the flower spikes.
Avoid harvesting all the flowers, as this can weaken the plant.
Leave some flowers on the plant to continue blooming and provide nectar for pollinators.
Handle the flowers gently to preserve their appearance and shape.
Continuous Harvesting
Hyssop is a prolific herb that can be harvested multiple times throughout the growing season. By regularly harvesting the leaves and flowers, you can encourage the plant to produce more growth and extend its productive period. However, be careful not to over-harvest, as this can stress the plant and reduce its overall vigor.
Drying Hyssop Leaves
To dry hyssop leaves, gather them in small bunches and hang them upside down in a cool, dry, and well-ventilated area away from direct sunlight. Once fully dried, remove the leaves from the stems and store them in an airtight container, away from light, heat, and moisture.
Air-Drying Method
Air-drying is the most common and straightforward method for drying hyssop leaves. Here’s how to do it:
Gather the freshly harvested hyssop leaves or stems into small bundles, securing them with a rubber band or string.
Remove any discolored or damaged leaves before drying.
Hang the bundles upside down in a cool, dry, well-ventilated area, such as a shed, garage, or attic.
Avoid direct sunlight, as it can cause the leaves to lose their color and potency.
Allow the leaves to dry for 1-2 weeks, or until they become crisp and easily crumble.
Oven-Drying Method
If you need to dry hyssop leaves quickly or live in a humid climate, you can use the oven-drying method:
Preheat your oven to the lowest temperature setting (around 100-120°F or 38-49°C).
Spread the hyssop leaves in a single layer on a baking sheet lined with parchment paper.
Place the baking sheet in the oven and leave the door slightly ajar to allow moisture to escape.
Check on the leaves every 30 minutes, rotating the baking sheet to ensure even drying.
The leaves should be completely dry within 2-4 hours, depending on the temperature and humidity levels.
Storing Dried Hyssop Leaves
Once the hyssop leaves are fully dried, it’s important to store them properly to maintain their flavor and potency:
Remove the dried leaves from the stems by gently running your fingers along the stem or using a fork to dislodge them.
Discard any remaining stems or debris.
Store the dried leaves in an airtight container, such as a glass jar or resealable plastic bag.
Keep the container in a cool, dark place, away from direct sunlight and moisture.
Properly stored, dried hyssop leaves can retain their quality for up to a year.
Culinary and Medicinal Uses
Hyssop leaves can be used fresh or dried to add a unique, savory flavor to soups, stews, marinades, and sauces. They can also be used to make infused oils, vinegars, and herbal teas. Medicinally, hyssop has been traditionally used as an antiseptic, expectorant, and digestive aid, although it’s essential to consult a healthcare practitioner before using it for medicinal purposes.
Culinary Uses
Fresh or dried hyssop leaves can add a distinctive flavor to a variety of culinary dishes:
Soups and stews: Add hyssop leaves to vegetable, meat, or bean-based soups and stews for a unique flavor profile.
Marinades and rubs: Combine hyssop with olive oil, vinegar, garlic, and other herbs to create flavorful marinades or dry rubs for meats, poultry, or vegetables.
Salad dressings: Infuse vinegar or olive oil with hyssop leaves to make aromatic salad dressings.
Baked goods: Incorporate dried hyssop leaves into bread doughs, scones, or biscuits for a subtle herbal flavor.
Teas and infusions: Steep fresh or dried hyssop leaves in hot water to make a refreshing herbal tea or infusion.
Medicinal Uses
Throughout history, hyssop has been used for various medicinal purposes, although its effectiveness for specific conditions has not been conclusively proven. Some traditional uses include:
Respiratory support: Hyssop has been used as an expectorant to help loosen mucus and relieve coughs and bronchitis.
Digestive aid: The herb has been used to promote digestion and relieve gas, bloating, and other digestive issues.
Wound healing: Hyssop’s antiseptic properties have been utilized to help clean and heal minor wounds and cuts.
Anti-inflammatory: Some studies suggest that hyssop may have anti-inflammatory properties, potentially helping with conditions like arthritis or muscle pain.
It’s important to note that while hyssop has a long history of traditional use, its medicinal efficacy has not been extensively studied, and it should not be used as a substitute for professional medical treatment. Always consult with a healthcare professional before using hyssop or any other herb for medicinal purposes, especially if you have an existing medical condition or are taking medications.

Reap the Rewards of Growing Hyssop in Your Garden Now
Growing hyssop in your garden is a rewarding experience that not only adds visual appeal but also provides a wealth of culinary and medicinal benefits. With its hardiness, drought tolerance, and resilience, hyssop is a low-maintenance plant that can thrive with proper care and attention. Embrace the beauty and versatility of hyssop, and let it become a treasured addition to your garden sanctuary.
Cultivating hyssop can be a gratifying journey for any gardener, whether you’re a seasoned pro or just starting out. From the moment you sow the seeds or plant the seedlings, you’ll be embarking on a rewarding adventure that will bring you closer to nature and deepen your appreciation for the wonders of the plant world.
As you nurture your hyssop plants, you’ll witness their remarkable transformation from delicate seedlings to vibrant, fragrant beauties.


