


There’s nothing quite like the satisfaction of harvesting fresh, juicy melons straight from your own garden. The sweet aroma and vibrant colors of homegrown melons are unmatched by their store-bought counterparts. Cultivating your own melons offers a sense of accomplishment and a deeper connection with nature that can’t be found elsewhere. Use this guide full of top melon growing tips in order to reap the rewards of melon farming at home.
Beyond the joy of a bountiful harvest, growing melons at home provides numerous benefits. Not only do you have full control over the cultivation process, ensuring the use of organic methods and reducing exposure to pesticides, but you also reduce your carbon footprint and food waste associated with long-distance transportation. Furthermore, having your own melon patch adds beauty and visual appeal to your outdoor space, making it a delightful addition to any garden.
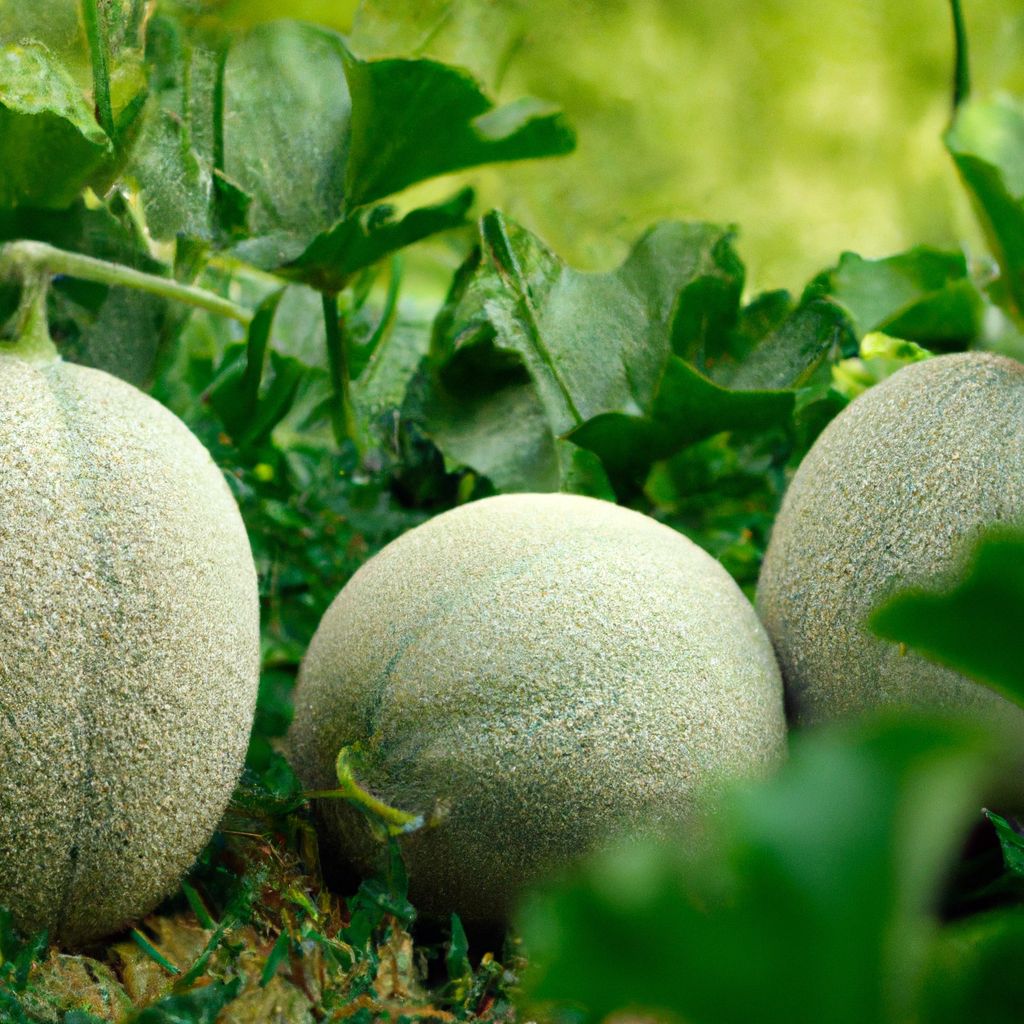
The Joys of Homegrown Melons
Imagine stepping out into your backyard on a warm summer day, surrounded by lush green vines adorned with vibrant yellow blossoms. As you carefully tend to your melon patch, you can’t help but feel a sense of pride and accomplishment. Watching these plants grow from tiny seeds to bearing plump, juicy fruits is a truly rewarding experience.
Homegrown melons offer a level of freshness and flavor that simply can’t be matched by store-bought varieties. When you bite into a melon straight from your own garden, the sweet, juicy flesh bursts with an unparalleled depth of flavor. The aroma alone is enough to make your mouth water, transporting you to sunny fields and warm summer days.

Benefits of Growing Melons at Home
Beyond the sheer joy of cultivating your own produce, growing melons at home offers numerous benefits:
- Organic and Pesticide-Free: By growing melons yourself, you have complete control over the cultivation process. You can choose to use organic methods, avoiding harmful pesticides and chemicals, ensuring a healthier and more sustainable crop.
- Reduced Carbon Footprint: Store-bought melons often travel long distances, contributing to greenhouse gas emissions and environmental pollution. By growing your own, you significantly reduce your carbon footprint and support local food production.
- Reduced Food Waste: With a melon patch in your backyard, you can harvest only what you need, minimizing food waste and ensuring that every juicy morsel is savored and enjoyed.
- Variety and Experimentation: Commercial growers typically focus on a select few melon varieties, but when you grow your own, you can experiment with a wide range of unique and heirloom varieties, each offering its own distinct flavor and texture.
- Cost Savings: While the initial investment in seeds, soil, and equipment may seem daunting, the long-term cost savings of growing your own melons can be substantial, especially if you have a large family or a love for these sweet fruits.
- Therapeutic Benefits: Gardening itself has been proven to offer numerous therapeutic benefits, including stress relief, increased physical activity, and improved mental well-being. Tending to your melon patch can be a relaxing and meditative experience, allowing you to reconnect with nature and escape the hustle and bustle of daily life.
Choosing the Perfect Melon Variety
To embark on a successful melon growing journey, it is essential to select the right melon variety suited for your climate and cultivation space. Various melon types exist, each with its unique flavor, texture, and growing requirements. Understanding the different melon varieties available and considering factors such as climate, available space, and personal preferences will help you choose the perfect melon variety for your garden.
Melon Types and Characteristics
Here’s a table showcasing some popular melon types and their characteristics:
| Melon Type | Size | Shape | Color |
|---|---|---|---|
| Honeydew | Medium to large | Oval | Pale green or yellow |
| Cantaloupe | Medium to large | Round | Netted skin, orange flesh |
| Watermelon | Large to very large | Oval or round | Green rind, red or yellow flesh |
| Galia | Medium to large | Round | Yellow-green skin, sweet green flesh |
| Canary | Medium to large | Oval | Bright yellow |
This table provides a quick overview of the size, shape, and color of different melon varieties, helping you visualize and choose the type that best suits your preferences.
Factors to Consider When Selecting Melon Varieties
When selecting melon varieties for cultivation, it is important to consider several key factors:
- Disease Resistance: Choose melon varieties that exhibit good resistance to common diseases such as powdery mildew, fusarium wilt, and downy mildew. This will help ensure the health and productivity of your plants.
- Growth Habit: Take the growth habit of the melon variety into consideration. Some varieties have a vining growth habit, while others are more compact and bushy. It is important to select a variety that suits the available space in your garden and your preferred method of trellising or support.
- Days to Maturity: Pay attention to the listed days to maturity for each melon variety. This information will give you an estimate of how long it will take for the melons to reach a harvestable size. Opt for varieties with maturity dates that align with your growing season.
- Flavor and Texture: Take your personal preferences for flavor and texture into consideration. Some melon varieties are renowned for their sweet and juicy taste, while others have a milder or more unique flavor. Consider the type of melon you enjoy eating and choose varieties that align with your taste preferences.
- Harvest and Storage: Think about your plans for using the melons. Certain varieties are more suitable for immediate consumption, while others have a longer storage life. Decide whether you want melons that can be stored for extended periods or if you prefer varieties that are best enjoyed fresh.
By carefully considering these factors and selecting the right melon varieties, you can ensure a successful and enjoyable melon growing experience tailored to your specific needs and preferences.

Preparing the Soil for Melon Happiness
Creating an optimal growing environment for your melon plants starts with proper soil preparation. Melons thrive in loose, well-draining soil that is rich in organic matter, and they require specific soil conditions for healthy growth and abundant fruit production.
Soil Requirements for Melon Plants
| Soil Requirement | Description |
|---|---|
| Well-drained soil | Melon plants require soil that drains well to prevent waterlogging, which can lead to root rot. |
| Sandy soil | Melons prefer sandy soil that is loose and well-aerated, allowing the melon roots to access water and nutrients more easily. |
| Neutral pH | The soil should have a pH level between 6.0 and 7.0, which is considered neutral, providing optimal conditions for nutrient uptake. |
| Rich in organic matter | Melon plants thrive in soil that is rich in organic matter, such as compost or well-rotted manure, improving soil structure, fertility, and water retention. |
This table outlines the key soil requirements for melon plants, ensuring you provide the right growing conditions for their success.
Improving Soil Drainage and Fertility
To improve soil drainage and fertility, consider the following steps:
- Assessing Soil Drainage: Before planting melons, ensure that the soil has good drainage. Excess water can lead to root rot and other diseases. Test the soil by digging a hole and filling it with water. If it takes more than a few hours for the water to drain, you may need to improve drainage.
- Adding Organic Matter: Incorporate organic matter into the soil to improve fertility and drainage. Compost, well-rotted manure, or leaf mold are excellent options. Apply a layer of organic matter and mix it thoroughly into the soil.
- Amending with Sand or Perlite: If your soil has heavy clay or retains too much moisture, adding sand or perlite can enhance drainage. Aim for a sandy loam texture, which provides a balance between water retention and drainage.
- Considering Raised Beds: If your soil drainage is poor or you have limited space, consider growing melons in raised beds. Raised beds offer better control over soil conditions, including drainage and fertility. Ensure the beds are properly constructed and filled with well-draining soil.
- Ensuring Proper Irrigation: While improving drainage is essential, it’s also important to provide adequate moisture for melon plants. Irrigate consistently, allowing the soil to dry slightly between waterings. Avoid overwatering, as this can lead to waterlogged conditions.
- Monitoring Soil Fertility: Regularly check the nutrient levels in the soil. Conduct soil tests to determine deficiencies and adjust fertilizer applications accordingly. Melons require balanced nutrition, particularly nitrogen, phosphorus, and potassium.

Sowing the Seeds of Success
Knowing the best time to plant melons and the techniques for starting melon plants from seeds or seedlings is crucial for a successful harvest. Whether you decide to sow seeds directly in the ground or begin with nursery-grown seedlings, proper preparation and planting techniques play a significant role in ensuring optimal plant growth and development.
Best Time to Plant Melon Seeds or Seedlings
The best time to plant melons depends on several factors, including your region’s climate and the specific variety of melon you plan to grow. Here are some guidelines to help you determine the optimal planting time:
- Check the average last frost date: Melon plants are sensitive to cold temperatures, so it’s important to plant them after the risk of frost has passed in your area.
- Consider soil temperature: Melon seeds germinate best when the soil temperature is consistently above 60°F (15.6°C). Use a soil thermometer to test the temperature at the depth you plan to plant the seeds.
- Research your melon variety: Different melon varieties have different optimal planting times. Some melons, like watermelons, need a longer growing season and should be planted earlier, while others, like cantaloupes, can be planted later.
- Take local climate into account: If you live in an area with a short growing season or cooler temperatures, you may need to start your melon seeds indoors or use techniques like cloches or row covers to extend the growing season.
Preparing Seedlings or Germinating Seeds
If you decide to start your melon plants from seeds, here are some tips for successful germination:
- Choose high-quality seeds: Use seeds from a reputable supplier or save seeds from a previous harvest.
- Start seeds indoors: Begin germination indoors about 4-6 weeks before the last frost date in your area.
- Use seed starting mix: Fill seed trays or pots with a well-draining seed starting mix designed for germination.
- Plant seeds properly: Plant one or two seeds per tray or pot, placing them about 1 inch deep.
- Maintain consistent moisture: Water the soil gently to keep it moist but not waterlogged.
- Provide warmth: Place the trays or pots in a warm location with temperatures around 75-80°F to encourage germination.
- Provide light: Once the seedlings emerge, provide them with ample light by placing them under grow lights or near a sunny window.
- Monitor for pests and diseases: Watch the seedlings closely for any signs of pests or diseases and take appropriate action if necessary.
- Harden off seedlings: Before transplanting, gradually expose the seedlings to outdoor conditions for a few hours each day to harden them off.
If you prefer to use nursery-grown seedlings, ensure they are healthy with several true leaves before transplanting them into your garden or containers.

Planting Techniques
When it comes to planting melons, having knowledge of proper planting techniques is crucial for a successful harvest. Here are some tips:
- Sowing seeds: When sowing melon seeds directly in the ground, choose a sunny spot. Dig small holes about 1 inch deep and place 2-3 seeds in each hole, spacing them 2 feet apart.
- Transplanting seedlings: If using seedlings, make sure they are healthy with several true leaves. Dig holes big enough for the root system and transplant the seedlings, being careful not to damage the roots.
- Proper spacing: Allow at least 3 feet between melon plants for adequate growth and airflow. Vining varieties may need even more space.
- Watering: Provide sufficient water to the newly planted melon seeds or seedlings. Ensure the soil remains consistently moist but not waterlogged.
- Support structures: Some melon varieties may need trellises or cages for support. Install these structures early on to prevent damage to the vines as they grow.
- Pest protection: Take measures to protect your melon plants from common pests like aphids, cucumber beetles, and squash bugs. You can use natural insecticides or physical barriers like row covers.
- Mulching: Apply a layer of organic mulch around the base of the plants. This helps retain moisture, suppress weed growth, and maintain stable soil temperatures.
- Fertilizing: As the melon plants grow, periodically fertilize them with a balanced fertilizer to provide essential nutrients.
- Pruning: Regularly inspect the plants and remove any damaged or diseased leaves or fruits. Pruning also helps control growth and prevents overcrowding.
By following these planting techniques, you’ll give your melon plants the best start possible, setting them up for a bountiful harvest.

Nurturing Your Melon Patch
Proper care is essential to nurture your melon plants throughout their growth cycle and maximize their yield. This includes providing adequate watering, feeding and fertilizing, ensuring pollination of melon flowers, and implementing effective pest and disease management strategies.
Watering Melon Plants
Melon plants require consistent, deep watering to promote root development and fruit production. Here are some tips for proper watering:
- Watering frequency: Water melon plants deeply once or twice a week, depending on the weather and soil conditions. Sandy soils may require more frequent watering.
- Watering technique: Direct the water at the base of the plants, aiming to wet the soil around the roots. Avoid wetting the leaves, as this can promote disease.
- Soil moisture check: Check the moisture level in the soil by inserting your finger about an inch deep. If it feels dry, it’s time to water. If it’s still moist, wait a day or two before watering again.
- Adequate depth: Provide enough water to ensure the soil is evenly moist but not waterlogged. Melon roots can extend several feet deep, so deep watering is crucial.
- Timing: Water melon plants in the early morning or late afternoon to reduce evaporation and allow the leaves to dry before nighttime, which can prevent fungal diseases.
A true story to emphasize the importance of proper watering: One summer, I neglected to water my melon plants for several days during a heatwave. When I finally watered them, I noticed that the leaves had wilted, and the fruits were small and dehydrated. Thankfully, I adjusted my watering routine by providing consistent moisture, and the plants bounced back, producing juicy and flavorful melons.
Feeding and Fertilizing Melon Plants
Feeding and fertilizing melon plants is crucial for their healthy growth and productive harvest. Here are the steps to ensure your melon plants receive the necessary nutrients:
- Choose the right fertilizer: Select a balanced fertilizer with equal ratios of nitrogen, phosphorus, and potassium (NPK). This will provide the essential nutrients that melon plants need.
- Apply the fertilizer: Spread the fertilizer evenly around the base of the plants, making sure to keep it a few inches away from the stems. Avoid over-fertilizing, as it can lead to excessive foliage growth instead of fruit development.
- Water the plants: After applying the fertilizer, water the plants thoroughly. This will help the nutrients percolate into the soil and reach the plant’s roots.
- Monitor plant growth: Keep an eye on the plants’ growth and appearance. If you notice any signs of nutrient deficiencies, such as yellowing leaves or stunted growth, consider supplementing with a foliar spray or adjusting your fertilization practices.
- Maintain a feeding schedule: To ensure consistent nutrition, feed your melon plants every two to three weeks throughout the growing season. This will support continuous growth and fruit production.
Pro-tip: When feeding and fertilizing melon plants, be cautious not to over-fertilize, as this can lead to excessive vegetative growth at the expense of fruit production. Pay attention to the specific fertilizer instructions and the needs of your melon variety to achieve optimal nutrient balance.

Pollination of Melon Flowers
Successful pollination of melon flowers is crucial for fruit production. Here are some tips to ensure effective pollination:
- Attract pollinators: Bees are the primary pollinators for melon flowers, so it’s vital to attract them to your garden. Plant bee-friendly flowers like lavender, sunflowers, or calendula nearby.
- Provide sunny locations: Bees are more active in areas with ample sunlight, so ensure your melon plants are situated in a sunny location.
- Maintain water sources: Provide a shallow water source, such as a birdbath or a shallow dish filled with pebbles and water, to attract and hydrate bees.
- Hand pollination: If you notice a scarcity of bees or have a small garden, you can manually transfer pollen from the male flowers to the female flowers using a small brush or cotton swab.
- Avoid pesticides: Refrain from using broad-spectrum pesticides, as they can harm beneficial insects like bees and other pollinators.
By ensuring proper pollination, you’ll increase the chances of your melon plants producing a bountiful harvest of sweet, juicy fruits.
Managing Pests and Diseases
Despite your best efforts, pests and diseases can sometimes threaten your melon crop. Here are some strategies for effective pest and disease management:
- Implement Integrated Pest Management (IPM): IPM is an approach that combines cultural, biological, and chemical control methods to manage pests and diseases effectively while minimizing environmental impact.
- Maintain sanitation: Remove and destroy any infected plant parts or debris to prevent the spread of diseases. Keep your garden area clean and free from plant waste.
- Encourage natural predators: Attract beneficial insects like ladybugs, lacewings, and parasitic wasps by planting companion plants like marigolds, dill, or fennel. These predators feed on common melon pests like aphids and cucumber beetles.
- Rotate crops: Practice crop rotation, avoiding planting melons in the same area year after year. This can help reduce the buildup of soil-borne diseases and pests.
- Use organic pesticides judiciously: If necessary, use organic pesticides approved for use in melon cultivation, following the instructions on the label and applying them in a targeted manner.
- Monitor regularly: Regularly inspect your melon plants for signs of pests or diseases, and take prompt action to address any issues before they spread.
By implementing these pest and disease management strategies, you can protect your melon plants and ensure a healthy, bountiful harvest.

Reaping the Rewards
After weeks of nurturing and care, the moment of harvest is undoubtedly the most exciting part of melon cultivation. Knowing when your melons are ready for picking and understanding the proper techniques for harvesting and storing them will ensure that you enjoy the full flavor and sweetness of your homegrown melons.
Harvest Indicators
Different melon varieties have distinct indicators that signal when they’re ready for harvest. Here are some common signs to look for:
- Watermelons: Look for a dull, matte skin instead of a shiny one. The spot where the melon rests on the ground should also change from white or green to a creamy yellow color. Additionally, give the melon a gentle knock – a dull, hollow sound indicates ripeness.
- Cantaloupes: These melons emit a sweet, musky aroma when ripe. The skin should have a distinct netting pattern, and the melon should yield slightly when gently pressed around the stem end.
- Honeydews: Ripe honeydews will have a creamy yellow or golden skin color instead of a green one. The rind should also feel slightly soft when pressed with your thumb.
- Muskmelons: Look for the appearance of netting or ribbing on the skin, and check for a sweet, fruity fragrance. The melon should give slightly when pressed around the stem area.
- Galia melons: These melons are ready for harvest when the leaf at the stem turns yellow, and the melon has a visually appealing appearance.
It’s essential to pay attention to these specific indicators for each melon variety to ensure you harvest them at their peak ripeness and flavor.
Harvesting Techniques
Once you’ve identified the signs of ripeness, it’s time to harvest your melons. Here are some tips for successful harvesting:
- Harvest gently: Melons can be easily bruised or damaged, so handle them with care. Use a sharp knife or pruning shears to cut the stem, leaving a short stub attached to the melon.
- Harvest early in the day: For optimal freshness and shelf life, harvest melons early in the morning when temperatures are cooler.
- Avoid pulling or twisting: Never pull or twist melons from the vine, as this can damage the plant and the fruit.
- Use a cushion: Place a cushion or a pad in your harvesting container to prevent bruising the melons as they’re collected.
- Clean and dry: After harvesting, gently wipe the melons with a damp cloth to remove any dirt or debris, then allow them to air dry completely before storing.
Storing Melons
Proper storage is crucial to extend the shelf life of your freshly harvested melons. Follow these steps for optimal storage:
- Check for ripeness: Only store fully ripe melons. Unripe melons will not continue to ripen once picked.
- Remove stems: Cut the stem of the melon about 1 inch above the fruit before storing.
- Keep them cool: Store melons in a cool, dry, and well-ventilated area, such as a basement or a cellar. Ideal storage temperatures range from 50°F to 60°F.
- Provide air circulation: Arrange the stored melons in a single layer, leaving some space between each melon to allow for air circulation.
- Monitor regularly: Check the stored melons regularly for signs of over-ripening or spoilage. Remove any melons that are starting to deteriorate to prevent them from spoiling the others.
- Enjoy within the appropriate time: Different melon varieties have different storage times. Generally, melons can be stored for 1-2 weeks, but it’s best to consume them as soon as possible for optimal flavor and quality.
By following these harvesting and storage techniques, you can savor the sweet, juicy flavors of your homegrown melons for an extended period, making the most of your hard work and dedication in the garden.


