Irises are captivating flowers that can transform any garden with their vibrant colors and unique shapes. Cultivating these flowers successfully requires using the right techniques and care. This comprehensive guide covers everything needed – from necessary iris growing conditions to planting and propagation – to master growing irises for beginners and experienced gardeners.
Why Grow Irises
Irises offer numerous rewards to those who cultivate them. As long-blooming perennials, they develop into lovely clumps that burst into flower year after year. These rugged plants also tend to be quite low-maintenance, resisting many common diseases and pests that may plague other garden varieties.
Aesthetic Rewards
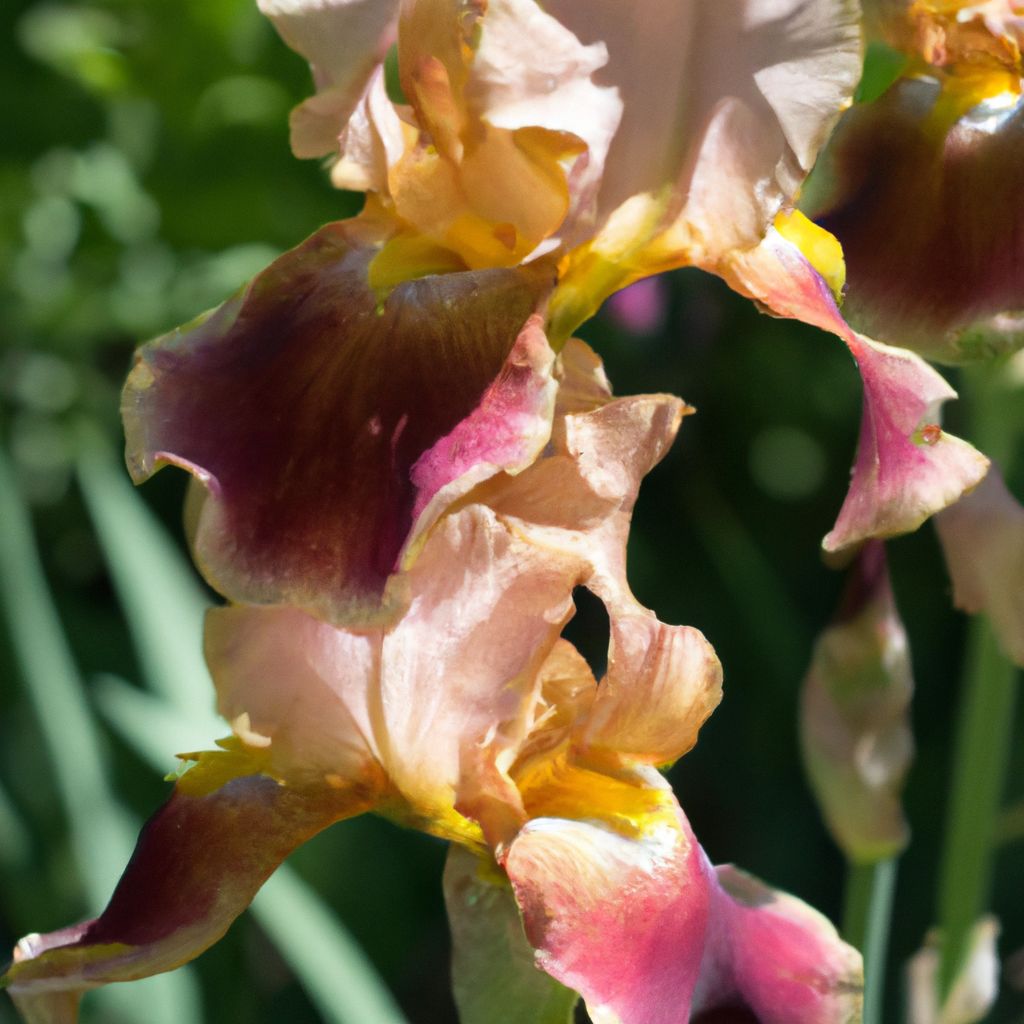
Irises produce absolutely stunning blooms ranging from the deepest purples to the brightest golden yellows. Their flowers are often adorned with elegant decorative touches such as signals and crests in contrasting colors. The diversity of colors and forms found across the dozens of iris species is virtually unmatched in the plant world. Irises have an abundance of variety to offer any garden space.
Sweet Fragrance
While not all irises are fragrant, some choice varieties like I. pallida and I. mesopotamica offer sweet floral fragrances that will scent the garden. The blooms’ perfume provides an added sensory experience on top of their visual beauty, making them even more delightful additions to gardens or flower arrangements.
Extreme Adaptability
Irises as a plant family grow in remarkably diverse climates ranging from the hot and humid swamps of Louisiana to the bitterly cold reaches of Siberia. There is practically an adaptable iris species well-suited to thrive in just about every environment a gardener could want to cultivate them in.
Benefits to Local Ecosystems
Bees, butterflies, hummingbirds and other vital insect and avian pollinators frequently visit iris blossoms seeking their nutritious nectar. Irises also serve as beneficial caterpillar host plants for the young of certain butterfly species. Cultivating irises doesn’t just beautify the garden – it also directly helps support local biodiversity and ecosystems.
Cultural and Historical Significance
Irises have a rich cultural history, appearing frequently in ancient Egyptian hieroglyphic decorations and classic Greek myths while also representing wisdom, valor, and courage in the coded language of flowers. Growing these plants connects the modern gardener to the rich human history of these captivating blooms.

Iris Types to Grow
While all iris plants produce the same recognizable strap-shaped leaves and unique yet familiar flowers, the irises grown in gardens generally have either bulbous or rhizomatous root structures. These differences in root structures and subsequent growth habits impact how gardeners will cultivate the plants.
Most Popular Garden Iris Varieties
Gardeners have many lovely iris varieties to choose from for incorporating into the landscape. Here is an overview of some of the most popular types seen in gardens worldwide:
Bearded Irises
The classic bearded iris is the image most folks envision when they hear the word “iris.” These irises have large, full petaled blooms adorned by fuzzy decorative “beards” on the falls (lower petals). Bearded irises bloom profusely in nearly every color except true red, and many have recurring reblooming cycles that extend their floral display season considerably.
Siberian Irises
Siberian irises have fine, grassy looking leaves that complement their small, delicate-looking blooms. The blossoms emerge in cool shades of blue, violet, white and golden yellow. These hardy plants are ideal selections for gardeners in northern climates.
Japanese Irises
Japanese irises have huge blossoms with wide, flat and slightly puckered petals displaying stunning patterns and color combinations. The fine picotee white edges on the petals resemble floral lacework. Japanese irises require moist soils, so they are excellent candidates for planting near water features.
Louisiana Irises
Louisiana irises originated in the Southern United States, and their graceful blooms display that regional heritage well. Louisiana iris flowers come in stunning shades of bright purple, radiant yellows, and striking bluish hues ranging from pale powder blue to deep indigo. Their vibrant colors and fondness of soggy soil make them perfect choices for poolside planting.
Dutch Irises
Dutch irises are among the first irises to bloom in the spring garden. Their dainty size but vivid purple, lavender, icy blue and golden yellow coloration have made them floral industry favorites as cut flowers. Dutch irises are also very easy to cultivate in containers, making them fantastic options for gardeners short on space.

Key Considerations for Climate and Growing Zone Suitability
Irises grow well across a wide range of gardening zones and climate types. However, ideal growing conditions can vary quite a bit between iris species and cultivars.
When selecting which irises to purchase and incorporate into the residential garden, gardners should consider the following environmental factors:
Sun Exposure
While most types of irises need a minimum of six hours of direct sunlight per day, a few varieties can tolerate partial shade quite well. Carefully evaluate the sunlight exposure patterns in your prospective planting area before deciding which iris varieties to choose.
Preferred Soil Moisture Levels
Different iris species and cultivars have quite varying preferences on soil moisture levels. Some demand consistently drier soil while others thrive in muckier consistently wet conditions. Select iris varieties best suited to match the natural moisture level tendencies of the garden beds they will be planted into. Doing so saves the gardener from having to heavily amend the soil.
Cold Hardiness Ratings
When selecting irises, pay close attention to each variety’s cold hardiness zone rating. Choose only varieties rated to be fully winter hardy in your specific planting zone. Attempting to grow non-adapted plants almost never ends well.
Heat Tolerance
Some types of bearded irises can struggle during hot summers, while Louisiana and Pacific Coast native irises are much better adapted to sweltering temperatures. When summers in your area tend to be extremely hot, Louisiana and Pacific Coast natives make for more reliably vigorous choices.

Preparing for Planting
Properly preparing for iris planting during the preceding season or seasons sets the gardener up for long-term success. Ensuring ideal growing conditions are in place before ever setting a bulb or rhizome into the ground gives the irises the very best chance to grow into landscape showstoppers.
Much of the advance planning focuses on two primary areas – getting the soil composition right and providing adequate sunlight exposure. Taking the time to get these two factors fully prepared forms a sturdy foundation that supports healthy, thriving plants.
Soil Composition Preparation
Irises need soil that drains readily while still retaining some moisture. To prepare iris planting beds:
- Loosen the top 12 inches of existing soil using a garden fork, rototiller or shovel
- Mix 2 to 4 inches of finished compost, well-aged manure, peat moss or well-rotted wood chips into the soil to improve moisture retention and nutrition
- Use a soil testing kit to determine the planting bed’s pH levels, adjusting mineral content to achieve slightly acidic to neutral readings
Taking these soil preparation steps well in advance of planting gives the beds time to settle and stabilize. Thoroughly amending soil also encourages the extensive root system development rhizomatous irises need to support profuse growth and flowering. Well-prepped soil equals abundant bloom returns down the road.
Sun Exposure Planning
With only a couple varietal group exceptions, the vast majority of irises thrive best in garden beds situated in full sun locations. When preparing where to situate new iris plantings, carefully consider the following solar exposure factors:
- Full sun = At least 6 hours of direct sun hitting the planting bed daily
- Morning sunlight is particularly beneficial
- A few iris types can make due with light afternoon shade
- Avoid planting irises in areas that receive no direct sun exposure at all
Meeting irises’ high sunlight demand is the key to achieving lush foliage growth, strong and sturdy bloom stalks, and fully intense flower colors. Ensuring the planting site doesn’t have sunlight blocked by the shadows of buildings, trees and shrubs is too often overlooked yet absolutely vital to success.
Gardeners who carefully plan out beds sited or adapted to receive plentiful sunshine give their future irises the best advantage. Once planted in the right spot, they’ll thrive for years to come.
Mastering Iris Planting Techniques
The origins of those delightful iris blossoms arise from below ground, contained either within bulbs, tubers, or rhizomes depending on the variety. To properly establish these geophytes in the garden for abundant flowering, certain ideal timeframes and reliable planting methods should be followed.
Ideal Timeframes for Planting
Paying attention to timing considerations when incorporating new plants into the garden means much higher success rates.
General iris planting guidelines include:
- Spring Planting – Best suited to bulbous irises like Dutch, English, and Spanish types. Plant them early in spring as soon as soil can be worked, alongside other popular spring bulbs like daffodils and tulips.
- Summer Planting – The best time for adding new rhizomatous bearded irises is usually during the months of July and August, after the spring-blooming bulb types have completed their floral display.
- Fall Planting – Alternatively, planting bearded iris rhizomes in September or October works well in most temperate regions. This fall planting time frame gives rhizomes several weeks to establish roots before growth shuts down for winter dormancy.
For easiest success and least transplant shock, plan to incorporate new irises into prepared garden beds roughly 4-6 weeks preceding your winter’s first expected frost date. Mid-winter planting is tough on transplants while late fall planting may not give roots enough warmer weather days to fully anchor plants before hard freezes begin.
Step-By-Step Iris Planting Methodology
Follow this straightforward stepwise iris planting method for reliably robust establishment:
- Prepare Soil First – Loosen existing soil down 12 inches deep via double-digging, then mix 2 to 4 inches of organic compost or high-quality bagged topsoil evenly throughout the planting bed. Break down large clumps and smooth rake beds when finished amending.
- Dig Properly Sized Holes – Excavate planting holes at least wide and deep enough to fully accommodate each new rhizome or bulb while allowing adequate room for roots to spread outwards without crowding. Space holes 12-18 inches apart dependent upon expected mature plant width.
- Place Rhizomes/Bulbs Carefully – Arrange bulbs in holes with their pointed growing tips facing skywards. Settling bearded iris rhizomes into their holes calls for orienting wide, fan-shaped leaf clusters to sit just at or barely below soil level with fleshier roots facing downwards into soil below. Take care not to plant rhizomes too deeply.
- Backfill Holes – Refill holes with the amended garden soil, being certain to eliminate air pockets around roots or bulbs. Gently yet firmly pack soil to anchor plants.
- Water Liberally Immediately – As soon as planting is complete, liberally water the entire planting bed until the soil is fully saturated both around and beneath each rhizome or bulb. This initial thorough soaking settles soil particles closely around the roots and bulbs to promote easier establishment.
Properly matching ideal iris planting timing guidance with reliable garden bed preparation steps and hole/planting depth plant by plant gives your new investment the very best beginning foundation. Master this integrated planting approach for vibrancy flowering for years to follow!
Caring for Irises Through the Seasons
Keep iris plantings looking their absolute best by understanding and faithfully addressing essential care needs aligned with each season:
Spring Care Priorities
Spring is iris growth awakening time. Focus spring efforts on:
- Remove any leaf debris around emerging green shoots
- Scout for early signs of pests or disease
- Apply pre-emergent organic herbicide to control weeds
- Water thoroughly if rains are insufficient
- Mix slow-release granular fertilizer into soil when foliage reaches 4-6” tall
- Monitor for adequate moisture weekly until blooming finishes
Attentive spring iris care ensures nourished, vigorous summer performance.
Summer Care Goals
Bearded iris summer care should focus on:
- Promptly deadheading spent blooms by snapping or cutting off flowers stalks back down to the rhizome
- Continuing deep weekly watering to encourage strong reblooming
- Ongoing pest monitoring with immediately tackling any emerging issues
- Holding off on fertilizing again until autumn
- Refraining from transplanting or dividing summer-active irises until fall
Diligent summer care keeps plantings powering through the hot and heavy iris bloom season.
Fall Care Checklist
As autumn approaches, shift fall care efforts toward:
- Mostly ceasing watering except during extreme dry spells
- Cutting back yellowing leaves as they naturally die back
- Lifting and dividing overgrown clumps early in the fall
- Selecting, preparing and planting any new iris rhizomes within ideal fall timing
- Applying final balanced fertilizer feeding just before winter dormancy sets in
- Adding protective winter mulch layers after several hard frosts hit
Attentive fall preparations help iris plantings rest and recharge over winter.
Gardeners who stay on top of best practices aligned with seasonal needs will be rewarded with vibrant color spring after spring in their well-cared for iris beds.

Propagating Irises to Expand Collections
Avid iris growers can easily increase garden plantings for free through reliable propagation techniques. Methods like rhizome division and seed harvesting allow building expanded plantings of favored heirloom varieties already thriving on site.
Propagation also allows gardeners to more affordably amass new-to-you iris varieties by producing higher volumes to trade or share locally with fellow enthusiasts. Plus propagating offers opportunities to create your very own new iris hybrids.
Dividing Existing Iris Clumps
Most types of mature iris plants grown in garden soils appreciate getting divided every 3 to 5 years. This periodic division process keeps growth vigorous by preventing overcrowding of the underground roots and rhizomes.
Follow this straightforward approach when dividing iris clumps:
When to Divide – Dig up and divide iris clumps soon after the last blooms of spring or early summer fade away. Avoid transplanting during hottest weather.
How to Divide Properly
- Carefully excavate the entire iris clump out using a garden fork, loosening dirt but keeping the mass intact.
- Gently shake off excess soil still clinging to prevent damaging brittle rhizomes. Optionally lightly rinse if very muddy.
- Trim away any severely damaged or diseased portions of rhizomes and root mass along with removing ragged leaf fans.
- Slice the tangled root mass into smaller individual rhizome pieces, ensuring that each new division has some healthy white roots attached and an intact fan of leaves.
- Replant divisions 12 to 18 inches apart atop ridges in organically enriched, well-drained soil. Aim to settle their roots back to just below but not buried too deeply beneath the soil surface.
Post-Planting Care – Water new divisions very well and keep soil moist but not muddy until plants show new growth. This prevents stress and supports easier re-establishment.
When divided properly iris plants suffer little shock and within 1-2 growing seasons will regain mature size. Their thank you will be in brighter, more prolific recurring bloom.
Harvesting and Storing Iris Seeds
Seed propagation offers patient gardeners unique opportunities to grow new iris hybrids with amazing flower colors or forms. Saving seeds for sowing follows a simple sequence:
Seed Collection
- Allow spent blooms to remain on plants forming green seed pods once petals drop.
- Monitor pods until they turn yellowish and split partly open when seeds are ripe.
- Carefully gather dry seed pods as they keep maturing and place them into paper bags labeled by variety.
Seed Processing and Storage
- Further dry collected seed pods indoors for 3 to 4 more weeks until light and crispy brown.
- Crush thoroughly dried pods over a mesh screen to separate out seeds from pod shell debris.
- Place cleaned seeds in envelopes or jars clearly labeled by iris variety and color.
- Store the seeds somewhere completely dark, cool and dry until the coming spring’s sowing time.
Spring Seed Planting
- Sow harvested seeds quite thickly in containers or trays allowing for typically low germination rates. Keep moist until sprouting.
- Transplant resulting seedlings into garden beds once they reach 3-4 inches in height and exhibit a few leaves.
Growing irises from carefully collected then processed seeds offers patient gardeners delightful surprises in unique new floral forms and fantastic color combinations.

Troubleshooting Iris Growing Problems
Sometimes issues emerge while cultivating even the most resilient of plants like irises. By learning to recognize key symptoms and causes of cultural problems or diseases, growers can quickly troubleshoot arising plant health concerns.
Catching issues early when they first start appearing and promptly addressing underlying causes maximizes the efficacy of any corrective interventions. Routine garden monitoring paired with rapid response prevents minor hiccups from cascading into losing treasured plants.
What Causes Poor or No Flowering?
If an iris plant that previously bloomed well suddenly begins to produce fewer or inferior flowers – or worse fails to flower entirely – the likely primary underlying causes stem from:
- Getting too little sunlight due to new shade falling onto the planting bed
- The plant becoming seriously overcrowded by itself or neighboring plants
- Consistently missing yearly fertilizer applications
- Accidental over-fertilization burning roots or leaves
Solutions:
- Evaluate sunlight levels and airflow circulation impacts from surrounding plants. Selectively trim or transplant neighbors allowing more direct sunlight to reach struggling plants.
- Lift rhizomes and divide dense clumps into individual vigorous sections with sufficient roots and fans of leaves to support their re-establishment. Replant the healthiest divisions with improved spacing and soil nutrition.
- Apply balanced slow-release granular fertilizer yearly when new shoots emerge instead of missing seasons. Mix into soil instead of sprinkling pellets atop the bed.
With some attentive troubleshooting and amendments to growing conditions, poorly performing irises can transform back into prolific bloomers again.
What Triggers Pale Leaves?
New leaves emerging with insufficient chlorophyll pigmentation appear yellow instead of vibrant green. This yellowing is called chlorosis and usually stems from:
- Nutrient deficiencies in the soil, particularly not enough nitrogen or iron
- Overly alkaline soil pH preventing plants from accessing nutrients
- Damaged roots struggling to take up adequate minerals
Solutions:
- Test soil pH levels using an inexpensive home kit. Lower pH into slightly acidic levels by mixing sphagnum peat, pine needles or coffee grounds into beds.
- Boost nitrogen via amendments like alfalfa meal, blood meal or mixing in extra compost. Address iron deficiencies with chelated liquid soil drenches or by foliar feeding plants diluted Epsom salts solutions.
- Rule out root issues like rot fungi or tunneling iris borers. Discard badly infested plants with slim chances of recovery.
Attend closely to soil conditions and plant nutrition requirements for preventing leaves yellowing and compromised growth.
What Causes Leaf Spots and Plant Wilts?
Sudden collapse of leaves and whole plants along with new lesions scattered across leaves often arises from:
- Fungal or bacterial pathogen attacks brought on by excess ambient moisture
- Prolonged soil saturation preventing oxygen from reaching roots
- Insufficient soil drainage incapable of handling heavy rainfalls
Solutions:
- Rule out cultural conditions like overwatering or soils retaining excessive moisture. Improve drainage via incorporation of compost, sand or gravel and only water when the top few inches become dry.
- Remove and discard heavily infected plants as soon as first noticed before pathogens spread plant to plant. Severely infected plants seldom recover despite intensive treatment.
- Adjust irrigation practices to utilize drip lines or soaker hoses that apply water directly to soil instead of rainfall sprinklers that thoroughly soak all foliage.
While iris varieties vary in disease resistance, improving cultural conditions proactively prevents most common plant pathogens from taking hold in the first place. Maintain vigilance against infections setting in through attentive garden monitoring and care.

Celebrating Gorgeous Iris Blooms
After many months spent tending, nurturing and protecting favorite plantings through changing seasons, the long-anticipated iris blooming bonanza finally arrives come late spring! Follow these tips for reveling in maximal floral reward enjoyment:
Keep Beds Looking Sharp through Bloom Seasons
A few quick maintenance habits encourage ongoing beauty:
- Deadhead spent blooms as each finishes displaying color to maintain tidy appearance
- Use a sharp pair ofIris scissors to harvest the elegant stalks for stunning cut flower arrangements
- Discard debris promptly to limit spread of insects and pathogens
Build Upon Favorite Varieties
Add free bonus plants through:
- Dividing earlier planted mature clumps just after seasonal bloom periods wane
- Starting new plants from collected and propitiously planted seeds
Continuing to enrich iris plantings with new additions extends vibrant floral displays over more weeks of the gardening year.
Share the Wealth
Once your personal iris collections grow bountiful, share the beauty!
- Offer rhizome divisions to fellow gardening friends
- Participate in local online giveaways or plant swaps
- Set out gift potted iris plants for neighborhood enjoyment
Spread kindnesses and joys through keeping the flowery wealth circulating.
The hands-on gardening journey traveled from first iris plantings through to infinite floral displays becomes even more meaningful shared together alongside fellow enthusiasts. Bond new friendships while motivating one another to unlock ever more beautiful potential from the irises gracing your cultivated gardens.


