


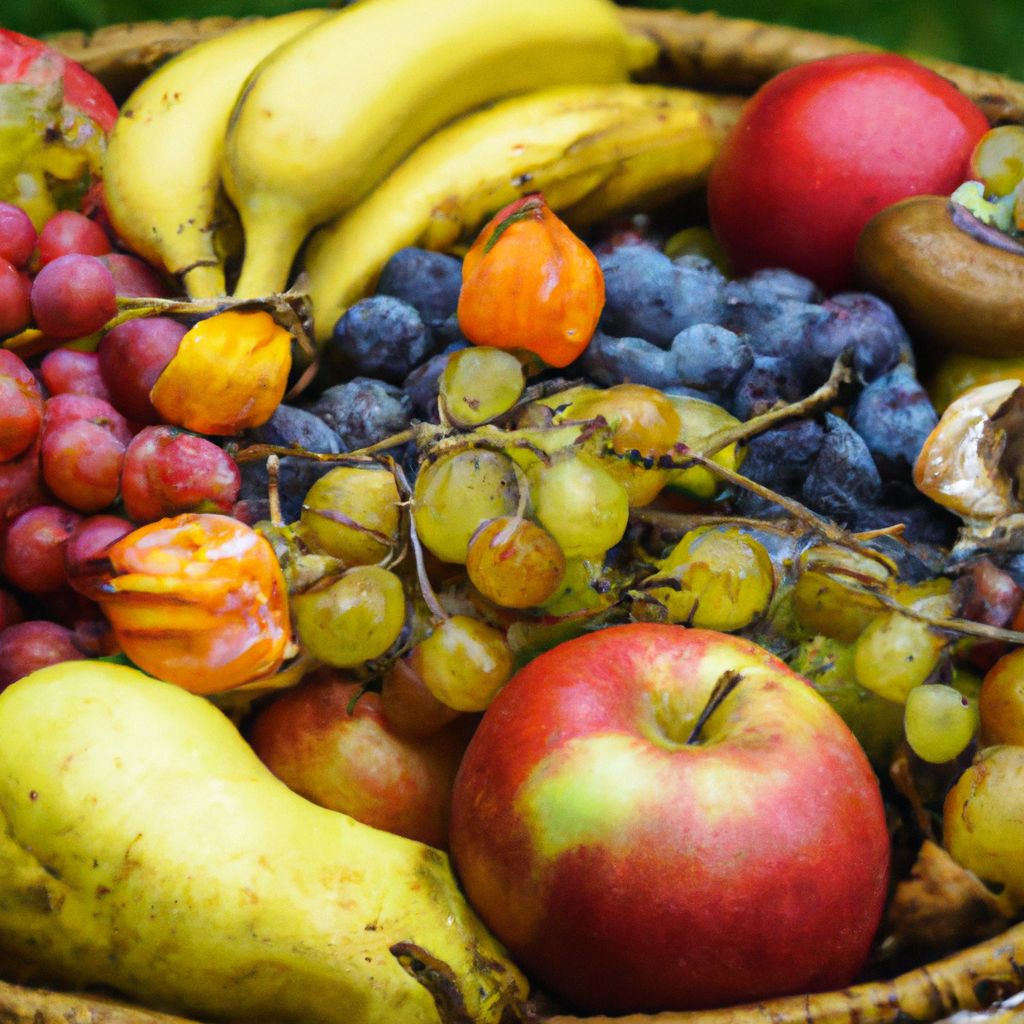
Western European homegrown fruits refer to the many delicious and nutrient-rich fruits that grow natively or thrive in the Western European climate and soil. From apples, pears, and berries to stone fruits like cherries, plums, peaches and more, Western Europe offers prime conditions for cultivating a variety of tasty fruits right at home. Read on to discover why and how to successfully nurture homegrown fruits where you live.
The Allure of Western European Homegrown Fruits
When compared to store-bought options, homegrown Western European fruits boast exceptional flavor and quality. By nurturing fruits adapted to your local climate, you can ensure optimal freshness, nutritional content, and ripe flavor profiles. Additionally, home cultivation reduces the carbon footprint associated with commercial agriculture and offers a sustainable way to enjoy pesticide-free, locally-grown produce. The rewarding experience of nurturing your own fruit trees or plants can be incredibly fulfilling.
Superior Freshness and Flavor
One of the main advantages of nurturing Western European homegrown fruits is their unparalleled freshness and rich flavor compared to store-bought varieties. Since the fruits are harvested at peak ripeness directly from your backyard or garden, they retain maximum juiciness, nutrients, and complex tastes. You have complete control over cultivating fruits ideally suited for your region’s climate, maximizing sweetness and quality.
Homegrown fruits also score higher on flavor scales by expert taste testers. In various studies comparing commercial and homegrown strawberries, tomatoes, apples and more, panels overwhelmingly preferred the homegrown versions for vibrancy, sweetness and well-balanced flavors. By skipping long supply chains, you can enjoy fruits at their flavor pinnacle.
Enhanced Nutrition and Health Benefits
In addition to flavor advantages, research shows that homegrown fruits deliver greater nutritional density and associated health perks. The shorter the time between harvest and eating fruits, the higher their vitamin and antioxidant content. One study found homegrown tomatoes contain almost double the vitamin C and 80% higher beta-carotene levels than store-bought options.
Higher antioxidant levels boost immunity, reduce inflammation and may lower disease risks. Other nutrients like folate, anthocyanins and phenolic compounds also degrade over time after picking, so homegrown fruits give you a more nutritious boost.

Lower Environmental Impact
Commercially grown fruits often require significant inputs like petrol-based fertilizers, intensive irrigation systems and plastic mulch that leave a heavy carbon footprint. Long-distance transportation from industrial farms to store shelves also burns fossil fuels and contributes emissions.
However, nurturing homegrown fruits has a drastically lower environmental impact. You can implement organic techniques to eliminate synthetic chemicals. Shorter supply chains slash transportation miles. When expanded on a larger scale, homegrown cultivation could significantly mitigate climate change impacts of industrial agriculture.
Cost Savings
Although homegrown fruits require an initial investment of time, labor and resources to plant and nurture, over the long run they provide very tangible cost savings. Once fruit trees or plants are established after 2-4 years, they can bear bountiful harvests for decades with proper care. The cost per pound, bushel or kilo of homegrown fruits is a fraction of retail prices. Preserving excess fruits from bumper crops through freezing, canning or other methods allows you to enjoy seasonal flavors year-round.
Sense of Pride and Accomplishment
For many gardeners, few things match the satisfaction of biting into a perfect, ripe peach or berry nurtured with your own two hands. Home fruit growing provides a therapeutic creative outlet to try new varieties, experiment with organic techniques and continually refine your green thumb skills. The sense of wonder when fruit trees burst into colorful blooms or heavy clusters of plums and cherries weigh down branches cannot be replicated. Being intimately connected to the seasonal rhythms of growth instills pride in supporting your family with nourishing foods grown through diligent nurturing.
Preparing Your Soil for Fruit Cultivation
Proper soil preparation lays the foundation for successfully growing European fruits at home. Most varieties thrive in nutrient-rich, well-drained soil with a slightly acidic to neutral pH around 6-7. Prior to planting, test and amend your soil accordingly by incorporating compost or organic matter to optimize nutrients and texture for healthy root systems.
Soil Requirements
Understanding the ideal soil conditions for Western European homegrown fruits is the first step in preparation. While specific needs vary for different fruits, most require fertile, well-drained soil to thrive. Here are the key characteristics to promote optimal growth:
Well-drained: Waterlogged soil encourages fungal root rot and impedes nutrient absorption. Adding organic materials like compost, manure, leaf mold and peat moss creates air pockets for drainage. Incorporating coarse sand or small gravel can also improve permeability.
Rich Organic Matter: Organic matter serves as food for essential soil organisms that recycle nutrients into plant-accessible forms. Aim for 5-10% organic content. Compost, manure, leaves and cover crops are great sources.
Balanced pH: Most European fruits grow best in slightly acidic soil with a pH around 6-6.5. Exceptionally acidic or alkaline conditions make critical nutrients unavailable for uptake by plants. Test soil pH and amend as needed.
Loose Texture: Compacted soil restricts root development and oxygen circulation. Rototilling or double digging yearly helps loosen dense soil. Adding organic bulking agents can also improve texture long-term.
Free of Weeds/Debris: Get a head start on weed control by removing roots of perennial weeds before planting. Eliminate debris like rocks and building materials that could impede planting.
By understanding and providing the ideal growing conditions, you give your fruits the highest chance of success. Test your soil’s current characteristics and make any necessary improvements before planting.
Soil Testing
An important step before amending and planting is testing your soil to identify current nutrient levels, organic matter content, pH and other properties. At-home soil test kids provide basic readings, or you can utilize professional lab services for in-depth analysis including customized improvement recommendations.
Here are the key indicators you want lab results for:
- Texture: Ratio of sand, silt and clay particles. Ideal fruit soil texture is loam or sandy loam.
- Organic matter %: Shoot for minimum 5-10% for nutrient reserves and moisture retention.
- pH: Target slightly acidic pH 6-6.5. Amend if outside this optimal range.
- Macronutrients: Major nutrients like nitrogen, phosphorus and potassium should be balanced.
- Micronutrients: Test for sufficient but not excessive secondary/minor nutrients.
- Cation exchange capacity (CEC): Ability to retain positively charged nutrient ions. Higher is better.
Once test results are available, you can zero in on any deficient areas needing improvement before planting your fruits. For example, low nitrogen levels would indicate applying high-nitrogen compost. An ideal soil test equips you with a blueprint for amendments.
Soil Amendment
Depending on your soil test results, a variety of amendments may be necessary to create optimal growing conditions. Here are some common improvement techniques:
Compost/Organic Matter: Mix in 1-3 inches of quality compost or manure to boost nutrients and feed soil biology.
pH Adjusters: Lower pH with elemental sulfur for acidic lovers like blueberries. Raise pH with limestone for fruits preferring alkaline soils.
Biochar: Enhances nutrient and water retention for long-term soil building.
Cover Cropping: Sow nitrogen-fixing crops like clover or buckwheat to enrich soil fertility.
Sand/Peat: Blend into heavy clay soils to lighten texture for drainage and root growth.
Mycorrhizae: Beneficial root fungi that expand nutrient and water uptake. Great for new plantings.
Wood Ash: Provides potash, calcium, magnesium and raises pH slightly.
Bone/Blood Meal: Fast-acting organic fertilizers high in phosphorus and nitrogen.
Regularly retest your soil after making significant amendments. It may take some seasons of tweaking to reach the sweet spot! But proactive improvement pays dividends through healthier, more productive plants.

Selecting Fruit Varieties
When choosing homegrown fruits, select varieties proven to thrive in your specific region of Western Europe. Prioritize disease-resistant cultivars suited for local climate and soil qualities. Consider ripening times, yield, and intended use when deciding what to grow.
Climate Considerations
Western Europe encompasses a diversity of microclimates – from cool, wet maritime zones to hot, dry Mediterranean areas. Carefully match fruits to your local precipitation patterns, temperatures, frost dates and other climate factors for success.
For example, late-blooming apple varieties like Braeburn and Jonagold perform well in colder northern regions more prone to spring frosts. Meanwhile, heat-loving persimmons and figs require a long warm season to properly ripen. Talk to experienced local growers or consult regional planting calendars for site-specific recommendations.
Popular Varieties
Here are some beloved, time-tested varieties for different Western European regions:
Apples
- Braeburn – high yielding; stores well
- Elstar – sweet, low acidity
- Topaz – disease resistant; fresh eating
Pears
- Comice – succulent, smooth texture
- Concorde – high yields; multi-use
- Conference – exceptional flavor; stores well
Stone Fruits
- Sweetheart cherries – excellent pollinator
- Santa Rosa plums – tolerant to brown rot
- Moorpark apricots – cold hardy; great for cooking
Berries
- Tulameen raspberries – large, sweet berries
- Bluecrop blueberries – all-purpose; heavy yields
- AlbiNorella Strawberries – highly productive; disease resistant
This list highlights fruits selected for traits like cold hardiness, disease/pest resistance, productivity, shelf life, balanced flavor and regional adaptability. Consult local nurseries, university extension offices or master gardeners on additional options tailored for your specific area.
Intended Use
Think ahead to how you plan to enjoy the fruits. Certain varieties store better for winter use or hold their shape when cooked or preserved. If you want fruit for fresh eating, prioritize exceptional sweetness and texture. Plan to make lots of pies or jams? Select high yielding, aromatic varieties ideal for baking. Have kids who quickly gobble up berries straight from the plant? Lean towards continuously fruiting plants for frequent snacking. Matching fruits to their end purpose results in the most satisfaction.

Planting Your Fruit Trees/Plants
Once you select suitable varieties, proper planting gives your fruits the healthiest start. Carefully follow best practices for site selection, timing, digging holes, positioning, backfilling, and providing support structures.
Site Selection
Choosing an appropriate planting site is a foundational decision, so evaluate these factors:
Sunlight: Most fruits need 6-8 hours of direct sun daily. Track light exposure over a full growing season.
Soil & Drainage: Pick a spot with fertile, well-draining soil you have tested and amended.
Air Circulation: Allow ample space between plants for air to circulate freely.
Water Access: Nearby irrigation access simplifies watering duties.
Protection: Position shelterbelts or protective fencing if wildlife browsing, theft or vandalism are concerns.
Space: Check recommended mature sizes and space plants accordingly. Avoid shading other plants.
Identify potential frost pockets, soaked areas or other microclimate risks on your property and avoid planting there. When sizing your home orchard or berry patch, start small for manageability.
Timing Considerations
When planting bareroot or potted material, timing matters! Here are optimal time frames:
Spring: Plant as soon as soil is workable and danger of severe frosts has passed.
Fall: Plant 6-8 weeks before first expected fall frost so roots establish before winter dormancy.
Containerized plants offer more planting flexibility. But target spring or fall seasons for best survival and first year growth of all new plantings if possible.
Planting Steps
Follow this checklist when adding new fruits to your landscape:
Dig Wide Holes: Dig at least 2-3 times wider than the root ball with sloping sides to encourage outward root growth. Depth equals the root ball.
Score Roots: If pot-bound, gently loosen any circled exterior roots before planting to encourage spreading.
Place Plant: Set into hole at same depth as pot, keeping the root flare visible. Remove any graft union protectors.
Backfill Soil: Refill hole with native soil, tamping periodically to stabilize. Avoid amendments which can burn young roots.
Water Thoroughly: Water deeply immediately after planting and regularly thereafter for fastest establishment.
Fertilize: Apply an organic fruit tree fertilizer or compost/manure tea approximately one month after planting when roots recover.
Support: Install support structures like stakes or trellises if needed.
Follow these guidelines carefully to get your plants off on the right foot!

Caring For Your Fruit Trees & Plants
While soil prep and planting are critical first steps, attentive aftercare determines the ultimate success or failure of homegrown fruits. Proper watering, pruning/training, and pest management require understanding plant needs and timely intervention.
After Planting Care
The first year after installing new fruits sets the tone for your plants’ long-term health and vigor. Prioritize these practices while roots establish:
Weed Control: Mulch basin after watering to smother weeds. Hand pull those that emerge.
Watering: Supply supplemental water for at least the first two years until extensive roots develop.
Fertilization: Continue applying balanced organic fertilizer or compost early in the second growing season.
Protect Trunk: Wrap young tree trunks to prevent sunscald, frost cracks or rodent damage during establishment.
Pest Monitoring: Inspect regularly and apply organic treatments promptly against early infestations. Catch issues before they escalate!
Minimal Pruning: Limit pruning to corrective shaping or removing broken/diseased branches as needed early on.
With attentive early care, your plants will transition more smoothly into mature, fruit-bearing specimens.
Watering Practices
The old adage “the first year they sleep, the second they creep, the third they leap” reflects the extensive root system development fruits undergo before exploding with growth. Make sure water needs are met at every stage:
New Transplants: Water thoroughly at planting and 2-3 times per week thereafter depending on weather, monitoring soil moisture at perimeter of root zone.
Established Plants: Weekly deep watering is typically sufficient for mature plants depending on rainfall minus evaporation. Soak the entire root zone.
Fruiting Plants: Just prior to and during the peak harvest window, plants benefit from additional water to size fruit. Monitor soil and tree cues like leaf droop.
Prolonged Dry Periods: Increase frequency during drought and consider setting up drip irrigation or soaker hoses.
Drainage Issues: Redirect downspouts away from tree/plant bases and improve soil composition to prevent waterlogging.
Tailor watering routines to actual conditions and err on the side of slightly drier rather than overly soggy soils. Fruit plants are resilient!
Pruning & Training Basics
Left totally alone, fruit trees grow into thickets of tangled, unproductive branches. Through regular pruning and training, you can regulate size, shape plants strategically, improve yields and support plant health.
Here are key goals and guidelines:
Establish Strong Structure: Train central leaders on young trees or cut secondary shoots to favor outward scaffold branches that support fruiting wood.
Open Centers: Allow sunlight penetration by conservatively thinning inner branches over time.
Control Height: For accessibility, prune trees like dwarf apples annually to limit size where necessary.
Remove Diseased Wood: Always prune out dead/damaged branches and sanitize tools between cuts with diluted alcohol.
Stimulate New Growth: Thin older non-productive wood to force new fruiting wood emergence.
Timing Is Key: Prune at the right stage of dormancy for your climate – early spring where winters are cold; winter in mild zones.
Start conservatively removing the worst offenders. With experience, you will develop an intuitive sense for strategically shaping plants. Done right, pruning and early training pays exponential dividends!
Dealing With Pests & Disease
Left unchecked, various unwelcome critters and pathogens can infest fruits, spreading issues rapidly to other plants. Exercise preventative vigilance and quick control measures using earth-friendly approaches:
Routine Scouting: Walk planting beds frequently looking for early signs of infestation like chewed leaves, spots/cankers on wood, distorted plant parts etc. Catch issues early!
Identify Culprits: Correct ID ensures using the right organic control measures. Common fruit pests include coddling moth (apples/pears), plum curculio (stone fruits), various borers, mites and more. Diseases like fire blight (apples/pears), black knot (plums) or brown rot (stone fruits) also frequently crop up. Understand your enemy!
Sanitation Matters: Rake up decomposing fruits/prunings hiding overwintering pests. Sterilize tools and wash hands thoroughly before working with different plants.
Encourage Beneficials: Welcome ladybugs, lacewings, birds and bats who feed on harmful insects. Avoid broad spectrum chemicals that harm pollinators and other helpful creatures.
Organic Sprays: Use certified organic insecticidal soaps, neem/horticultural oils, BT (bacillus thuringiensis) products and other non-toxic treatments against outbreaks after identifying the specific pest or disease at hand.
Remain alert to nip issues in the bud before they take over plantings. An ounce of prevention is worth a pound of cure when it comes to fruit-threatening predators and diseases.

Harvesting Your Fruits
After patient years nurturing plants from dormant whips or bare roots to maturity, the ultimate payoff arrives – harvest time! Follow best practices for identifying optimum ripeness and maximizing flavorful yields from your homegrown fruits.
Signs of Peak Ripeness
Determining the perfect moment to pick fruits requires close observation and experience. Monitor these indicators:
Color Change: Fruits transition from green to vibrant, deep shades when ripe like red apples or golden yellow peaches. Berries turn translucent.
Fruit Loosening: Ripe fruits separate easily from stems with light twisting versus resistant tugging on unripe ones.
Aroma: Fragrant scents become noticeable as sugars develop. Ripe berries or stone fruits will smell sweet.
Soft Spots: Gentle pressure yields slightly to the touch instead of rigid firmness in mature fruits. Cherries/plums feel plump.
Taste Tests: Sampling random fruits off trees or vines gives the best sense of sweetness. Just don’t get carried away before harvest!
Seed Color: Inside flesh, dark brown fertile seeds signal readiness over pale green Infertile ones in certain fruits like peppers and tomatoes.
Historical Timing: Experienced growers track prior year’s harvest dates to anticipate windows for checking specific varieties based on weather shifts.
Balancing patience allowing fruits to fully ripen with harvesting before critters beat you requires season-long vigilance. But ideal timing brings sweet rewards!
Harvesting Methods
Collecting ripe fruits requires a delicate touch to avoid bruising delicate skin or damaging plants:
Hand Pick Carefully: Gently twist/lift fruits off stems or branches. Take care not to yank limbs askew. Use both hands to cradle heavy stone fruits.
Pruners: Snip the slim stems attaching apples, pears or stone fruits instead of pulling if they resist detaching easily by hand.
Catch Baskets/Trays: Set baskets lined with soft linens/newspapers below branches and gently shake limbs to release ripe fruits. Prevents smash damage from hitting the ground.
Morning Harvests: Pick in early daylight hours after dew dries when fruits reach room temp but avoid hot mid-day harvesting to prevent scalding.
Be Thorough: Scan interior branches as easily visible low-hanging fruits often get picked prematurely. Hidden gems await discovery!
Clean Up Debris: Gather up any fruits that drop and dispose of in sealed containers away from gardens ASAP to deny pests habitat.
Avoid overhandling delicate fruits like berries that crush or mold easily. Other hardy varieties store better with stems left intact until prep and eating to seal in moisture. Treat every fruit with care from start to finish!

Post Harvest Storage & Usage
Figuring out storage methods prolonging your harvest depends on intended usage plans. Savor fresh-off-the-branch flavor ASAP with more delicate berries and stone fruits or process hearty caps to stock your pantry year-round.
Short Term Fresh Storage
For maximum juiciness and sweetness, enjoy freshly harvested fruits as soon as possible. These tips optimize short term storage spanning a few days to weeks:
Refrigeration: Store ripening stone fruit/berries in crisper drawers. Apples, pears and citrus fare better at room temp initially until just before eating.
Intact Stems/Leaves: Leave stems attached to fruits like tomatoes until prep time to seal in moisture and slow decay. Trim berry caps but keep hulls on strawberries if washing right before eating.
Sorted & Sanitized Containers: Clean all containers thoroughly first and avoid piling fruits to prevent accelerated spoilage. Inspect for any molding/damaged fruits and remove.
Ideal Conditions: Maintain high humidity around 90% for fresh fruits. Mist occasionally or wrap berries in paper towels in perforated plastic bags. Apples give off ethylene gas speeding ripening of nearby produce, so isolate alone.
Plan to use ripe stone fruits and delicate berries quickly. Heartier apples and citrus keep fresher longer. Taste test older stored fruits before eating/cooking.
Preservation Methods
When dealing with an overflowing bounty, extend shelf life through various processing techniques:
Freezing: Blanch firm fruits briefly in boiling water/syrup before freezing in airtight containers. Works well for berries (spread flat first for easy thawing), stone fruits, sliced apples.
Canning: Sterilize mason jars then seal cooked jams, butters, pie filling, sauces and more while piping hot. Natural pectin rich fruits like berries and stone fruits are perfect candidates.
Drying/Dehydrating: Remove moisture by drying rings, halves, slices or leathers consistently at 130-140 degrees Fahrenheit until pliable and fruit reaches desired density.
Juicing/Pureeing: Process excess fruits into concentrated juice or smooth purees. Some pulpy purees like mashed berries freeze well compared to separable juices.
Cold Storage: Some thick-skinned fruits like apples hold up to cold, humid conditions for months. Maintain temperatures around 32-40 degrees Fahrenheit in cold cellars/storerooms.
Get the maximum mileage from finite harvests using smart preservation techniques!
Using Your Fruits
Beyond snacking straight off the stem, homegrown fruits shine incorporated into all types of sweet and savory recipes:
Baked Goods: Raspberry glazed scones, plum clafoutis tartlets, cherry cobbler and countless other desserts welcome intensely flavored fruits.
Jams & Preserves: Capture the summery essence of strawberries, apricots, currants and more by boiling into glistening preserved spreads.
Fruit Salads: Toss your melange of harvests with a zingy dressing of honey and citrus or fresh whipped cream.
Savory Dishes: Add sweet contrast to rich meats like duck or game by pairing with a sauce using berries or stone fruits.
Beverages: Infuse berry purees, peach nectar or apricot juice into sparkling waters, lemonades, teas and refreshing cocktails.
Snackables: Dehydrate fruits like apples, grapes, citrus slices or pineapple rings for nutritious crispy snacks kids devour.
Embrace fruits at every meal beyond basic dessert applications. Their versatile sweetness and textures enhance the flavors of anything they accompany!

Additional Resources
Expand your homegrown fruit knowledge with these helpful resources:
Local Extension Services: County agricultural extensions provide guidance for regional best practices from soil testing to variety selection, planting, pest control and beyond! Master gardeners also give free advice.
Farmer’s Almanac Planting Calendar: Their customized tool recommends ideal regional varieties and planting times down to your zip code.
Homesteading Forums: Connect with a community of home growers sharing advice and encouragement for both beginning and seasoned gardeners.
Regional Gardening Books: Dive deeper into fruits tailored for your microclimate with guides focusing explicitly on fruits that thrive in environments similar to yours.
Nurseries/Orchards: Staff experience yields hidden gems of wisdom! Take advantage of pros who live, breathe and specialize in fruits daily.
Growing fruits may seem complicated but with the right guidance and persistence, the sweet taste of success awaits! Both tap personalized help and continue expanding your overall knowledge base.


