


Blackcurrants are a delightful berry bush that can be a rewarding addition to any garden. These small, deep purple fruits burst with sweet-tart flavor and provide an abundance of health benefits. This comprehensive planting guide covers everything you need to know to successfully grow blackcurrants, from choosing the right varieties and preparing the soil to planting, caring for the bushes, and harvesting a bountiful crop. Follow these tips and soon you’ll be enjoying homegrown blackcurrant berries.
Why Grow Blackcurrants?
Blackcurrants offer many advantages that make them worth planting in your garden:
- They are extremely high in vitamin C and antioxidants. Just one cup provides more than 300% of your daily vitamin C needs.
- The unique sweet-tart flavor adds delicious complexity to baked goods, jams, and beverages.
- Once established, blackcurrant bushes are cold hardy and can produce for up to 20 years.
- They ripen in summer just after strawberries, extending your fruit harvest.
- Birds tend to leave blackcurrants alone since they dislike the tart taste.
Blackcurrants are prized for their high antioxidant content, particularly anthocyanins, which give them their deep purple color. Antioxidants help protect the body from damage caused by harmful free radicals. The abundance of vitamin C in blackcurrants also supports immune system health.
Incorporating blackcurrants into your diet can provide anti-inflammatory effects to help reduce risk factors for various illnesses. The anthocyanins and other polyphenols in blackcurrants confer cardioprotective benefits as well, improving blood flow and vascular function.
Beyond their nutritional value, blackcurrants simply offer a burst of dynamic, tangy flavor. Their taste is reminiscent of other berries with a unique complexity akin to black cherries or concord grapes. The sweet yet tart juice and soft texture make blackcurrants perfect for culinary preparations ranging from muffins to savory sauces.
Unlike some fruits, blackcurrants are not a favorite of birds and other wildlife due to their tartness. This makes growing them a bit easier since they are less prone to being devoured before you get to harvest. Established blackcurrant bushes are also cold hardy down to -20°F (-29°C) and below. With proper care, a single bush can remain productive for up to 20 years, making blackcurrants a long-lasting fruiting shrub for any garden.
Selecting Your Blackcurrant Varieties
With blackcurrants gaining popularity, many new varieties have emerged through selective breeding over the years. Here are some top options to consider:
- Ben Sarek: This compact bush grows only 3-4 feet tall, making it perfect for containers. The medium-sized berries are sweet and flavorful.
- Titania: An excellent choice for fresh eating, Titania produces large, juicy berries on an upright bush. It has good resistance to powdery mildew disease.
- Ben Connan: One of the heaviest yielding varieties, Ben Connan bears large, late-ripening berries on a vigorous bush. A great option for warmer climates.
- Baldwin: Valued commercially for juices and liqueurs, Baldwin yields smallish berries with an intense, rich flavor. Ideal for processing.
- Ben Nevis: A Scottish heirloom variety that offers a reliable crop of medium-sized berries. It has good all-around disease resistance.
- Ben Hope: Another Scottish heirloom known for productivity and large fruit size. The tart berries work well in jams and sauces.
- Ben Lomond: A disease-resistant variety that produces abundant yields of large, juicy berries. It does require more pruning than some other cultivars.
- Ben Tirran: A heavy cropping bush that bears medium-sized blackcurrants. It is very hardy and suited to colder growing zones.
- Consort Black: Developed in Canada, Consort Black has good cold hardiness and large, flavorful berries that ripen mid-season.
- Ben Alder: This variety yields large blackcurrants on a moderately compact bush. It has good mildew resistance.
- Ben Vuirich: A very hardy Scottish heirloom with good productivity and large berry size. Well suited to northern regions.
- Big Ben: Produces very large berries on vigorous, upright bushes. It has some susceptibility to disease.
- Titania: An excellent choice for fresh eating, Titania produces large, juicy berries on an upright bush. It has good resistance to powdery mildew disease.
- Seabrook’s Black: A late season variety that bears medium to large berries. It forms a low, spreading bush.
Key Variety Comparison
To help narrow down your blackcurrant variety selection, here is a comparison of some key features:
Ben Sarek – Compact bush perfect for containers, sweet berries
Titania – Large berries for fresh use, upright growth, mildew resistant
Ben Connan – Heavy yields, large late berries, vigorous bush
Baldwin – Small berries with rich flavor ideal for processing
Ben Nevis – Reliable yields, good disease resistance
Ben Hope – Highly productive, large tart berries great for cooking
Ben Lomond – Abundant yields, juicy berries, needs frequent pruning
Ben Tirran – Cold hardy and heavily cropping, medium berries
Consort Black – Cold hardy, large midseason berries, spreading bush
So in summary, compact varieties like Ben Sarek work well in containers, while Ben Tirran and Consort Black are great options for cold climates. For fresh eating, consider Titania or Ben Lomond, while Ben Hope and Baldwin are better suited for processing. Select a variety tailored to your specific needs and growing conditions.

Preparing the Planting Site
To set your blackcurrant bushes up for success, preparing the planting site in advance is important:
Test Soil pH
Blackcurrants prefer slightly acidic soil, with an ideal pH range of 6.0-6.5. Testing your soil pH well before planting gives you time to modify it if needed. Home testing kits are inexpensive and widely available.
Amend Soil as Necessary
If your soil pH needs adjusting, amendments can be worked into the soil a month or two prior to planting. Lime raises pH in acidic soils, while sulfur lowers pH in alkaline soils. Well-rotted compost or manure also provides organic matter to enrich the soil.
Improve Soil Nutrients
Blackcurrants thrive when the soil has adequate nitrogen, phosphorus and potassium. Have your soil tested and amend based on recommendations. Compost and manure add organic nutrients.
Weed and Clear Debris
Eliminate any weeds, rocks or debris that could compete with your blackcurrant plants. Weeds rob nutrients and moisture from the soil, so remove them thoroughly.
Improve Drainage
Blackcurrants do not tolerate wet, poorly draining soil. Install drainage tiles, build raised planting beds, or simply choose a slope over low spots prone to water collecting.
Even Out Soil
Smooth out the soil surface to eliminate dips where water can pool. Mound soil in low spots and depressions to improve drainage.
Add Support System
Install sturdy posts and anchor wires before planting to support blackcurrant bushes. This prevents branches weighed down with fruit from breaking.
By prepping your planting site in these ways, you ensure proper growing conditions for your blackcurrant bushes. The small upfront investment of time and care sets up your garden for success.
Site Selection Factors
Choosing the optimal site for your blackcurrant planting involves assessing several factors:
- Sunlight: Blackcurrants need full sun – at least 6 hours of direct sun per day.
- Soil: Well-draining, nutrient-rich soil with a pH of 6.0-6.5 is ideal.
- Drainage: Blackcurrants are prone to root rot in wet conditions.
- Air circulation: Allow at least 5-6 feet between bushes for adequate airflow.
- Competition: Avoid planting near trees and shrubs that may compete for resources.
- Convenience: Situate bushes close to your home for easy access and care.
Take the time to carefully evaluate prospective planting sites in your yard. Selecting the right location will give your blackcurrant bushes the best chance of thriving.
When and How to Plant Blackcurrants
Blackcurrants are extremely cold hardy, making them ideal for even very chilly climates. But proper timing for planting is still important:
Spring Planting
In most regions, spring is the best time to plant container-grown blackcurrants. Wait until after the threat of frost has passed and soil temperatures warm to at least 55°F (13°C). Planting too early risks cold damage to new shoots. Aim for early to mid spring once the soil can be worked easily.
Fall Planting
Where winters are cold enough to meet chilling requirements, bare-root blackcurrants can be planted in fall. This timing gives plants a chance to establish roots before the ground freezes. Plant 6-8 weeks before the first expected fall frost.
Planting Process
Dig a hole slightly wider and deeper than the root ball or bare roots. Set the plant at the same level it was growing in the nursery. Backfill with native soil, tamping down gently to remove air pockets. Water thoroughly after planting.
Spacing Needs
Allow 5-6 feet between bushes in rows spaced 5-6 feet apart. Proper spacing prevents overcrowding and allows air circulation to minimize disease.
Support and Prune
Install support posts and anchor wires for the bushes. Prune back stems by half after planting to encourage branching and fruit bud formation.
Container Planting
Blackcurrants can also be planted in containers. Use at least a 18-24 inch diameter container with drainage holes. Use a quality potting mix and situate in full sun.
Proper planting techniques give your blackcurrant bushes the healthy start they need. Taking the time to plant them correctly will pay off for years to come.
Caring for Your Blackcurrant Bushes
Caring for blackcurrants properly is key to keeping plants healthy and productive for years to come:
Watering
- Water 1-2 inches per week. More during drought and fruiting periods.
- Avoid water stress. Drought causes small berries and poor quality fruit.
- Use drip irrigation or soaker hoses to target the roots and conserve water.
- Mulch around plants to retain moisture and reduce weed growth.
Pruning
- Prune annually to stimulate new growth and maximize berry yields.
- Remove dead, damaged or diseased wood anytime.
- Thin crowded branches to allow light and air penetration.
- Limit plants to 6-8 main branches through pruning.
Fertilizing
- Fertilize each spring with organic balanced fertilizer.
- Work compost into soil annually to maintain nutrients.
- Avoid high nitrogen fertilizers that cause excessive foliage growth.
Pest Control
- Monitor for pests like aphids, sawfly larvae, mites.
- Remove pests by hand or use a strong spray of water.
- Apply neem oil or insecticidal soap for heavy infestations.
- Use floating row covers as a preventive barrier.
Weed Control
- Mulch around plants to suppress weeds.
- Hand pull weeds, taking care not to disturb roots.
- Maintain 2-3 inches of organic mulch. Replenish as needed.
With attentive care throughout the seasons, your blackcurrant bushes will thrive for decades. Establishing good care practices early on ensures your plants get off to the right start.
Ongoing Maintenance
Caring for established blackcurrant bushes involves regular maintenance:
- Check soil moisture weekly and water as needed.
- Fertilize each spring and replenish mulch.
- Prune annually to stimulate fruiting wood and remove old branches.
- Scout for pests and diseases. Take control measures as needed.
- Renew trellising and wires to support fruiting branches.
- Weed around bushes to reduce competition for nutrients.
- Harvest ripe berries promptly to avoid fruit drop.
- Remove suckers and weak shoots to maintain plant shape.
- Protect plants from harsh winter weather if needed.
- Clear fallen leaves and debris from around plants.
- Assess overall vigor and fruit productivity.
With routine care and maintenance, your blackcurrant planting will continue providing abundant harvests.

Harvesting and Enjoying Blackcurrants
The payoff for all your nurturing care comes at harvest time, when you can enjoy fresh blackcurrants at their flavorful best:
When to Harvest
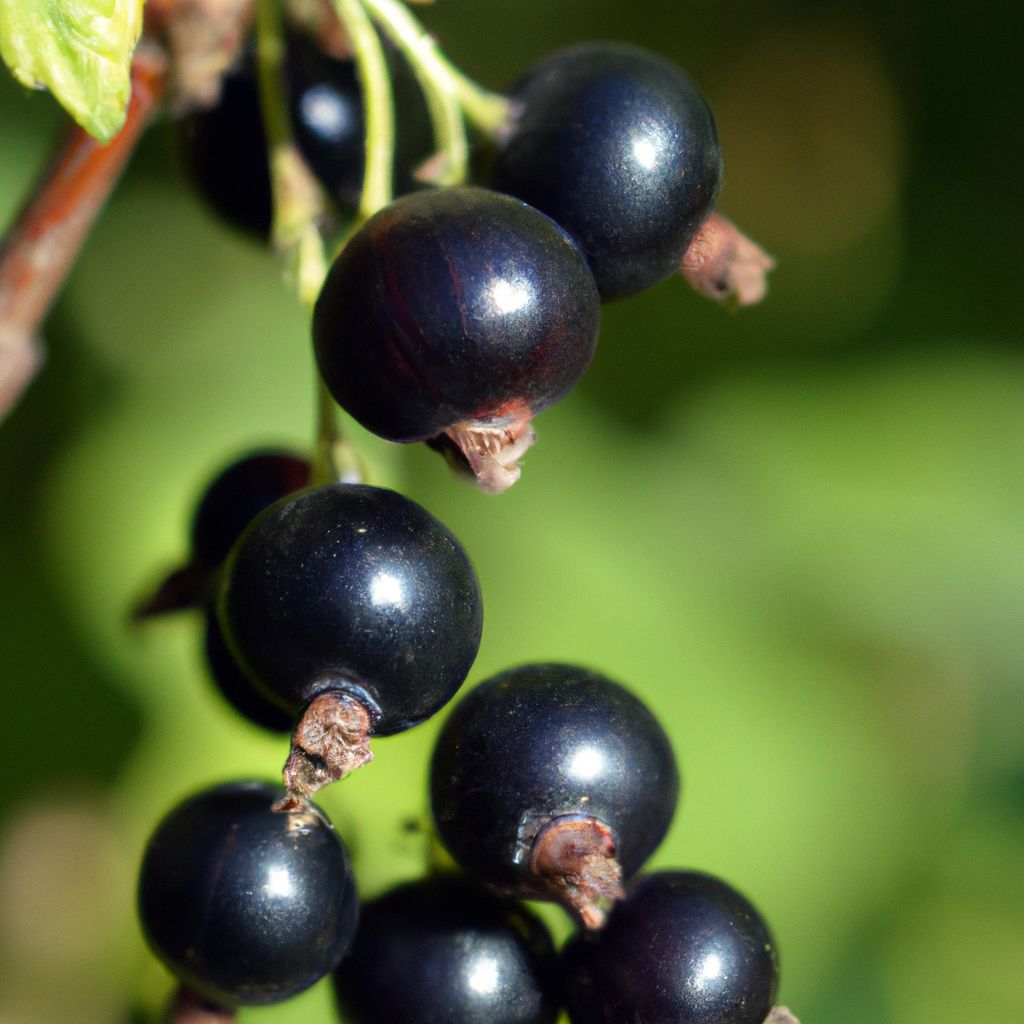
- Harvest blackcurrants when the fruits turn glossy black.
- Flavor peaks 7-10 days after fruits first turn black.
- Pick individual berries or cut entire fruit clusters.
- Harvest berries during cool, dry morning hours.
How to Harvest
- Use clippers or pruning shears to cut fruit clusters from the main stems.
- Gently place picked berries into a basket or tray to avoid crushing.
- Spread a tarp under bushes to collect fallen berries.
Storage
- Store unwashed blackcurrants in a single layer no more than 3 berries deep.
- Refrigerate promptly in airtight containers. Berries last 1-2 weeks.
- Freeze excess harvested berries spread singly on cookie sheets before transferring to bags.
Culinary Uses
Enjoy blackcurrants fresh or use them in:
- Jams, jellies, compotes
- Juices, ice pops, coolers
- Pies, tarts, muffins, scones
- Yogurt, ice cream, smoothies
- Sauces for meats and desserts
- Wine, liqueurs, cocktails
With proper harvesting technique and a bit of creativity, blackcurrants offer a world of possibilities both fresh and preserved. The sky’s the limit for using their vibrant flavor.
Harvesting Tips
Follow these tips for successfully harvesting your blackcurrant crop:
- Harvest early in the day when berries are cool and dry.
- Use clean, sanitized containers and avoid overfilling.
- Remove any damaged, crushed, or moldy berries promptly.
- Don’t leave harvested berries sitting in sun or heat.
- Refrigerate berries as soon as possible after picking.
- Handle berries gently to avoid bruising.
- Wear gloves to protect hands from stains.
- Cut berries rather than pulling to avoid damaging bushes.
- Pick berries at their peak ripeness for full flavor.
With the proper harvesting techniques, you’ll be able to enjoy blackcurrants at their most delicious straight from your backyard.
Troubleshooting Common Problems
While generally tough plants, blackcurrants can encounter a few issues:
Preventing Disease
Good cultural practices go a long way in preventing disease issues:
- Select resistant varieties when available
- Improve air circulation around plants
- Practice crop rotation from year to year
- Remove and destroy diseased plant material
- Water at the base of plants to keep foliage dry
- Scout regularly for early signs of problems
- Sanitize pruning tools between cuts
- Allow proper spacing between plants
- Avoid overhead watering on foliage
Treating Leaf Spot Diseases
Leaf spot diseases like anthracnose, rust, and leaf blight can mar blackcurrant foliage. Treatment involves:
- Promptly removing and destroying infected leaves.
- Applying appropriate fungicide sprays at first onset.
- Improving air flow around plants.
- Watering at the base and keeping foliage dry.
- Raking up and disposing fallen leaves.
Combatting Mildew
Powdery or downy mildew can affect blackcurrants during wet conditions:
- Plant resistant varieties like Titania.
- Prune for openness and air circulation.
- Remove and destroy infected plant parts.
- Apply sulfur fungicide spray preventively.
- Avoid overhead watering that wets foliage.
- Thin plants and suckers to improve airflow.
Managing Reversion Disease
Reversion disease causes reduced yields and plant decline:
- Plant resistant varieties like Ben Sarek.
- Disinfect pruning tools after each cut.
- Prune out affected shoots well below visible symptoms.
- Remove and destroy all nearby wild currants and gooseberries.
- Do not replant currants and gooseberries in the same soil.
By taking preventive cultural measures and promptly treating issues as they arise, your blackcurrant bushes can thrive and remain productive for years to come. Be sure to identify specific disease and pest problems accurately so you can apply the proper organic control practices. Your local extension office is a great resource if you need help diagnosing issues.
Growing Blackcurrants Organically
Blackcurrants are well-suited for organic production. Here are some tips:
Start with Healthy Plants
Source certified disease-free plants from reputable organic nurseries. This gives bushes the healthiest start.
Build Soil Fertility
Incorporate ample compost, manure, and other organic amendments when preparing beds. Test soil and correct any deficiencies.
Apply Organic Mulch
Maintain 2-3 inches of organic mulch like wood chips or straw around plants to retain moisture, suppress weeds, and feed soil as it decomposes.
Control Weeds Naturally
Hand pull weeds around plants, cultivate shallowly, or use landscape fabric barriers.
Attract Beneficial Insects
Plant flowers that attract predatory insects to patrol for pests. Ladybugs, lacewings, and parasitic wasps help control aphids, mites and other pests.
Use Organic Pest Control
Apply organic insecticidal soaps, neem oil, or spinosad for pest control instead of synthetic pesticides. Always follow label directions.
Provide Adequate Nutrition
Use organic fertilizers like bone meal, blood meal, fish emulsion, etc. to maintain soil fertility and plant nutrition.
Prune for Health
Annual pruning improves air circulation and light penetration, reducing habitat for diseases. Disinfect tools between cuts.
Rotate Crops
Avoid planting blackcurrants in the same location each year. Rotate to different beds to disrupt disease and pest cycles.
Sanitize Equipment
Clean and sanitize any tools, containers, and equipment that contact blackcurrants to prevent spreading diseases.
Harvest Promptly
Pick berries as they ripen to avoid losses from dropped fruit which can harbor pests and diseases.
By following organic growing methods, you can produce an abundant blackcurrant harvest while protecting and enhancing the health of your garden ecosystem.
Growing Blackcurrants in Containers
Don’t have space for a blackcurrant patch? You can still grow these berries in containers:
Select a Large Pot
Choose a container at least 18-24 inches wide and deep to accommodate blackcurrant roots. Make sure it has drainage holes.
Use Quality Potting Mix
Use a potting soil formulated for containers, not garden soil. The mix should contain compost or organic matter.
Give it Sun
Situate container-grown blackcurrants in a spot receiving at full sun – at least 6 hours of direct sunlight daily.
Water Consistently
Check soil moisture frequently and water container plants as needed to maintain even moisture. Avoid drought stress.
Apply Balanced Fertilizer
Feed container blackcurrants with a water-soluble organic fertilizer every 2-4 weeks during the growing season.
Prune for Shape
Prune container-grown bushes in late winter to remove dead wood and shape the plant. This encourages fruiting.
Bring it Inside
Move potted blackcurrant plants to a protected area if temperatures drop below -10°F (-23°C) for winter.
With the right care, you can successfully grow blackcurrants on a patio, balcony or porch. The compact varieties like Ben Sarek are ideal choices for container culture.

Regional Growing Tips
Blackcurrants can be grown in most regions, but may benefit from some localized tips:
Hot Climates
- Provide some afternoon shade if temperatures exceed 85°F (30°C).
- Maintain consistent soil moisture. Mulch and irrigate as needed.
- Avoid late summer pruning that could stimulate growth leading into winter.
Humid Climates
- Improve air circulation around plants through pruning and spacing.
- Water at the base of plants to keep foliage dry.
- Scout for fungal diseases like mildew and anthracnose.
Cold Climates
- Select very hardy Russian varieties like Viking or Polevaya.
- Plant in a sheltered location with good winter wind protection.
- Cover plants with row cover fabric if extreme cold is expected.
Coastal Regions
- Provide a windbreak for protection from sea winds.
- Monitor soil pH carefully as sea spray lowers pH over time.
- Control aphids aggressively as they spread quickly in mild weather.
Understanding your specific growing conditions allows you to tailor your blackcurrant care and cultivation for success. Connect with local gardeners to gain insights into blackcurrant growing in your area.
Enjoy Bountiful Blackcurrants Forever
When cared for properly, blackcurrant bushes will generously reward your efforts with bountiful harvests for years to come. Although they require some pruning and maintenance, blackcurrants are generally unfussy, resilient plants. By following this comprehensive planting guide, you can experience the joy of growing your own bush full of glistening, flavorful berries. Imagining the jams, sauces, baked goods and other treats you can create with your homegrown blackcurrants will surely motivate you in nurturing your plants from soil preparation to planting to harvesting. Soon you’ll see why so many gardeners get hooked on growing blackcurrants once they taste the sweet success of these nutritious berries.


