


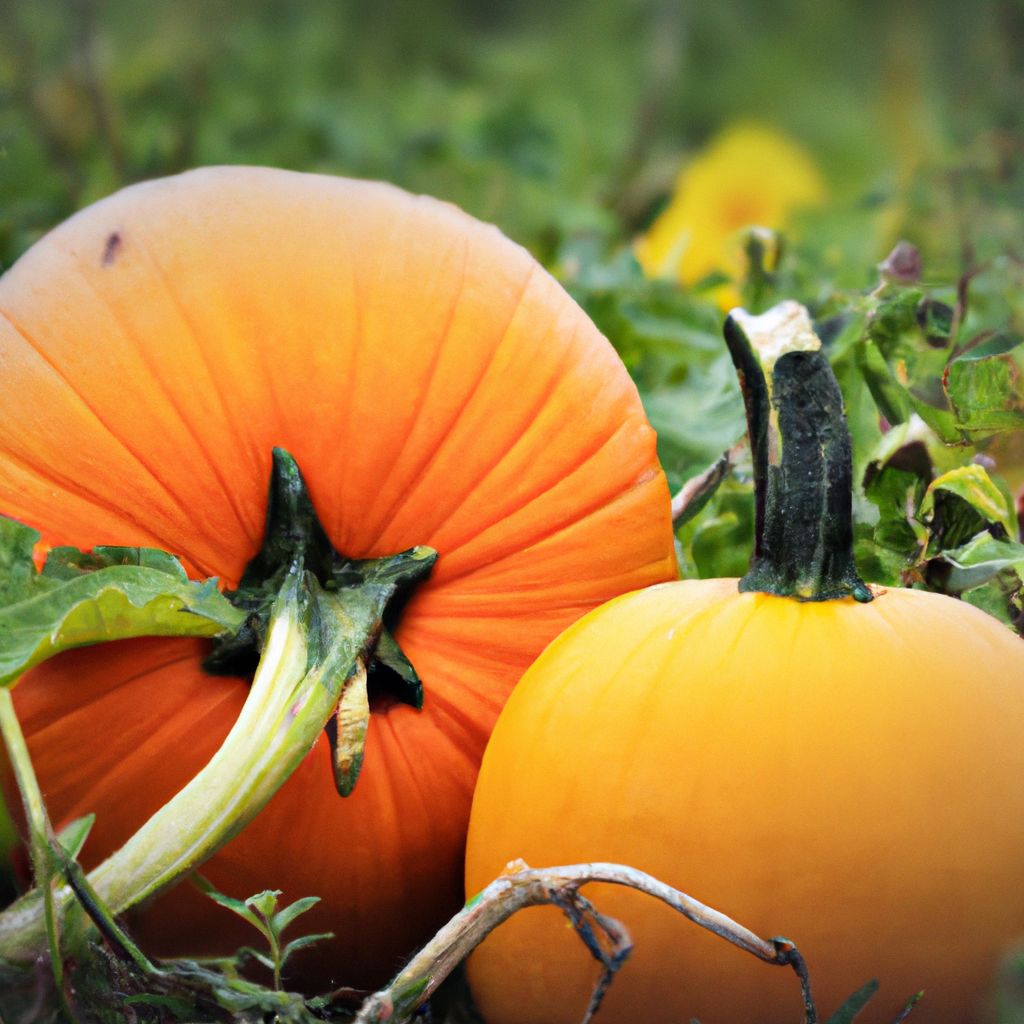
Come autumn, glowing orange pumpkins are as much a staple as falling leaves and hayrides. However, successfully growing the plump, perfect pumpkins of your dreams starts much earlier in the season, read this article to understand the ultimate pumpkin growing conditions. With their iconic shapes, bright colors and versatility from the kitchen to front porch decor, pumpkins offer an enjoyable challenge for novice and seasoned gardeners alike.
While pumpkins require ample space for sprawling vines, a small backyard plot or even container planting can yield abundant harvests to take you from pumpkin carving at Halloween to baking holiday pies. This guide covers all the key steps of the pumpkin growing journey – from selecting the best variety for your needs to harvesting and storing fruits through the winter.
We’ll explore how to pick the right pumpkin type based on size, ripening times, color and intended use, whether giant fruits for competitive weigh-offs or mini white varieties for seasonal crafting. Preparing your soil properly forms the foundation of success. Learn amendment and testing techniques to create ideal growing conditions before sowing seeds or setting out transplants.
Getting a jumpstart with indoor seeding quickly yields vigorous young plants ready for their permanent home outdoors. Timely transplanting coupled with consistent moisture, nutrition and pest prevention sets your patch up for prolific yields. Before you know it, a bounty of plump pumpkins will await picking when vines fade and fall descends. We’ll cover optimal harvesting cues and post-harvest curing methods for maximizing both flavor and storage life.
From seed catalogs to straw bale seats, pumpkins offer fun for all ages. Follow this guide to grow your best crop yet and enjoy the ride from start to finish!

Select the Best Pumpkin Variety
With over 800 varieties of pumpkins and squash to choose from, selecting the right one for your needs and climate is key. Consider the following factors:
- Intended use – Carving, cooking/baking, ornamental decoration?
- Size – Small, medium or large sized pumpkin best suits your space?
- Days to maturity – Choose an early, mid or late season variety.
- Hardiness – Ensure the variety can tolerate your climate and growing season.
- Pest/disease resistance – Select varieties bred with protections against common pumpkin issues.
Some top recommendations include:
- Jack-O-Lanterns – Classic carving types like Connecticut Field, Howden, Ghost Rider.
- Sugar Pie – Sweet, small fruits perfect for baking pies and other desserts.
- Cinderella – Large variety good for heavy yields.
- Baby Bear – Mini pumpkins ideal for decoration.
Jack-O-Lantern Varieties
If you plan to carve pumpkin masterpieces, choose a tried-and-true jack-o’-lantern variety. Some of the best options include:
- Connecticut Field – The classic pumpkin for carving. Sturdy, vibrant orange medium-large fruits with thick stalks.
- Howden – Similar to Connecticut Field but with darker orange color and built-in disease resistance.
- Ghost Rider – A white pumpkin alternative to traditional orange. Offers good carved faces and spooky ambience.
- Magic Wand – Long snake-like green stems make these extra fun for carving.
Baking/Cooking Varieties
For the best kitchen creations like soups, baked goods and more, consider these tasty pumpkin picks:
- New England Pie – Small, sweet-fleshed fruits perfect for classic pumpkin pies.
- Sugar Pie – Similar to New England but with slightly thicker, bright orange flesh.
- Cinderella – Plentiful yields of mid-large sized pumpkins with exceptional flavor.
- Fairytale – Dense, sweet flesh and attractive ribbing make these nice for decorating too.
Mini/Ornamental Varieties
For decorative appeal, miniature pumpkin varieties allow for fun displays. Top small pumpkin picks include:
- Baby Boo – Ghostly white mini pumpkins weigh under a pound but have sturdy stems.
- Jack Be Little – A classic miniature variety perfect for tabletop or window displays.
- Munchkin – Prolific yields of vibrant oranges mini pumpkins perfect for autumn accents.

Prepare the Planting Area
Pumpkins require nutrient-rich, loose soil and at least 6 full hours of direct sunlight daily. Follow these preparation tips:
Clear the Area
Eliminate any weeds, rocks or debris. This prevents competition for nutrients and improves planting ease.
Loosen the Soil
Use a rototiller or garden fork go down 12-15 inches. This allows roots to spread freely.
Amend the Soil
Incorporate 2-4 inches of aged compost or manure. This fuels plants growth and productivity.
Other organic amendments like alfalfa, kelp, bone or blood meal also supply nutrition. Just be sure to apply based on package instructions.
Test and Adjust pH
Ideal range is 6.0-6.8. Add lime to raise, sulfur to lower. Proper pH maximizes nutrient availability.
Most garden centers sell do-it-yourself soil testing kits you can use annually. Or ask your local agricultural extension office about sending samples for professional analysis.
Create Planting Mounds
Form mounds about 6 inches tall and 2-3 feet wide. This improves drainage and ripening.
Adding extra compost or manure into the mounds gives developing roots an extra nutrient boost. Top dress later in season too.

Start Seeds Indoors
Get a head start on the growing season by sowing seeds indoors 2-4 weeks before your regions last expected spring frost. Follow these tips:
Prepare Containers
Use individual biodegradable pots or seed trays with drainage holes, filled with seed starting mix.
Peat pots made of compressed peat moss can go straight into the garden soil, eliminating any transplant shock issues.
Sow Seeds
Plant 2-3 seeds per container at a depth of 1 inch. More may be needed if germination rates are low.
Old seeds or improper planting depths impact germination success. Always use fresh seeds within suggested planting date.
Provide Warmth and Light
Place containers in a sunny window or under grow lights. Maintain temperatures of 70-85°F for best germination.
Consider using a heat mat if having trouble maintaining ideal warmth levels indoors during cool weather.
Water and Humidity
Ensure soil stays evenly moist. Use a spray bottle to mist leaves if indoor air seems excessively dry.
Erratic moisture causes seeds/seedlings to dampen off. Remove any affected plants promptly to avoid spread.
Fertilize Lightly
Use half strength liquid fertilize once true leaves emerge. This fuels growth before garden planting.
Another option is to mix mycorrhizae fungus or biochar into starting mix for added nutritional benefits.
Harden Off Seedlings
Set plants outdoors in partial shade for short periods over 7-10 days. This toughens them before transplanting.
If cold snaps occur, provide extra warmth and protection overnight to avoid chilled plants and stunted development.

Move Seedlings Outdoors
Transplant pumpkin seedlings into the garden after final frost date when soil temperatures reach at least 65°F. Follow these guidelines for the move:
Choose Location
Select a prepared, sunny spot in the garden for transplanting, with good airflow and space for vines.
Avoid planting pumpkins in the same location as squash, melons or cucumbers. Rotate annual crops to prevent disease buildup.
Space Seedlings
Allow 5-6 feet between planting holes if growing vining or bush varieties. Less for mini pumpkins.
Spacing too tightly increases fungal disease risk and reduces yields. But vines can intermingle between mounds.
Dig Wide Holes
Holes should be 2-3 times wider than the seedling’s root ball to encourage spread.
Roughen sides with a garden fork and fill in any glazed areas that might limit penetration. Backfill gently to stabilize.

Give Plants Proper Care
Pumpkins are heavy feeding plants. Provide consistent moisture, nutrition and maintenance:
Water Deeply
Supply 1 inch of water weekly. Avoid leaf wetness. Use drip irrigation or soaker hoses for best results.
Fluctuating soil moisture causes issues like blossom end rot, poor fruit sizing and lower Brix levels (sugar content).
Fertilize Regularly
Side dress plants with a complete organic fertilizer every 2-3 weeks per package instructions.
Another option is to use a balanced liquid feed with micro nutrients added. Foliar spray if signs of deficiencies appear.
Control Weeds
Keep garden weed-free to limit pest habitat and disease spread.
Heavy mulching with leaves, straw or grass clippings smothers weeds. Just leave space around stem bases.
Monitor for Pests
Identify and address any insect invaders early. Common pests include cucumber beetles, squash bugs and vine borers.
Companion planting nasturtiums, basil or tansy near vines can help repel harmful insects.
Prevent Diseases
Scout for development of blights, wilts and fungal issues. Remove any severely infected plants promptly.
Good airflow and drip irrigation reduces likelihood of diseases establishing. Space plants appropriately.
Prune Foliage
Trim away dead or pest damaged leaves and stems. Improve airflow and plant vigor.
Maintain vines by pinching off growing tips once fruits being forming. This redirects energy into existing pumpkins.
Provide Support
Use trellises, fencing or cages to support vine development, improve fruit yield and quality.
Staking also makes harvesting easier by keeping fruits elevated and clustered. Less contact with soil prevents rot.

Pollination Needs
Ensure proper pollination for fruit formation by attracting beneficial bees and pollinators:
- Plant flowering herbs like borage, basil and oregano which offer nectar-rich blooms.
- Provide shallow dishes of fresh water for pollinators to access.
- Consider adding bee houses or nesting tubes around the garden perimeter.
- Avoid applying pesticides during flowering stage which can deter pollinators.
As a self-pollinating plant, pumpkins can also be hand pollinated by transferring pollen between flowers using a small brush or cotton swab.
Harvest Time
Time to reap the rewards! Follow these harvesting and post-harvest handling tips:
Monitor Ripening
Pumpkins are ready when fruits are fully colored with hardened rinds and dry, brown stems.
The bottom of the fruit touching soil surface should be creamy yellow/orange, not white or green still.
Harvest Promptly
Once mature, use clean, sharp pruners to cut fruits from vines, leaving 3-4 inches of stem attached.
Any immature pumpkins can be harvested once frost threatens and left to finish ripening indoors in a warm spot.
Handle with Care
Carry pumpkins by their stems and avoid drops, jolts or bruises during transport from garden.
Line collecting bins or wheelbarrows with a soft bedding layer like straw, leaves, or burlap sacks to prevent nicks and abrasions.
Cure Pumpkins
Place in warm, dry area for 10-14 days which further ripens and toughens rinds for winter storage.
Ideal curing temperature is 80-85° F with plenty of air circulation all around. Turn fruits occasionally to prevent flat spots.
Store Properly
Find cool (50-55°F), dark location to store long-term. Check regularly and use soon after curing.
Avoid temperature fluctuations and humidity which shortens storage life. Discard any fruits showing soft spots or mold growth.
Now enjoy months of sweet pumpkin harvests and happy Halloween decorating ahead!

Enjoy Your Beautiful Bounty of Colourful Pumpkins
With proper planning, care and timing, a thriving pumpkin patch with beautiful fruits can become a wonderful reality in spaces large and small. Whether hoping to claim champion status at the state fair, craft clever jack-o’-lantern displays or bake classic fall pies, selecting varieties suited to your climate, space and timeline makes achieving pumpkin success that much easier.
Preparing soil deeply encourages extensive root zones to access nutrients and moisture. Speeding up growth with proper indoor sowing and hardening off gives gardeners in cooler climates ample yield potential. Consistent moisture to developing vines and pollinator encouragement ensures fruit formation. Attention to ripening cues and gentle handling prevents disappointments at harvest-time.
While pumpkins have a well-deserved reputation as heavy feeders, even novice gardeners can reap multiple fruits per plant with smart amendments and care. A bounty of colorful pumpkins invites creativity in the kitchen and outdoor décor displays. Extend enjoyment by properly curing and storing leftover pumpkins not used immediately after picking.
Each stage of the pumpkin growing process offers teachable moments for gardeners of all ages. Share both the work and excitement with children. Allow them the fun of selecting favorite varieties, caring for plants and lining up prized pumpkins come fall. By following this guide, your whole family can embrace growing pumpkins as an enjoyable tradition brimming with both tasty and memorable rewards.

Frequently Asked Questions
1. When should I start pumpkin seeds indoors?
For best results, start pumpkin seeds indoors 2-4 weeks before the average last spring frost in your area. This gives seedlings ample time to germinate and grow stronger before moving into the garden after any cold threat passes.
2. How much room do pumpkins need to grow?
As vigorous vines, pumpkins require substantial space. Plant in sunny areas protected from wind, allowing 5-6 feet between hills for growth. Mini pumpkin plants can be spaced closer at 2-3 feet apart.
3. How often and how much should pumpkins be watered?
Pumpkins require consistent moisture for best growth, around 1 inch of water per week either via rainfall or manual watering. Evaluate soil and climate conditions, increasing frequency during hot, dry periods to maintain ideal levels.
4. What causes pumpkins to rot?
Excess moisture is the leading cause of pumpkin rot. Use drip irrigation or soaker hoses to minimize foliar wetness. Allow fruits to fully mature on vines and avoid waterlogged soil. Handle fruits gently to prevent bruising.
5. When are pumpkins ready to pick from the vine?
Pumpkins are mature when fruits feel hard, develop their full color and vines begin dying back. Stems should appear dry and leathery. Check the bottom resting on soil – it should be creamy yellow rather than white or green.
6. What are some troubleshooting tips for growing pumpkins?
Review growing guidelines to ensure proper soil prep, sunlight levels, planting times and consistent deep watering. As heavy feeders, side dress soils with extra compost or manure if plants seem stunted. Support developing vines and fruits off soil to prevent rot. Scout for pest/disease issues promptly and treat organically.
7. How do I know which pumpkin variety to grow?
Select varieties based on size, ripening times, color, uses and disease resistance best suited for your region. Mini white pumpkins work well for decorative crafts, sugar pie types for baking dishes. Large jack-o-lanterns or Cinderellas produce bold fruits perfect for competitive contests.
8. When is the best time to harvest pumpkins?
Monitor pumpkins in autumn for maturity cues – fully colored rinds, hardened shells, faded vines and dry brown stems. Use a sharp knife to cut fruits from vines, leaving 3-4 inches of stem attached to prolong storage life.
9. Can you grow pumpkins in pots or containers?
Yes, miniature pumpkin varieties can thrive when grown in large pots, fabric grow bags or other containers. Ensure containers have drainage holes, use a quality potting mix and provide consistent watering/nutrients to support the vines and fruits.
10. How long do harvested pumpkins last?
To extend storage life after harvest, cure pumpkins for 10-14 days in warm, dry conditions before moving to a cool (50-55°F), dry indoor location. Check regularly and use cured pumpkins within 2-3 months for best quality and flavor.


