


Quinoa is an ancient grain that has recently gained immense popularity for its robust nutritional profile. However, successfully growing this versatile crop requires an in-depth understanding of its specific cultivation needs. This guide will explore the core fundamentals of quinoa growing conditions and cultivation, from soil requirements to planting techniques and care. By grasping these essentials, farmers can unlock the full potential of quinoa and reap plentiful, nutritious harvests.
Comprehending Quinoa Growing Conditions
The unique properties and adaptability of quinoa allow it to thrive in a wide range of environments. However, optimizing growing conditions is key to abundant yields. This involves dialing in four key factors:
Proper Soil Composition
Quinoa favors nutrient-rich, well-drained soil with a near-neutral pH between 6.2 and 7.5.
Regular soil testing enables farmers to assess nutrient levels and composition. Test kits are affordable and provide valuable data.
Based on test results, necessary amendments like compost, manure, or mineral supplements can create an ideal growing medium.
Good drainage is crucial to prevent fungal root diseases. Mixing in sand or gravel improves drainage in dense clay soils.
Healthy levels of organic matter encourage beneficial microbial activity and improve moisture retention.
Adequate Sunlight and Warmth
Quinoa requires at least 8 hours of direct sunlight daily for optimal growth. Less sun exposure results in stunted plants.
Temperatures between 60-75°F allow for vigorous growth during the growing season.
In regions with extremely hot summers, strategic shading in mid-afternoon prevents excess heat stress.
Row covers, low tunnels, cold frames or greenhouses allow growing quinoa in colder climates by protecting seedlings and extending the season.

Efficient Irrigation Techniques
Careful watering provides consistent moisture without oversaturating the soil.
Drip irrigation systems and sprinklers efficiently deliver water to the plant roots while minimizing evaporation loss.
Quinoa generally requires about 1 inch of water per week, adjusted based on specific climate conditions.
Moisture monitoring tools like tensiometers help gauge exactly when to water.
Too little water causes stunted plants, while overwatering increases disease risk. Proper irrigation optimizes growth and yield.
Selecting Thriving Varieties
Over 120 varieties of quinoa exist, with varying tolerances to heat, altitude, drought and disease.
Choosing region-appropriate varieties matched to local conditions prevents crop failure.
Heat and altitude tolerant varieties like Cherry Vanilla and Q37 enable growing quinoa across a wider range of environments.
Consult regional growing guides and agriculture departments to select optimized varieties.
Consider planting several varieties with different maturities to manage harvest timing and cascade crops.
With the right growing conditions, quinoa will reward farmers with abundant, high-quality yields. Now let’s explore how to translate this understanding into growing success.
Preparing Optimal Soil for Planting
Creating the ideal soil environment gives quinoa the best start. This involves:
Assessing and Amending Soil
Conduct soil tests 6-8 weeks prior to planting to allow time for amendments.
Macronutrients like nitrogen, phosphorus and potassium impact plant vigor and yield capacity.
Micronutrients such as calcium, sulfur and iron affect protein content and seed quality.
Based on soil test results, work in necessary amendments 2-3 weeks before planting.
Well-decomposed compost, manure, leaf mold and organic fertilizers release nutrients slowly over the growing season.
Extensive Tilling to Smooth and Loosen Soil
Plow fields to uproot weeds, break up compacted zones and fully incorporate soil amendments.
Secondary tillage with a disk, harrow or cultivator further loosens topsoil and levels the planting bed for uniform germination.
Rototilling best prepares smaller beds, creating fine-textured, stone-free soil.
Smooth, loose soil enables tiny quinoa roots to easily penetrate the growing medium.
Enriching Soil with Organic Matter
Organic matter boosts nutrient retention, improves drainage and promotes helpful microbial communities in the soil.
Well finished compost, crushed leaves, grass clippings and aged manure are excellent choices.
Incorporate 2-3 inches of organic material in the top 8 inches of soil.
Consider planting cover crops like vetch, rye or clover the year before quinoa and tilling their residue into the soil.
With enriched, loosened soil, quinoa plants can establish an extensive root system to access nutrients and withstand stresses. This fertile footing fuels abundant fruiting all season.

Sowing Seeds for Maximum Yields
The planting stage sets the course for later success. Best practices include:
Selecting Plump, Viable Seeds
High quality seeds possess a uniform shape and color with no cracks or damage.
Choosing certified organic quinoa seeds ensures purity and breaks pest cycles.
Verify seed vendor germination rates, which should reach at least 90%.
Refrigerating seeds preserves longevity and vigor. Discard seeds over 1 year old.
Determining Optimal Planting Time
Target soil temperatures of 50°F-70°F which strikes the balance between prompt germination and frost avoidance.
In northern regions, use cold frames or low tunnels to warm spring soils and get a head start.
Time plantings to avoid peak summer heat during the flowering and seed set stages, when heat causes sterility.
Stagger planting dates 2 weeks apart to extend the harvest window.
Maximizing Emergence Rates
Presoaking seeds 12-24 hours minimizes dormancy issues.
Inoculating with rhizobium bacteria enhances germination rates and supports seedling health.
Direct sowing into raised beds ensures proper drainage and warmth to encourage vigorous sprouting.
Covering beds with horticultural fabric minimizes soil splash onto young shoots during intense spring storms while transmitting full light levels.
Optimizing Early Growth
Thin seedlings to proper spacing once 2 sets of true leaves emerge. This reduces competition between plants.
Row spacing of 18-30 inches provides adequate room for root and canopy development.
Narrower spacings of 8-12 inches can work for high density intercropping with compatible crops like lettuce.
Installing trellises and windbreaks protects tender shoots from damage during spring tempests.
Employing these best practices for sowing and early care gives quinoa the best start to maximize yields.

Providing Expert Care for Healthy Growth
Consistent care sustains rapid spring growth. Key aspects include:
Strategic Watering for Consistent Moisture
Water early in the day to allow foliage to dry out before nightfall, preventing fungal issues.
Provide 1-2 inches per week from seedling stage through grain fill, adjusting for rainfall.
Reduce watering once grains fully form to focus growth energy on plumping seeds.
Monitor soil moisture at 6 and 12 inch depths and water when top 6 inches dries. Deep watering encourages deep roots.
Mulching around plants retains soil moisture while suppressing weeds.
Applying Balanced Fertilizer
Side dressing rows with a 10-10-10 or 5-10-10 NPK fertilizer nourishes rapid vegetative expansion and flowering.
For organic growers, alfalfa meal, fish emulsion, Seqestered calcium and rock phosphate supply key macronutrients.
2-3 light applications spaced over the growing season prevents nutrient leaching while building fertility for future years.
Ongoing Pest Prevention
Common quinoa pests and control strategies include:
Flea beetles: row covers, repeated vacuuming, and neem oil sprays.
Aphids: natural predators like ladybugs and lacewings or insecticidal soaps.
Slugs: diatomaceous earth around plants.
Birds: scare devices and protective netting just before maturity.
Identifying and Managing Diseases
Prompt disease identification through regular crop inspection enables rapid treatment to avoid epidemics. Common issues include:
Downy Mildew – tan lesions on leaves and stems indicating too much moisture. Increase spacing for airflow and avoid overwatering. Copper fungicides also treat.
White Mold – White fuzzy growth on stems and leaves during cool, humid conditions.
Improve air circulation through wider spacing and control weeds.
Plow under crop residue immediately after harvest to reduce inoculum levels for next season.
Apply special biofungicides containing Trichoderma strains at first onset.
By staying vigilant and addressing issues early, farmers can nurture a thriving, high-yielding stand through the growing season.

Harvesting Quinoa at Peak Perfection
Determining optimal harvest timing is both art and science. Signs of maturity include:
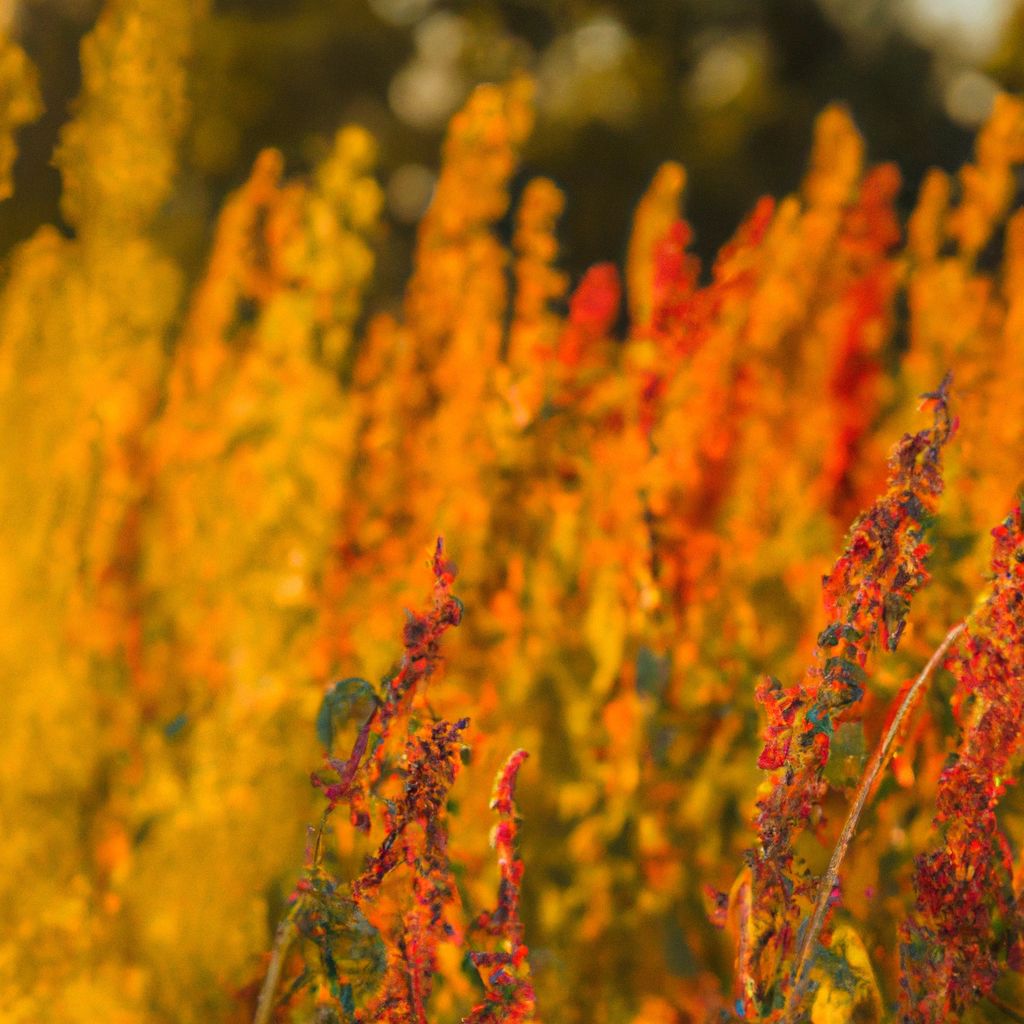
Subtle Color Changes
Seeds transition from green to light brown upon maturity. Entire stands take on richer golden hue as harvest nears.
Monitor fields for signs of bleaching on older seed heads, indicating seeds beginning to shatter.
Harvest panicles that have fully changed color but before strong winds detach grains from the heads.
Stalk and Stem Drying
The stalks and stems start drying out and becoming brittle when grains approach maturity.
By lightly squeezing stalks between your fingers near the base, you can feel the loss of moisture and structural integrity indicating harvest season.
Once stalks begin breaking rather than bending, harvest immediately.
Testing Seed Maturity
Flavor offers the definitive evaluation of grain maturity. Seeds progress from grassy and bitter to larger and nuttier tasting upon reaching full ripeness.
By gently nibbling a few raw seeds every few days, patient farmers can pinpoint peak flavor maturity.
Consider the predominantly traditional method of testing seeds, as described in the true story from the article above. This technique has proven its efficacy over many generations, across diverse regions and climates, as a reliable measure for recognizing ripeness. However, remember that harvesting too early yields bland or bitter grains with low germination rates that bring lower value, so confirm maturation through multiple guides.

Harvesting Techniques
Use a sharp sickle, scythe or pruning shears to cleanly cut stalks near the base, leaving 4-6 inches of stem attached. Field knives risk uprooting entire plants, costing precious grains.
Time harvest in the early morning before heat dries delicate grains, causing them to pop off stalks.
Gently gather cut stalks into manageable bundles and transport to a dry, covered area for curing.
Success lies in balancing rapid drying to preserve ripe seeds before rain or wind storms lead to fallout losses, while avoiding overdrying that discolors and diminishes seed quality.
Drying and Finishing Techniques
Improper or rushed drying risks mold, discoloration, blanching or loss of viability. Best practices include:
Hang gathered bundles upside down on wires or poles under a dry shelter with ample airflow for 1-2 weeks.
Check bundles daily and gently rub to separate drying grains from stems into a catching tarp or container below.
Avoid direct sunlight to prevent UV damage. Bring bundles indoors or cover with shade cloth if rain threatens.
Once detached from stalks, finish drying grains to 12% moisture content on screens indoors before threshing and winnowing.
Further drying to 8-10% for storage maintains quality but leaves grains too brittle for commercial sale.
Threshing and Cleaning
Rub completely dry panicles by hand over a bucket or tarp to loosen and catch seeds.
Flailing bundles inside breathable sacks or whacking with padded sticks also works for small operations.
Stationary or portable mechanized quinoa threshers save immense labor for larger growers.
Final winnowing to remove chaff is easily achieved using fans or wind. Dense seeds readily separate from lighter debris when poured from buckets repeatedly on breezy days.

Tips for Successful Quinoa Cultivation
Additional pointers to maximize productivity include:
Employ Crop Rotation
Rotating quinoa fields to a new area each year optimizes soil nutrition while breaking pest and disease cycles from the previous crop. Excellent rotational partners include cereals like wheat or barley along with legumes like peas or alfalfa which fix nitrogen. Let fields rest for at least 2-3 years before repeating quinoa. Intercropping creates biodiversity and natural synergies between complementary crops.
Adapt Harvesting Equipment
Specialized machinery like quinoa headers for combine harvesters increase efficiency exponentially on larger operations. These advanced implements utilize flexible rubber combs to gently lift and separate seeds as stalks pass through, protecting delicate grains. Upgrading to commercial scale drying and milling equipment also streamlines processing.
Choose Dual Purpose Varieties
Opting for quinoa varieties suitable for both grain and leaf production doubles potential markets. While grain quinoa offers nutritional density, emerging baby leaf quinoa fills demand from restaurants and home chefs for specialty greens. Ornamental cultivars also showcase exotic blooms in diverse colors. With creative marketing, multifunctional quinoa unlocks diverse revenue streams from each harvest.
By following both timeless traditions and cutting edge techniques, quinoa growers can continually increase productivity and profitability on both boutique and commercial scales. This balanced pairing of ancestral wisdom and innovation may outline the future for countless farmers embracing thoughtful diversification.

Frequently Asked Questions
What are the optimal temperatures for growing quinoa?
Quinoa thrives in temperatures between 60-75°F during the growing season for vigorous growth and seed production. Some varieties can tolerate temperatures from near freezing up to over 100°F, but cool weather below 50°F results in stunted, slow growth. Protecting young plants from frost is critical.
What types of soils are best for quinoa cultivation?
Quinoa grows best in a range of well-drained, nutrient rich soil types with neutral pH around 6.5-7.5. Loamy soils high in organic matter provide excellent growth. Heavy clay soils need added organic matter or sand to improve drainage. Very sandy soils may require more frequent irrigation and nutrient management.
How much water does quinoa need?
Quinoa requires around 1-2 inches of water per week during the growing season, adjusted based on rainfall and evapotranspiration. Soil should be consistently moist but not waterlogged. Insufficient water results in stunted plants while overwatering increases disease risk. Careful moisture monitoring optimizes growth.
How do I harvest quinoa?
Harvest quinoa when the seed heads fully dry out and turn light brown by cutting stalks near the base once the grains reach maturity. Allow the plants to dry further in breathable sacks or by hanging upside down indoors before threshing seeds from the stalks. Finally, winnow the seeds to remove chaff.
What are some common pests and diseases?
Common quinoa pests include birds, aphids, mites, slugs, snails and flea beetles while diseases like downy mildew, white mold and bacterial leaf spots may arise. Scout fields routinely for issues and respond rapidly. Prevention through crop rotation, cover cropping and avoiding overwatering is most effective.
Why soak quinoa seeds before planting?
Soaking quinoa seeds overnight prior to planting kickstarts the germination process through imbibition, shortening dormancy. This increases uniform sprouting across the field for optimum plant stands. Soaking also softens the outer seed coating for easier emergence.
What fertilizer is best for quinoa?
While quinoa grows well in marginal soils, adding balanced fertilizer supports maximum production. Apply a 10-10-10 or similar NPK fertilizer according to soil test recommendations after plants establish. For organic growers, alfalfa meal, fish emulsion and rock phosphate also provide macro and micronutrients.
Can quinoa be grown in greenhouses or high tunnels?
Protected cultivation of quinoa is gaining popularity, enabling off-season harvests and shielding plants from temperature swings. High tunnels, hoop houses and greenhouses allow climate modification for faster early growth. However, the structures must still provide adequate light and ventilation to prevent humidity and heat buildup.
What are the health benefits of quinoa?
Quinoa is highly nutritious, delivering ample protein, vitamins, minerals, antioxidants and fiber with less carbohydrates than grains. The proteinquality nearly equals dairy with all 9 essential amino acids, offering health benefits for vegans, vegetarians an anyone seeking better nutrition. Quinoa also aids digestion and heart health.


