


Tulip cultivation brings delightful flowers and vibrant color into any garden. This comprehensive 3,000 word guide provides key information for gardeners of all levels on successfully growing tulips.
Choosing High Quality Bulbs
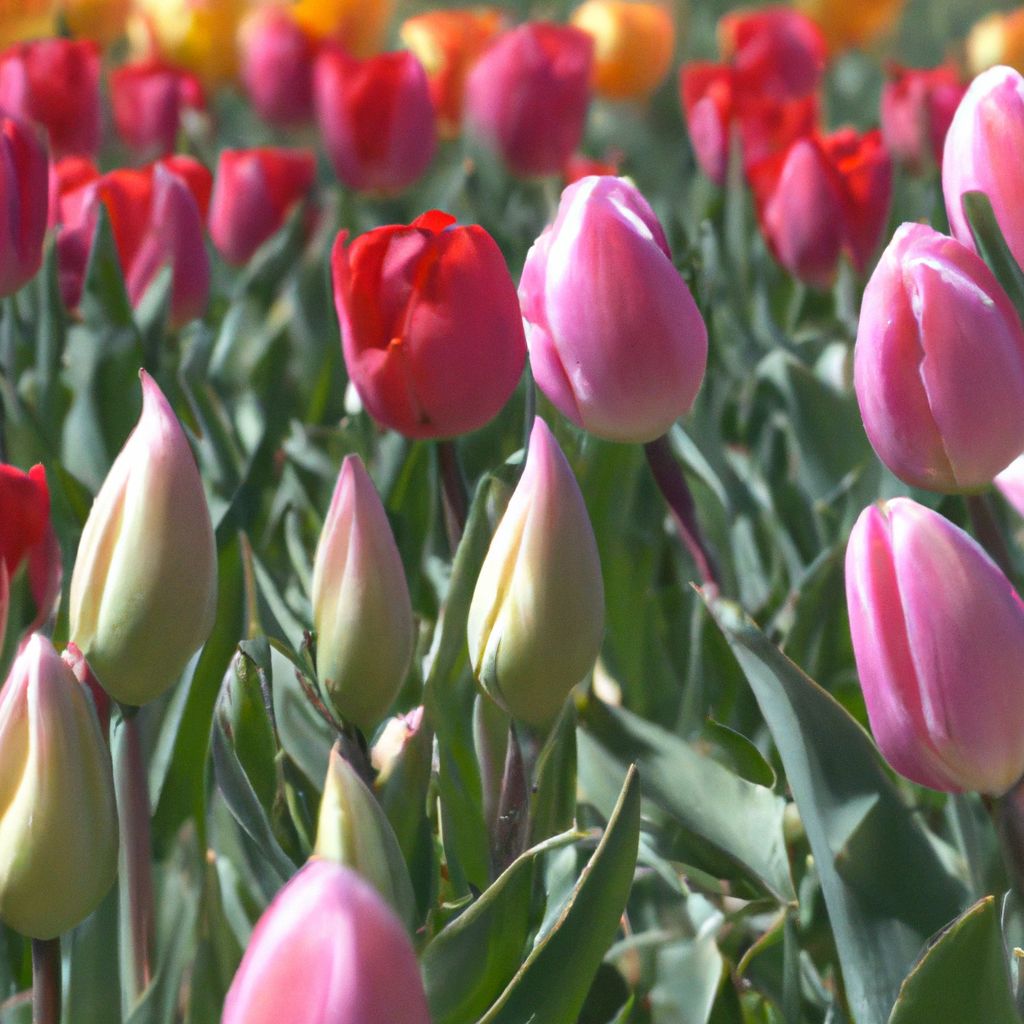
Selecting the best bulbs is critical for a robust tulip garden. There are over 3,000 registered tulip varieties to choose from. Consider bloom time, flower forms, colors and plant sizes when deciding on varieties:
- Bloom time: Early, mid and late season blooming bulbs extend color from early spring through early summer.
- Flower forms: Choose from single, double, fringed, parrot and many other unique tulip flower types.
- Colors: Vibrant options include red, pink, purple, yellow, white and bi-colors.
- Plant size: Dwarf varieties under 8 inches work well in containers and rock gardens. Tall types over 24 inches make dramatic focal points.
Inspect bulbs upon arrival for:
- Firmness: Bulbs should feel solid, not soft or spongy.
- Symmetry: Avoid bulbs with irregular shapes or flat sides.
- Outer skins: Skin should appear plump and intact, without cracks or signs of mold.
- Weight: Heavier bulbs signal health and abundant nutrients to fuel growth.
Reputable suppliers offer correctly stored, pest-free bulbs. Order early as most vendors sell out of rare varieties. Request planting and care instructions suited to your growing zone.

Preparing the Planting Area
Test drainage and pH where bulbs will grow. Heavy clay or continually soggy soil will lead to bulb rot.
To evaluate drainage:
- Dig 12-inch deep, 1 x 1 foot square hole
- Fill with water and let drain completely
- Refill hole with water
- Time how long for water to fully drain
- Drainage under 8 hours signals adequate permeability
To test pH:
- Collect soil samples from around intended planting area
- Follow kit instructions to mix soil and distilled water
- Insert test strip or meter prongs into wet soil
- Acidic soil reads below 7 pH; alkaline above 7
- Tulips prefer slightly acidic 6 to 7 pH range
Improve drainage with addition of:
- Coarse sand to loosen heavy clay areas
- Gravel and organic materials for excessively boggy spots
Adjust pH by mixing planting area soil with:
- Agricultural lime to raise pH of too acidic soil
- Compost or peat moss to lower pH of too alkaline soil
Well-drained, nutrient-rich, slightly acidic soil encourages strong root development and colorful blooms.

Best Practices for Supplementing Nutrients
Nutrient-rich soil leads to vibrant blooms. Test planting zones annually to determine which soil amendments to add:
- Nitrogen (N): Essential for foliage and stem development. Deficiency causes stunted yellow plants.
- Phosphorus (P): Produces extensive root systems and beautiful flowers. Lack leads to small or missing blooms.
- Potassium (K): Supports overall plant health and hardiness. Shortage results in weak stems and sparse leaves.
- Calcium (Ca): Needed for cell wall structure. Deficit causes misshapen buds that don’t open fully.
- Magnesium (Mg): Key for photosynthesis to convert sunlight to energy. Lack results in pale striping and discoloration between leaf veins.
Test soil nutrient levels via home kits or lab analyses for pH and NPK values.
Amend soil based on test results:
- Nitrogen: Cottonseed meal, blood meal, fish emulsion, alfalfa meal
- Phosphorus: Bone meal, rock phosphate
- Potassium: Wood ashes, kelp, granite meal
- Calcium: Lime, gypsum
- Magnesium: Epsom salts, dolomite lime
Tip: Choose natural, slow-release amendments over synthetic chemicals. Mix into top 6 inches of soil before planting. Re-test annually and supplement as needed.

Selecting an Ideal Planting Site
Choose a site with:
- Full sun: At least 6 hours direct sun
- Good air circulation: Avoid enclosed areas
- Shelter: Protect from strong winds
- Proper spacing: Dense planting prevents airflow. Allow enough room for maturation.
- Well-drained soil
- Water access: Essential for healthy establishment
- Good aesthetics: Placement for optimal display
Mark planting locations in fall for accurate bulb spacing in enriched soil areas.
Planting and Ongoing Care
When: For spring blooms, plant bulbs in fall 1-2 months before expected first frost. Research ideal timing for your region.
Depth & Spacing: Place bulbs root side down at a depth 3 times their width, 4-6 inches apart depending on mature plant width.
Soil preparation: Loosen soil 12-15 inches deep via digging or tilling. Mix-in compost or well-rotted manure. Rake surface smooth.
Planting steps:
- Dig hole to appropriate bulb depth
- Place bulb root side down
- Fill hole and firm lightly around bulb
- Thoroughly water area after planting
Post-planting care:
- Water thoroughly anytime top few inches of soil become dry
- 2-3 times weekly watering often needed from planting until ground freeze
- Apply 2-3 inch mulch layer to conserve moisture and insulate bulbs
- Remove faded flowers to direct plant energy into bulb growth
- Allow foliage to yellow completely before removing
- Avoid soil disturbance around protective foliage
Apply balanced fertilizer when shoots first emerge in spring if soil lacked amendments. Do not over-fertilize or beautiful foliage may emerge at the expense of vibrant blooms.

Best Supports for Healthy Stems
Tulip stems often grow 12-24 inches tall, requiring staking interventions to remain upright:
- Insert stakes when shoots emerge or at first signs of leaning
- Place stakes 6 inches from the base to avoid bulb damage
- For flexible plastic stakes, allow stems to curve before tying
- Use soft ties and check weekly to prevent stem damage
- Leave supports in place until fading blooms are deadheaded
Proper staking prevents flopping, broken stems and flower damage due to mud or ground contact while allowing air circulation around plants.
Regional Considerations for Ongoing Success
Tulip needs vary based on local climate conditions. Adapt care techniques:
In hot climates:
- Seek heat-tolerant varieties
- Plant so foliage gets afternoon shade
- Mulch beds to moderate soil temperature
- Water more frequently
In excessively rainy areas:
- Improve drainage with sand/gravel
- Space bulbs farther apart
- Stake stems for better wind resistance
- Check often for diseases
In regions with intense winter cold:
- Choose extra-hardy varieties
- Provide reliable snow cover
- Check soil moisture – water if needed prior to deep freeze
Consult local nurseries, universities and gardening groups to dial in the best areas, planting times, soil, varieties and care protocols for your microclimate.

Pest and Disease Prevention
Monitor for:
- Rodents: Mice and squirrels consume bulbs in fall & winter
- Slugs & Snails: Devour tender shoots and leaves
- Insects: Thrips, aphids and plant bugs feed on stems and flowers
- Fungal & viral diseases: Spread rapidly in warm, wet conditions
Preventative measures:
- Allow garden debris to fully break down before amending soil
- Discard any bulbs with signs of mold, lesions or insects
- Remove afflicted plants immediately to prevent spread
- Keep pest trapped areas away from planting site
- Apply organic mulch layer for slug & snail control
- Use insect barriers: Diatomaceous earth, aluminium foil
- Check for rodent activity and set humane traps if necessary
Rapid response to early symptoms via mechanical removal, traps, organic treatments or targeted application of pesticides prevents major damage. Consult local resources for sustainable recommendations.
Common Diseases: Symptoms and Solutions
Rapid identification and treatment of diseases leads to healthier gardens:
Botrytis Blight
- Symptoms: Gray fuzz on flowers, leaves and stems; mushy petals
- Cause: Humid conditions coupled with cool nights and warm days
- Solution: Space plants for airflow; Avoid overhead watering; Remove and destroy infected plants; Apply appropriate fungicide
Tulip Fire
- Symptoms: Dark streaks on leaves & stems; scorched blooms
- Cause: Fungal infection worsened by crowded planting and excess moisture
- Solution: Space bulbs properly; Improve drainage; Remove and destroy afflicted plants; Apply sulfur fungicide spray
Tulip Virus
- Symptoms: Stunted plants; distorted, mottled leaves; lackluster colors
- Cause: Transmitted by aphids and contaminated tools
- Solution: Control spread of aphids; Sterilize tools; Remove and destroy infected plants
Prompt action to accurately diagnose and treat diseases keeps infections contained. Consult experts for sustainable control methods.

Supporting Growth and Blooms
Stems: Monitor and gently stake tall, weak stems to prevent flopping or wind damage.
Fading blooms: Deadhead individual spent flowers to sustain plant energy.
Yellow foliage: Allow leaves to fully yellow before removing to nourish next year’s bulbs.
Annual care: When foliage dies back, dig up bulbs and remove clingy dirt. Allow to dry in shaded, ventilated area for 2 weeks. Sort and discard any withered bulbs. Store remainder loose and layered (not crowded) in breathable mesh bags kept in cool (60-70° F), dark, dry location until fall replanting. Check periodically for mold or shriveling.
With informed variety selection, enriched soil, preventative care and proper handling, gardeners can perpetually enjoy colorful tulip displays. Consult online bulb groups and regional specialists for additional cultivation tips.
Troubleshooting Common Tulip Problems
Even when cultivated with care, tulips may occasionally suffer setbacks. Diagnose the issue by observing symptoms and identifying the culprit. Rapid response can restore plant health.
Flowering Issues
Few or no flowers:
- Planted incorrectly with pointed end down instead of up
- Insufficient sunlight
- Overcrowding limits nutrients and air circulation
- Rodent damage to bulbs
- Early spring warm spell causes early blooming
- Action: Replant right-side up; Move to sunnier site; Provide support; Protect bulbs from rodents; Watch weather patterns
Small flowers:
- Low soil nutrients
- Overcrowding/insufficient spacing
- Water stress
- Excess shade
- Action: Amend soil; Thin bulbs; Improve watering consistency; Increase sunlight
Leggy stems:
- Insufficient sunlight
- Over-fertilization promotes foliage over flowers
- Excess humidity
- Warm weather
- Action: Move to sunnier location; Reduce fertilizer; Improve air flow; Provide shade in extreme heat
Discolored petals:
- Nutrient deficiencies
- Diseases
- Pest damage
- Temperature swings
- Action: Test and amend soil; Treat disease; Eradicate pests; Add mulch for stable soil temp
Leaf & Stem Damage
Holes in leaves:
- Insect feeding
- Slugs/snails
- Rodents
- Action: Identify and manage pests
Leaves yellow early:
- Insufficient water
- Depleted soil nutrients
- Disease obstructing nutrients
- Action: Improve watering consistency; Test and amend soil; Treat diseases
Weak, falling stems:
- Lack of sunlight
- Excess humidity/moisture
- Nutrient deficiency
- Physical damage from wind or handling
- Action: Provide sunlight and air circulation; Eliminate moisture pockets; Add balanced fertilizer; Protect from wind damage via staking; Handle plants gently
Bulb Issues
Fail to emerge:
- Planted too deeply
- Rodent damage over winter
- Excessively soggy, heavy soil
- Soil too alkaline/acidic
- Action: Replant at shallower depth; Protect bulbs from rodents; Improve drainage; Adjust pH
Don’t bloom:
- Insufficient chilling period
- Overcrowding
- Inconsistent watering
- Sunlight blocked by other plants
- Action: Verify chill requirements; Thin density; Improve watering uniformity; Prune obstructing plants
By accurately identifying the causes of issues, tulip growers can take targeted restorative actions and regain control over cultivation success.

Tools and Techniques for Digging & Storing Bulbs
Follow these steps for optimal bulb lifespan:
Digging
- Insert spading fork 6 inches from foliage to lift bulbs gently
- Flex tines to shake free excess soil around roots
- Avoid damaging basal plates where next year’s roots will emerge
Cleaning & Sorting
- Allow to dry in shaded location for 1-2 weeks
- Gently remove all traces of soil with soft brush
- Sort by viability – discard mushy bulbs showing rot
Storing
- Place in breathable mesh or paper bags
- Keep bulbs separated – do not crowd
- Store in dark, dry, cool 60-70°F location
Checking
- Periodically check bags for mold, shriveling
- Remove affected bulbs immediately to prevent spread
- If needed, apply fungicide powder during storage
Proper digging, cleaning, sorting, storage and ongoing checks maintain optimum bulb health.
Extending the Tulip Season through Succession Planting
Stagger plantings to enjoy tulips over a longer period:
- Plant early, mid and late-blooming bulb varieties
- Mix bulbs with different bloom times in same area
- Space plantings 2-3 weeks apart in fall
- Site taller late bloomers toward back
- Position early, small varieties up front
Document varieties and locations each season to build on previous years. With attention to timing, color, and height, tulips can brighten the garden for months.

Hybridizing Tulips for Unique Colors
Adventurous gardeners can create entirely new tulip varieties via hand pollination:
- Select two flower colors/forms to combine
- When blooms open, remove anthers (pollen-bearing tips) of the first flower
- Transfer pollen from the second variety using small brush
- Cover pollinated bloom with mesh bag to prevent contamination
- Collect and dry seed pods after petals fall
- Refrigerate seeds over winter
- Start seeds indoors next season and transplant seedlings
Each new hybrid takes 7-8 years reach maturity. Careful records about parent plants improves outcomes. Enjoy the excitement of watching distinctive flower forms emerge!
Budget-Friendly Options for Establishing New Tulip Plantings
Tulips lend themselves well to various economical propagation options:
Plant bulb pieces with a stem, basal plate and small amount of food storage tissue. Monitor closely the first year as blooms may be smaller.
Grow bulbils which form on the parent flower stem to generate genetically identical daughter bulbs. It takes 3+ years to reach flowering stage. Marks stems to identify desired parent plants.
Lift and divide mature, large bulbs every 3 years. Replant the largest of the separated bulbs for blooms the next season. Compost smaller offset bulbs or add to new garden areas.
Start with tulip seedlings rather than purchasing mature bulbs. Grow purchased or home-cross hybrid seeds in flats, transplanting into garden spaces after 1-2 years when small bulbs form.
Employ patience and planning to establish splendid tulip gardens on a budget!
Welcome Spring With Tulips In Your Garden Home
Tulips bring joy through welcoming spring color after cold, grey winters. This extensive guide outlined key practices for planting vibrant bulbs suited to your climate and caring for them as perennial garden treasures. With attention to enrichment, moisture, nutrients and protection, tulips thrive season after season to delight cultivation hobbyists.


