


Cultivating your own wheat can be an immensely rewarding experience, offering a sense of self-sufficiency and a bountiful harvest. Whether you have a small backyard garden or a larger plot of land, growing wheat is a fulfilling endeavor that allows you to embrace the joys of home-grown produce. In this comprehensive guide, we’ll explore the intricacies of wheat farming, equipping you with the knowledge and tools to ensure a successful crop.
Selecting the Perfect Variety
Choosing the right wheat variety is the foundation of a successful harvest. Understanding the different types of wheat, such as hard red, soft white, and durum, is crucial for making an informed decision. Each variety offers unique characteristics, flavors, and nutritional profiles, suited for various culinary purposes like bread, pastries, or pasta.
Understanding Different Wheat Types
- Hard Red Wheat: Known for its high protein content and robust gluten structure, hard red wheat is ideal for baking bread, rolls, and pizza crusts. Its sturdy texture and nutty flavor make it a popular choice among artisanal bakers.
- Soft Red Wheat: With a lower protein content, soft red wheat is better suited for tender baked goods like cakes, cookies, and crackers. Its mild flavor and fine texture contribute to a delicate crumb in pastries.
- Hard White Wheat: Similar to hard red wheat in terms of protein and gluten content, hard white wheat has a lighter color and a milder flavor. It is often used for Asian noodles, flatbreads, and some artisan bread varieties.
- Soft White Wheat: Offering a delicate texture and a gentle, sweet taste, soft white wheat is a versatile choice for pastries, biscuits, and cereals. Its low protein content makes it a popular option for tender baked goods.
- Durum Wheat: With its exceptionally high protein and gluten content, durum wheat is the star ingredient for pasta, couscous, and semolina flour. Its firm texture and nutty flavor make it well-suited for the extrusion process used in pasta production.
Choosing the Ideal Variety for Home Growing
When selecting the ideal variety for your home garden, consider factors like climate suitability, disease resistance, yield potential, and grain quality. By carefully evaluating these aspects, you can choose a wheat variety that thrives in your region and meets your specific needs.
- Climate Suitability: Different wheat varieties thrive in different climates. Research the temperature and rainfall patterns in your area, and select a variety that is well-adapted to your local conditions.
- Disease Resistance: Some wheat varieties are naturally resistant to common wheat diseases like rust, powdery mildew, or Fusarium head blight. Choosing a disease-resistant variety can help minimize the need for chemical interventions and ensure a healthier crop.
- Yield Potential: Consider the yield potential of each wheat variety, as this will directly impact the amount of grain you can harvest from your garden. Look for varieties with a history of high yields in home growing conditions.
- Grain Quality: Evaluate the intended use of the wheat you plan to grow. If you primarily want to bake bread, look for varieties with higher protein content. For pastries or pasta, varieties with lower protein levels may be more suitable.
By taking the time to carefully evaluate these factors, you can make an informed decision and select a wheat variety that aligns with your goals, growing conditions, and culinary preferences.

Preparing the Soil for Success
Proper soil preparation is essential for nurturing a healthy wheat crop. Begin by conducting thorough soil testing and analysis to determine the nutrient levels, pH balance, and texture. This information will guide your decisions regarding soil amendments and fertilizers, ensuring your wheat plants receive the optimal growing conditions.
Soil Testing and Analysis
Soil testing and analysis should be your first step in preparing the soil for wheat farming. Here’s what you need to know:
- Nutrient Levels: A soil test will reveal the levels of essential nutrients like nitrogen, phosphorus, and potassium, as well as any deficiencies or excesses that need to be addressed.
- pH Balance: Wheat thrives in slightly acidic to neutral soils, with a pH range of 6.0 to 7.5. A soil test will determine if you need to adjust the pH through liming or sulfur applications.
- Soil Texture: The test will analyze the proportions of sand, silt, and clay in your soil, which affects drainage, water retention, and nutrient availability.
- Organic Matter Content: A healthy level of organic matter is crucial for soil fertility and structure. The test will indicate if you need to incorporate compost or other organic amendments.
By understanding the results of your soil test, you can make informed decisions about the amendments and fertilizers needed to optimize your soil for wheat farming.
Soil Amendments and Fertilizers
Once you have the soil test results, it’s time to address any deficiencies or imbalances through the use of soil amendments and fertilizers.
- Organic Amendments: Incorporating compost, well-rotted manure, or green manure crops can improve soil structure, water retention, and nutrient availability. These amendments also promote a healthy soil ecosystem by supporting beneficial microorganisms.
- Lime or Sulfur: Depending on your soil’s pH, you may need to apply lime (to raise pH) or sulfur (to lower pH) to achieve the optimal range for wheat growth.
- Nitrogen Fertilizers: Wheat is a heavy feeder, and nitrogen is essential for promoting healthy growth and yield. Common nitrogen sources include urea, ammonium nitrate, and manure-based fertilizers.
- Phosphorus and Potassium Fertilizers: These macronutrients support root development, disease resistance, and overall plant health. Look for balanced fertilizers that contain all three essential macronutrients (N-P-K).
- Micronutrient Supplements: In some cases, your soil may be deficient in micronutrients like zinc, iron, or boron. These can be addressed through targeted supplements or foliar applications.
Remember to follow the recommendations from your soil test report and apply amendments and fertilizers at the appropriate rates and timing for optimal results.
Drainage and Irrigation Practices
Implementing effective drainage and irrigation practices is equally important for a successful wheat crop. Well-drained soil prevents waterlogging, while proper irrigation ensures your wheat crop receives the right amount of moisture throughout its growth cycle.
- Drainage: Assess your soil’s natural drainage by observing areas prone to standing water after heavy rains. If necessary, install drainage tiles or create shallow trenches to divert excess water away from your wheat field.
- Irrigation Methods: Depending on your resources and setup, you can choose from various irrigation methods, such as sprinklers, drip lines, or furrow irrigation. Each method has its advantages and drawbacks, so consider factors like water efficiency, labor requirements, and initial investment costs.
- Watering Schedule: Wheat requires consistent moisture during the early growth stages, but too much water can lead to disease and root rot. Monitor soil moisture levels and water deeply but infrequently, allowing the soil to partially dry out between waterings.
- Timing: Avoid watering during the hottest parts of the day to minimize evaporation losses. Instead, water in the early morning or late evening when temperatures are cooler.
By implementing proper drainage and irrigation practices, you can ensure that your wheat crop receives the optimal amount of moisture at the right times, promoting healthy growth and maximizing yield potential.

Planting and Nurturing Your Wheat Crop
Start your wheat farming journey by selecting high-quality seeds and preparing them for planting. Timing and spacing are crucial factors to consider, as they impact plant growth and yield. Follow recommended planting schedules and row spacing guidelines to optimize your crop’s success.
Seed Selection and Preparation
Choosing the right seeds is the first step towards a successful wheat harvest. Here are some tips for seed selection and preparation:
- Seed Quality: Look for certified seed sources that guarantee high germination rates, varietal purity, and freedom from diseases and pests. High-quality seeds are the foundation of a healthy crop.
- Seed Treatment: Consider using treated seeds, which have been coated with fungicides or insecticides to protect against early-season pests and diseases. This can help ensure a strong start for your wheat crop.
- Seed Priming: Soaking or priming your seeds before planting can improve germination rates and seedling vigor. This technique helps the seeds imbibe water and initiate the germination process, leading to more uniform emergence.
- Seed Rate: Follow the recommended seeding rate for your chosen wheat variety and planting method. Typically, wheat is seeded at a rate of 90 to 120 pounds per acre, but this rate may vary depending on spacing and quality of soil.
Timing and Spacing for Planting
Proper timing and spacing are essential for maximizing the yield and quality of your wheat crop.
- Planting Time: Wheat is a cool-season crop, and the optimal planting time varies based on your climate and the specific variety you’re growing. In general, spring wheat is planted in early spring, while winter wheat is sown in the fall. Consult local extension services or experienced growers in your area for the ideal planting window.
- Row Spacing: The recommended row spacing for wheat ranges from 6 to 12 inches, depending on factors like soil fertility, moisture availability, and equipment used for cultivation and harvesting. Narrower row spacing can increase yields by optimizing light interception and reducing weed pressure.
- Seeding Depth: Wheat seeds should be planted at a depth of 1 to 2 inches, taking into account soil moisture and temperature conditions. Proper depth ensures adequate soil-to-seed contact and protects the emerging seedlings from drying out or being exposed to extreme temperatures.
- Planting Method: You can choose from various planting methods, such as broadcasting, drilling, or using a precision seeder. Each method has its advantages and disadvantages, so consider factors like seed-to-soil contact, precision, and ease of operation.
By following the recommended timing and spacing guidelines, you can maximize the growth potential of your wheat crop and set the stage for a bountiful harvest.

Weed Control Strategies
Effective weed control is vital to prevent competition for nutrients and sunlight, which can significantly reduce your wheat yield. Implement a multi-pronged approach to keep your wheat field free from unwanted growth.
- Cultural Practices: Proper seed bed preparation, crop rotation, and maintaining optimal plant density can help suppress weed growth by creating an unfavorable environment for weeds to thrive.
- Mechanical Weed Control: Techniques like cultivating, hoeing, or using a rotary hoe can effectively remove weeds from your wheat field, especially in the early growth stages before the crop canopy closes.
- Mulching: Applying a thick layer of organic mulch, such as straw or leaves, can help suppress weed growth by blocking light and preventing weed seeds from germinating.
- Herbicides: In some cases, the judicious use of herbicides may be necessary to control persistent or difficult-to-manage weeds. Always follow label instructions and apply herbicides at the recommended rates and timings.
Remember, effective weed control is an ongoing process, and you may need to employ a combination of these strategies throughout the growing season to keep your wheat crop free from weed competition.
Managing Pests and Diseases
Wheat is susceptible to various pests and diseases that can significantly impact yield and grain quality. Regular monitoring and proactive management are crucial for protecting your crop.
- Scouting: Regularly inspect your wheat field for signs of pests or diseases, such as discolored leaves, stunted growth, or insect damage. Early detection is key to effective management.
- Integrated Pest Management (IPM): Implement an IPM approach that combines cultural, biological, and chemical control methods. This holistic approach minimizes the reliance on chemical pesticides and promotes a balanced ecosystem.
- Pest Management: Common wheat pests include aphids, armyworms, and Hessian flies. Depending on the severity of the infestation, you may need to employ strategies like introducing beneficial insects, applying insecticidal soaps or oils, or using targeted chemical insecticides as a last resort.
- Disease Management: Wheat diseases like rust, powdery mildew, and Fusarium head blight can be managed through crop rotation, planting disease-resistant varieties, and applying fungicides when necessary.
- Record Keeping: Maintain detailed records of pest and disease occurrences, as well as the management strategies employed. This information can help you refine your IPM plan for future growing seasons.
By staying vigilant and implementing proactive pest and disease management practices, you can protect your wheat crop and ensure a healthy, high-quality harvest.

Caring for Your Wheat Crop
Once your wheat plants are established, providing proper care is essential for their growth and development. Mastering watering and irrigation techniques ensures your crop receives the right amount of moisture without overwatering or underwatering.
Watering and Irrigation Techniques
Proper water management is crucial for ensuring the success of your wheat crop. Here are some key considerations:
- Water Requirements: Wheat has varying water needs throughout its growth stages. During the vegetative stage, consistent moisture is crucial for promoting vigorous growth. As the crop matures and enters the reproductive stage, water requirements increase to support grain development and filling.
- Irrigation Methods: Choose an irrigation method that suits your specific conditions and resources. Options include sprinkler systems, drip irrigation, or furrow irrigation. Each method has its advantages and disadvantages in terms of water efficiency, labor requirements, and initial investment costs.
- Soil Moisture Monitoring: Regularly monitor soil moisture levels to determine when and how much to water. You can use simple tools like a soil moisture meter or more advanced techniques like tensiometers or neutron probes.
- Scheduling: Develop a watering schedule based on your crop’s growth stage, soil type, and weather conditions. Adjust the schedule as needed to account for factors like rainfall or extreme temperatures.
- Water Conservation: Implement water-saving practices, such as mulching, to reduce evaporation and conserve soil moisture. Additionally, consider using techniques like deficit irrigation, which can improve water use efficiency without significantly impacting yield.
Remember, overwatering can be just as detrimental as underwatering, leading to problems like nutrient leaching, disease development, and poor root growth. Aim for consistent, moderate watering to maintain optimal soil moisture levels throughout the growing season.
Nutrient Management Practices
Proper nutrient management is crucial for promoting healthy plant growth and achieving high yields in wheat farming. Here are some key practices to consider:
- Soil Testing: Regularly test your soil to monitor nutrient levels and pH. This information will guide your fertilizer application decisions and ensure you’re providing the right nutrients at the right time.
- Fertilizer Application: Based on soil test results and crop requirements, apply fertilizers containing nitrogen, phosphorus, and potassium (NPK) at the recommended rates and timings. Nitrogen is particularly important for wheat, as it promotes leaf and stem growth, as well as grain development.
- Split Applications: Instead of applying all the fertilizer at once, consider split applications, which involve applying a portion of the nutrients at planting and the remainder during the growing season. This approach helps ensure nutrient availability throughout the crop’s growth stages.
- Foliar Feeding: In some cases, foliar feeding (applying liquid fertilizers directly to the leaves) can be an effective way to address specific nutrient deficiencies or supplement soil-applied fertilizers.
- Crop Rotation: Practicing crop rotation with legumes or other nitrogen-fixing crops can help replenish soil nitrogen levels and reduce the need for excessive fertilizer applications.
- Precision Agriculture: If feasible, consider implementing precision agriculture techniques, such as variable rate fertilizer application, which allows you to apply nutrients precisely where they are needed, based on site-specific soil and crop data.
Proper nutrient management not only promotes plant growth and yield but also contributes to environmental sustainability by reducing nutrient runoff and minimizing the risk of over-fertilization.

Monitoring and Preventing Common Issues
Regular monitoring and proactive measures are essential for preventing and addressing common issues that can affect your wheat crop. Here are some common problems to watch out for:
- Yellowing Leaves: Yellowing or chlorotic leaves can indicate nutrient deficiencies, particularly nitrogen or iron. Address this issue by adjusting your fertilizer program or applying foliar nutrient sprays.
- Stunted Growth: If your wheat plants appear stunted or fail to reach their full growth potential, it could be due to nutrient imbalances, drought stress, or compacted soil. Investigate the underlying cause and take corrective measures, such as adjusting irrigation or incorporating soil amendments.
- Lodging: Lodging, or the bending or falling over of wheat stalks, can be caused by excessive nitrogen fertilization, high wind, or heavy rain. To prevent lodging, avoid over-fertilization, and consider planting varieties with strong straw strength.
- Disease Outbreaks: Monitor your crop for signs of common wheat diseases like rust, powdery mildew, or Fusarium head blight. Implement preventative measures like crop rotation, planting resistant varieties, and applying fungicides when necessary.
- Pest Infestations: Keep an eye out for insect pests like aphids, armyworms, or Hessian flies. Employ integrated pest management strategies, such as introducing beneficial insects or using targeted insecticides, to control infestations.
Optimal Light and Temperature Conditions
Wheat, like most cereal crops, requires specific light and temperature conditions to thrive. Understanding and providing the optimal conditions can significantly impact your crop’s growth, development, and ultimately, its yield.
- Light Requirements: Wheat is a full-sun crop, requiring at least 6-8 hours of direct sunlight per day. Insufficient light can lead to spindly growth, reduced tillering (the formation of additional stems), and lower grain yields.
- Early Growth Stages: During the early vegetative stages, wheat prefers cooler temperatures, typically between 60°F and 75°F (15°C to 24°C). These moderate temperatures promote robust leaf and tiller development, setting the foundation for a productive crop.
- Reproductive Stages: As the crop enters the reproductive stages (heading, flowering, and grain filling), warmer temperatures ranging from 70°F to 80°F (21°C to 27°C) are ideal. These temperatures support efficient pollination, grain development, and nutrient translocation from the vegetative parts to the grain.
- Temperature Extremes: While wheat can tolerate a wide range of temperatures, extreme heat or cold can be detrimental. Temperatures above 90°F (32°C) during the flowering and grain-filling stages can lead to shriveled or underdeveloped grains, reducing yield and quality. Conversely, frost or freezing temperatures during these critical stages can cause significant damage and crop loss.
- Site Selection: When planning your wheat farming endeavor, consider the location’s sunlight exposure and temperature patterns. Choosing a site with ample sunlight and moderate temperatures during the growing season can greatly benefit your crop’s performance.
- Row Orientation: In some cases, orienting your wheat rows in a north-south direction can optimize light interception and distribution, leading to more uniform growth and higher yields.
By providing the optimal light and temperature conditions, you can unlock the full potential of your wheat crop and maximize its yield and quality.

Harvest Time: Reaping the Rewards
As your wheat crop nears maturity, determining the right harvest timing is crucial. Watch for indicators such as crop color, kernel moisture content, and peduncle strength to ensure you reap the rewards at the perfect moment.
Determining the Right Harvest Timing
Timing is everything when it comes to harvesting your wheat crop. Here are some key indicators to help you determine the optimal time to harvest:
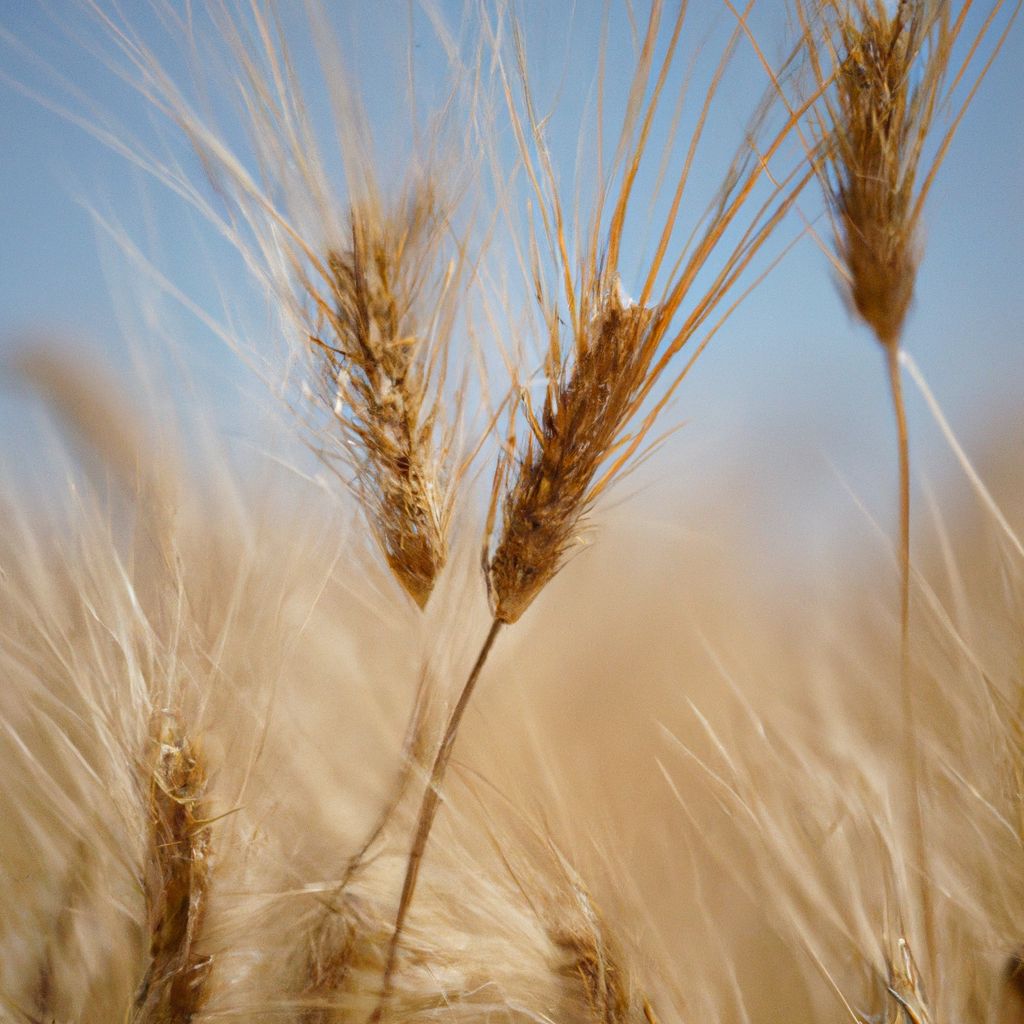
- Crop Color: As the wheat crop matures, the once-green plants will gradually turn golden yellow or light brown. This color change indicates that the grain is ripening and ready for harvest.
- Kernel Moisture Content: The ideal moisture content for harvesting wheat ranges from 15% to 18%. You can use a handheld moisture meter to test a sample of kernels from various areas of your field. If the moisture content is too high, the grain may spoil during storage; if it’s too low, the kernels may shatter during harvesting.
- Kernel Hardness: Mature wheat kernels should be firm and hard when squeezed between your fingers or bitten into. Immature kernels will be soft and doughy.
- Peduncle Strength: The peduncle is the stem that supports the wheat head or spike. As the crop matures, the peduncle becomes brittle and starts to turn a straw-like color. When the peduncles easily break or snap, it’s a sign that the wheat is ready for harvest.
- Seed Test Weight: Measure the test weight of your wheat by weighing a known volume of grain. A high test weight, typically between 60 and 64 pounds per bushel, indicates well-filled, high-quality grain.
By closely monitoring these indicators and consulting with local agricultural experts, you can determine the optimal harvest window and ensure you capture your wheat crop at its peak quality and yield potential.
Proper Harvesting Techniques
Once you’ve determined the right time to harvest, it’s crucial to employ proper harvesting techniques to maximize your yield and minimize grain loss. Here are some best practices:
- Equipment Selection: For small-scale wheat farming, a walk-behind or tow-behind harvester may be suitable. For larger operations, consider renting or investing in a combine harvester designed specifically for wheat.
- Cutting Height: Adjust the cutting height of your harvesting equipment to leave approximately 6-8 inches of stubble in the field. This practice helps prevent soil erosion and provides organic matter for the next crop cycle.
- Harvesting Pattern: When using a combine harvester, plan your harvesting pattern to minimize turning and reduce compaction in the field. Consider starting at the field’s perimeter and working inward in a spiral or circular pattern.
- Grain Handling: Ensure that your grain handling equipment, such as augers and grain carts, is clean and in good working condition to prevent grain damage or contamination during transfer.
- Weather Monitoring: Monitor weather conditions closely and aim to harvest when the grain moisture content is within the optimal range. Avoid harvesting in wet or humid conditions, as this can lead to mold growth and grain spoilage during storage.
- Safety Precautions: Always prioritize safety during the harvesting process. Familiarize yourself with the equipment’s operation manual, wear appropriate protective gear, and be mindful of potential hazards, such as moving parts or dust inhalation.
By following proper harvesting techniques and exercising caution, you can maximize your wheat yield, maintain grain quality, and ensure a safe and efficient harvest.

Cleaning, Threshing, and Winnowing
After harvesting your wheat crop, the next crucial steps are cleaning, threshing, and winnowing the grain. These processes separate the edible wheat kernels from the inedible plant material, ensuring a high-quality final product.
- Cleaning: Before threshing, it’s essential to remove any debris, weeds, or foreign objects from the harvested wheat. This can be done manually or with specialized cleaning equipment, such as air screens or rotary cleaners.
- Threshing: Threshing is the process of separating the wheat kernels from the stems and chaff (the protective casing around the grain). Traditional methods like beating the wheat against a hard surface or using a flail can be employed for small-scale operations. For larger crops, mechanical threshers or combine harvesters with built-in threshing mechanisms are more efficient.
- Winnowing: Once the grain is threshed, winnowing removes the lighter chaff and other debris from the heavier wheat kernels. This can be done manually by tossing the threshed wheat into the air and allowing the wind to blow away the chaff. For larger operations, specialized winnowing machines or combines with built-in cleaning systems can be used.
- Drying: Depending on the moisture content of the harvested grain, it may be necessary to dry the wheat before storage. Proper drying prevents mold growth, insect infestation, and other quality issues during storage. Grain dryers or well-ventilated drying bins can be used for this purpose.
- Cleaning and Grading: After drying, the wheat may undergo a final cleaning and grading process to remove any remaining impurities and sort the grain by size, quality, and intended use (e.g., milling, seed, or feed).
By following best practices for cleaning, threshing, and winnowing, you can ensure that your harvested wheat meets the highest quality standards and is ready for safe storage or further processing.
Safe Storage and Preservation Methods
Proper storage and preservation are essential for maintaining the quality and longevity of your harvested wheat. Here are some key considerations and best practices:
- Storage Facilities: Choose a clean, dry, and well-ventilated storage facility. Silos, bins, or airtight containers are ideal for protecting the grain from moisture, pests, and contamination.
- Moisture Control: Maintain the wheat’s moisture content below 13% to prevent mold growth and insect infestations. Use dehumidifiers or desiccants if necessary to control moisture levels.
- Temperature Control: Store the wheat at cool temperatures, ideally between 50°F and 60°F (10°C to 15°C). Higher temperatures can accelerate spoilage and insect activity.
- Pest Control: Implement integrated pest management strategies, such as regular inspections, sanitation, and the use of approved pesticides or fumigants, to prevent and control insect infestations.
- Aeration: Regularly aerate the stored wheat to maintain uniform temperature and moisture levels throughout the grain mass. This can be achieved through properly designed aeration systems or by periodically moving the grain from one storage container to another.
- Packaging and Labeling: For long-term storage, consider packaging the wheat in airtight containers or food-grade bags. Clearly label the containers with the variety, harvest date, and any relevant treatment information.

Embracing the Joys of Home-Grown Wheat
As you embark on this rewarding journey of wheat farming, embrace the joys of growing your own food and the sense of accomplishment that comes with it. With dedication, patience, and the knowledge gained from this comprehensive guide, you can cultivate a thriving wheat crop and savor the fruits of your labor in every bite of homemade bread, pasta, or pastry.
Growing your own wheat not only provides a sense of self-sufficiency but also offers a deeper connection to the land and the food you consume. Imagine the satisfaction of transforming a handful of seeds into a bountiful harvest, witnessing the cycle of life unfold before your eyes.
Beyond the practical benefits, wheat farming can be a therapeutic and grounding experience, allowing you to disconnect from the hustle and bustle of everyday life and reconnect with mother Earth and the food that goes onto your plate.


